WordPress Integration - Set up, Scheduling & Auto-Publishing (Recommended)
Learn how to set up WordPress integration with Agility Writer

Agility Writer
Last Update 2 years ago
This guide will walk you through the steps to set up Agility Writer WordPress Publishing Integration.
Supported Features:
- Easily integrate with multiple websites with just a few clicks.
- Automatically save images to your hosting server.
- Articles can be set to auto-publish once they're complete.
- Flexible scheduling for uploading in bulk.
- Support auto-inserts Meta Title, Description, and keywords for popular SEO plugins like Yoast, Rank Math, All-In-One SEO.
❗️This integration support from:
- WordPress version 5.6 and onwards
- PHP 7.4 and above
1. To start, navigate to the "Settings" and the "Integrations" menu.

2. Steps to set up WordPress Integration
Here are the steps to start:
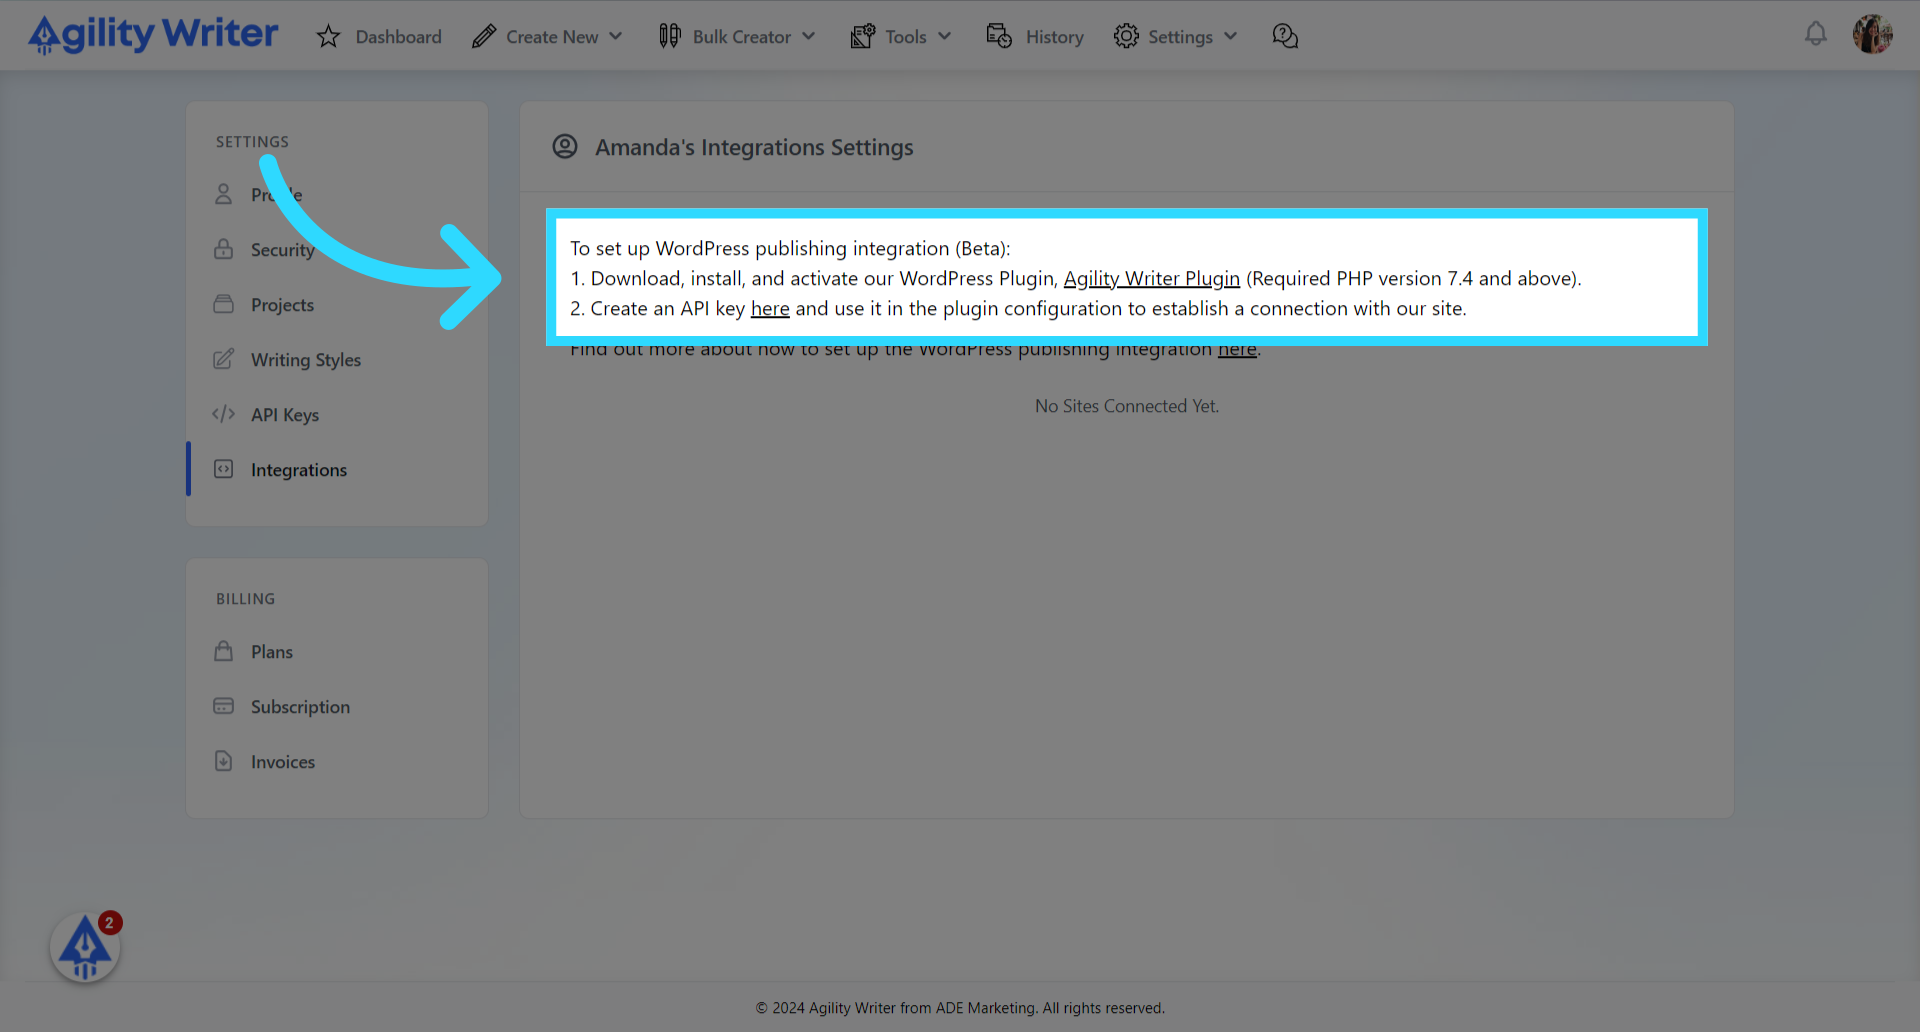
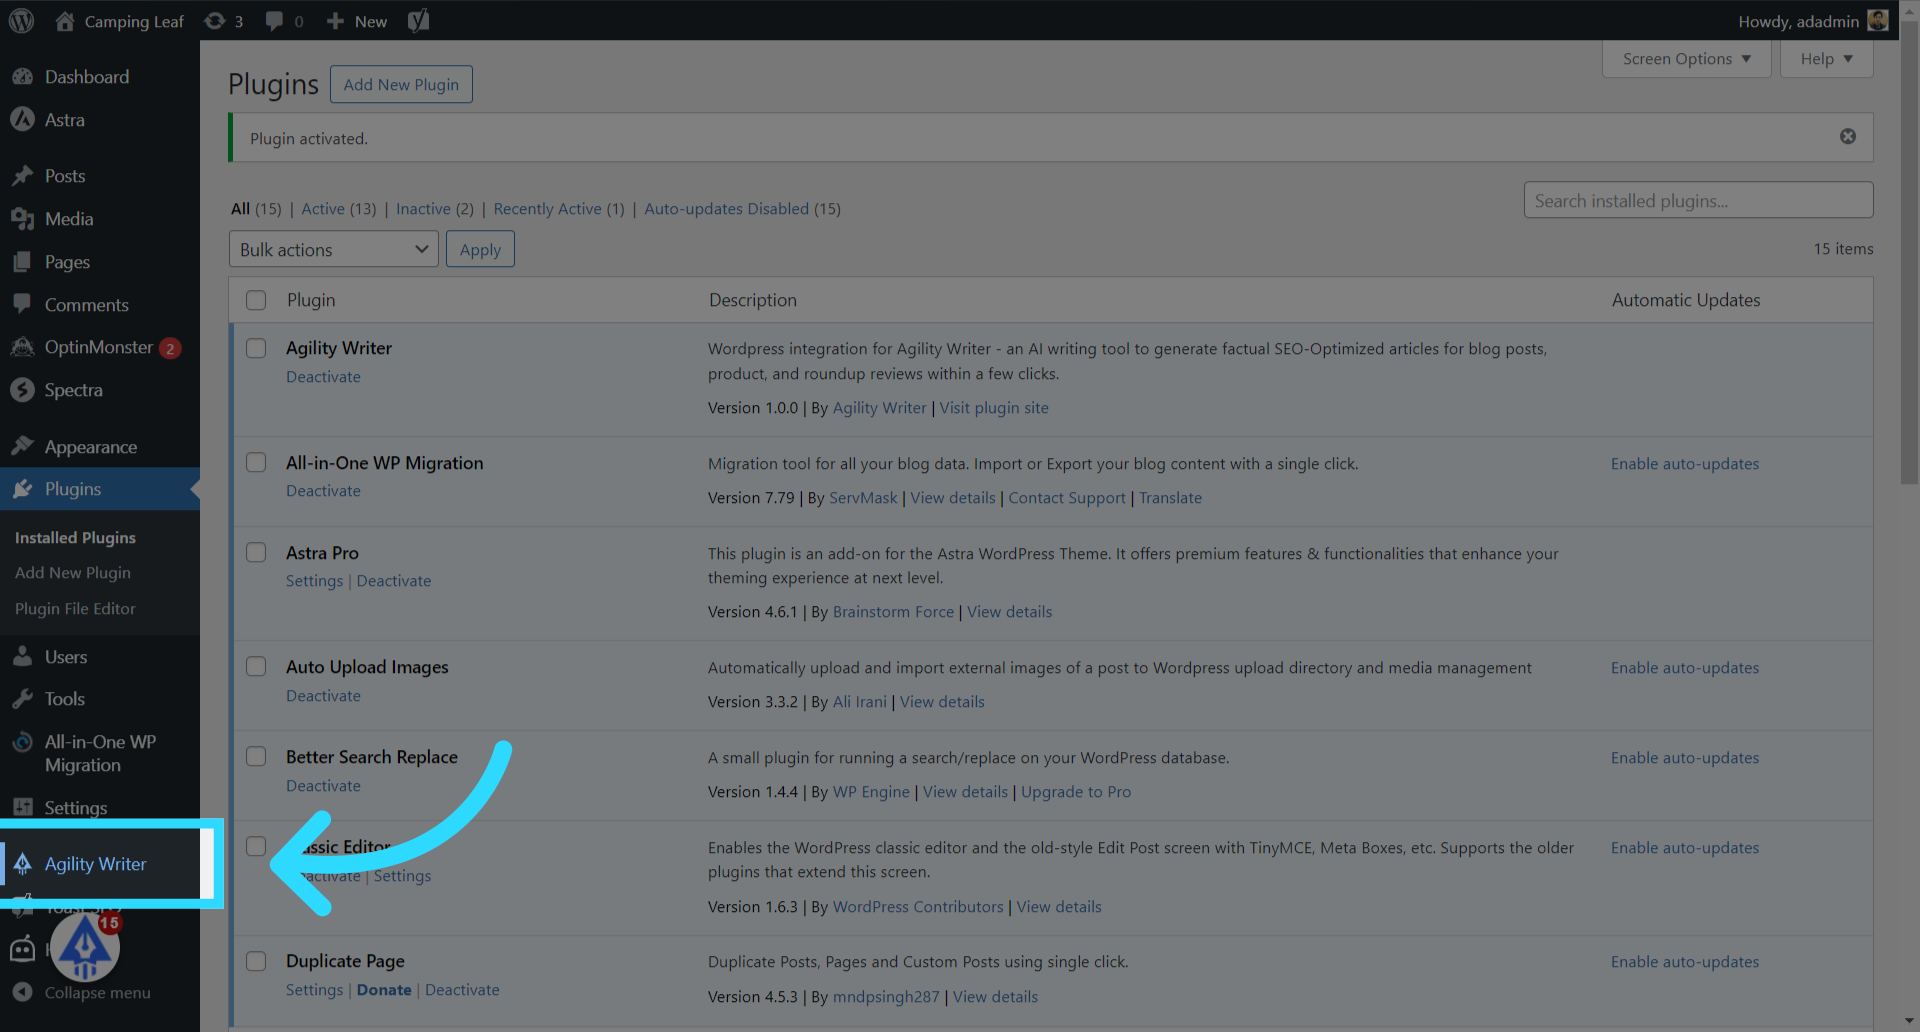
1. Download, install, and activate our WordPress Plugin.
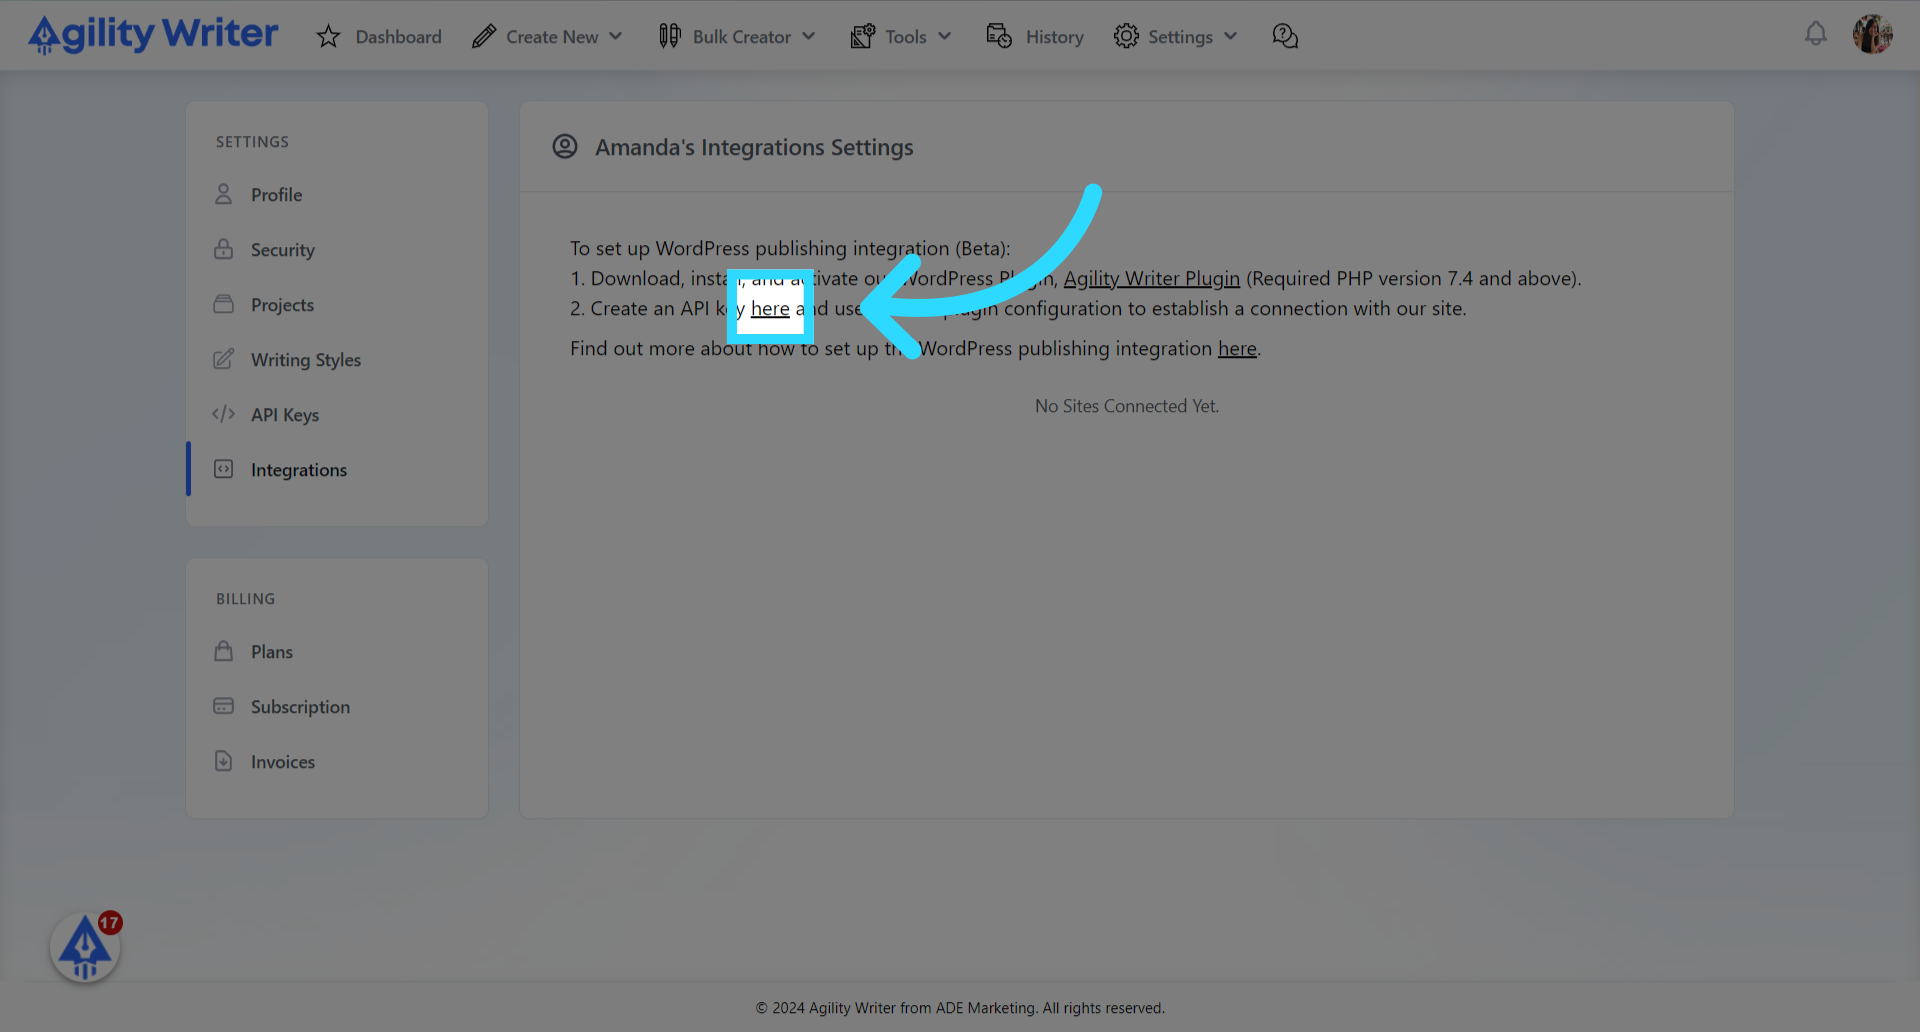
2. Create an API key here and use it in the plugin configuration to connect to Agility Writer.
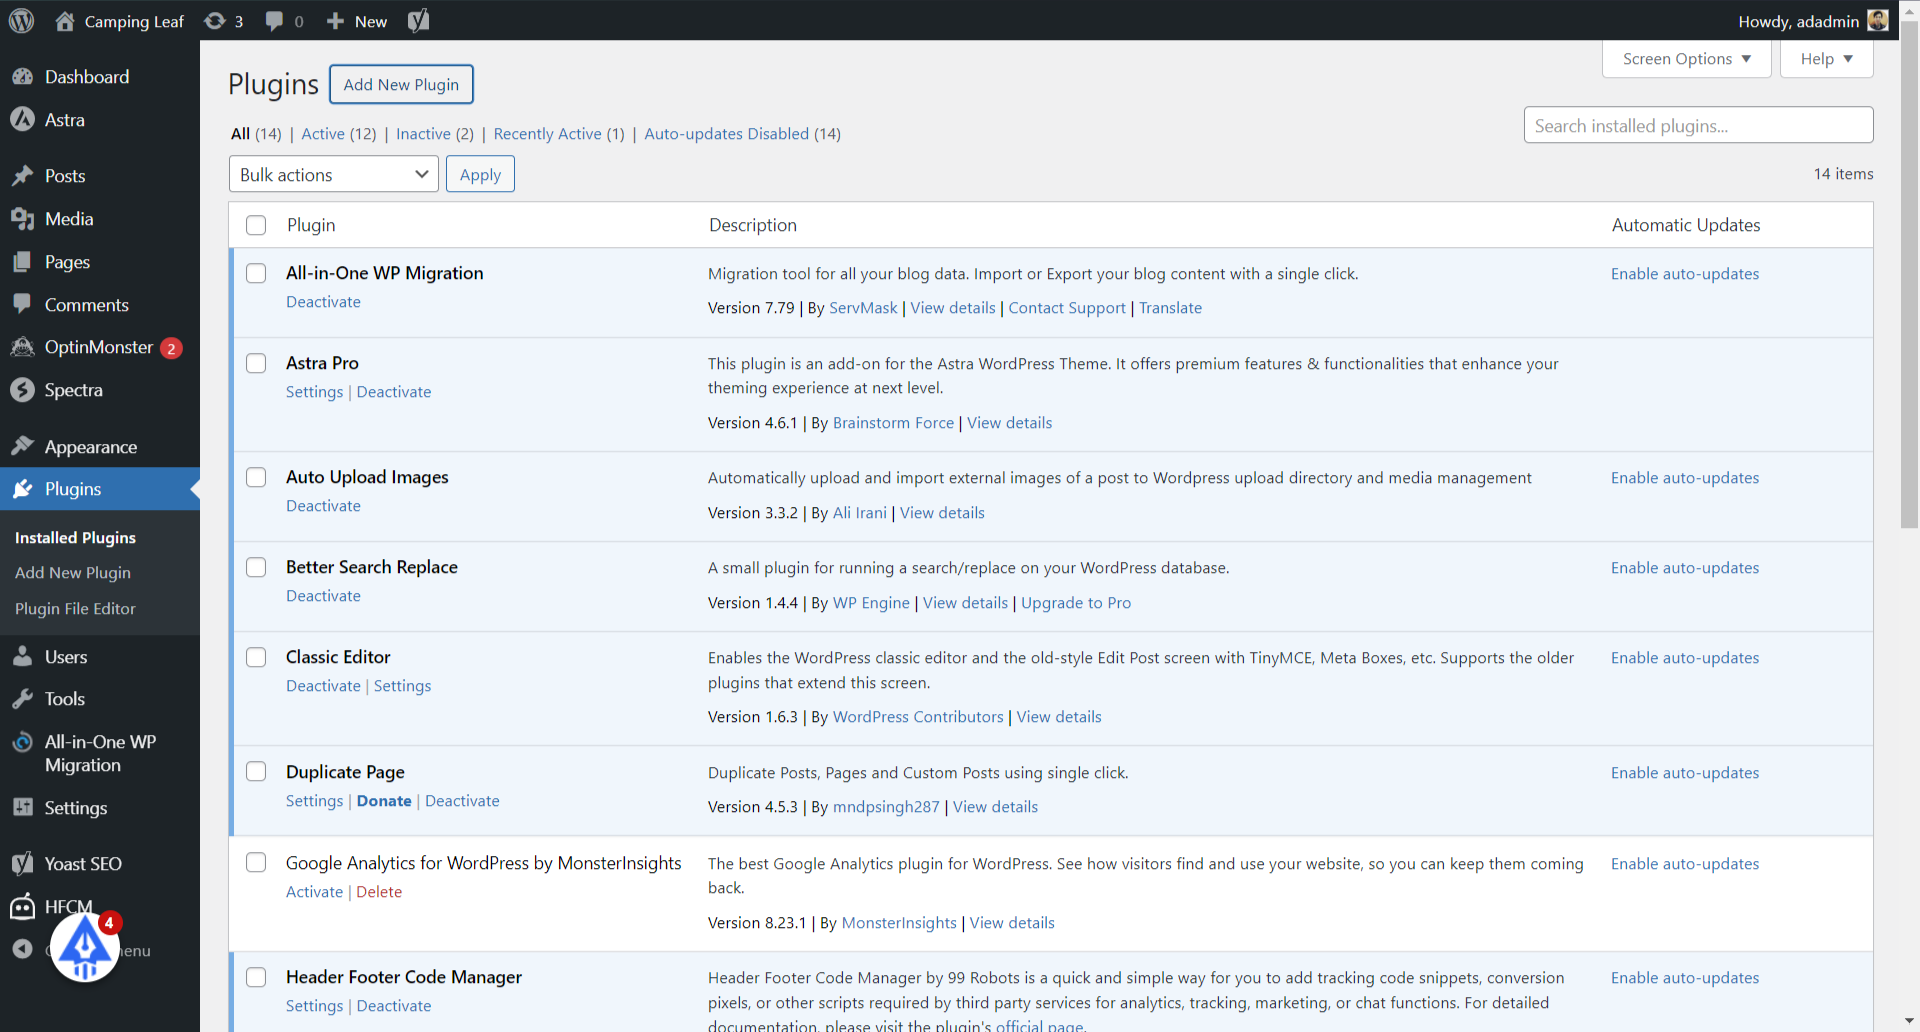
3. Download the plugin and navigate to WordPress Plugin Settings.
Once you downloaded the plugin, open the plugin setting in your WordPress administration area.
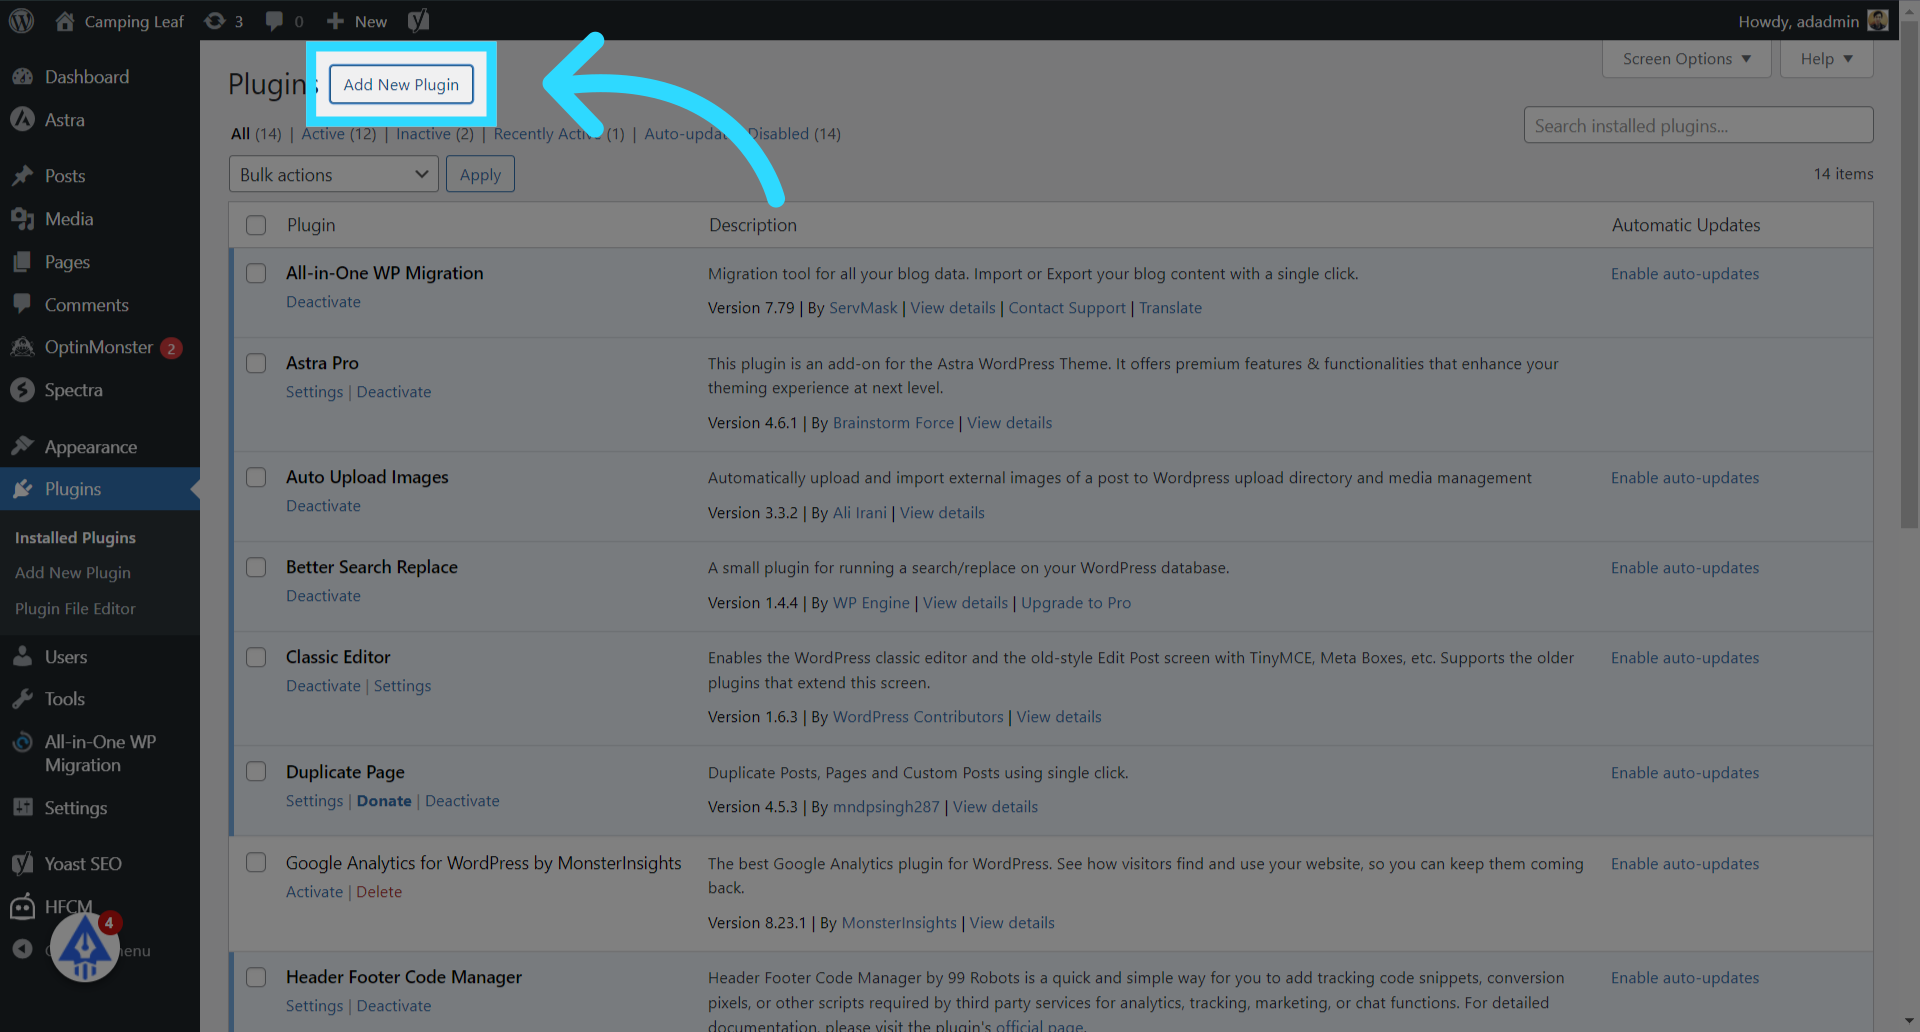
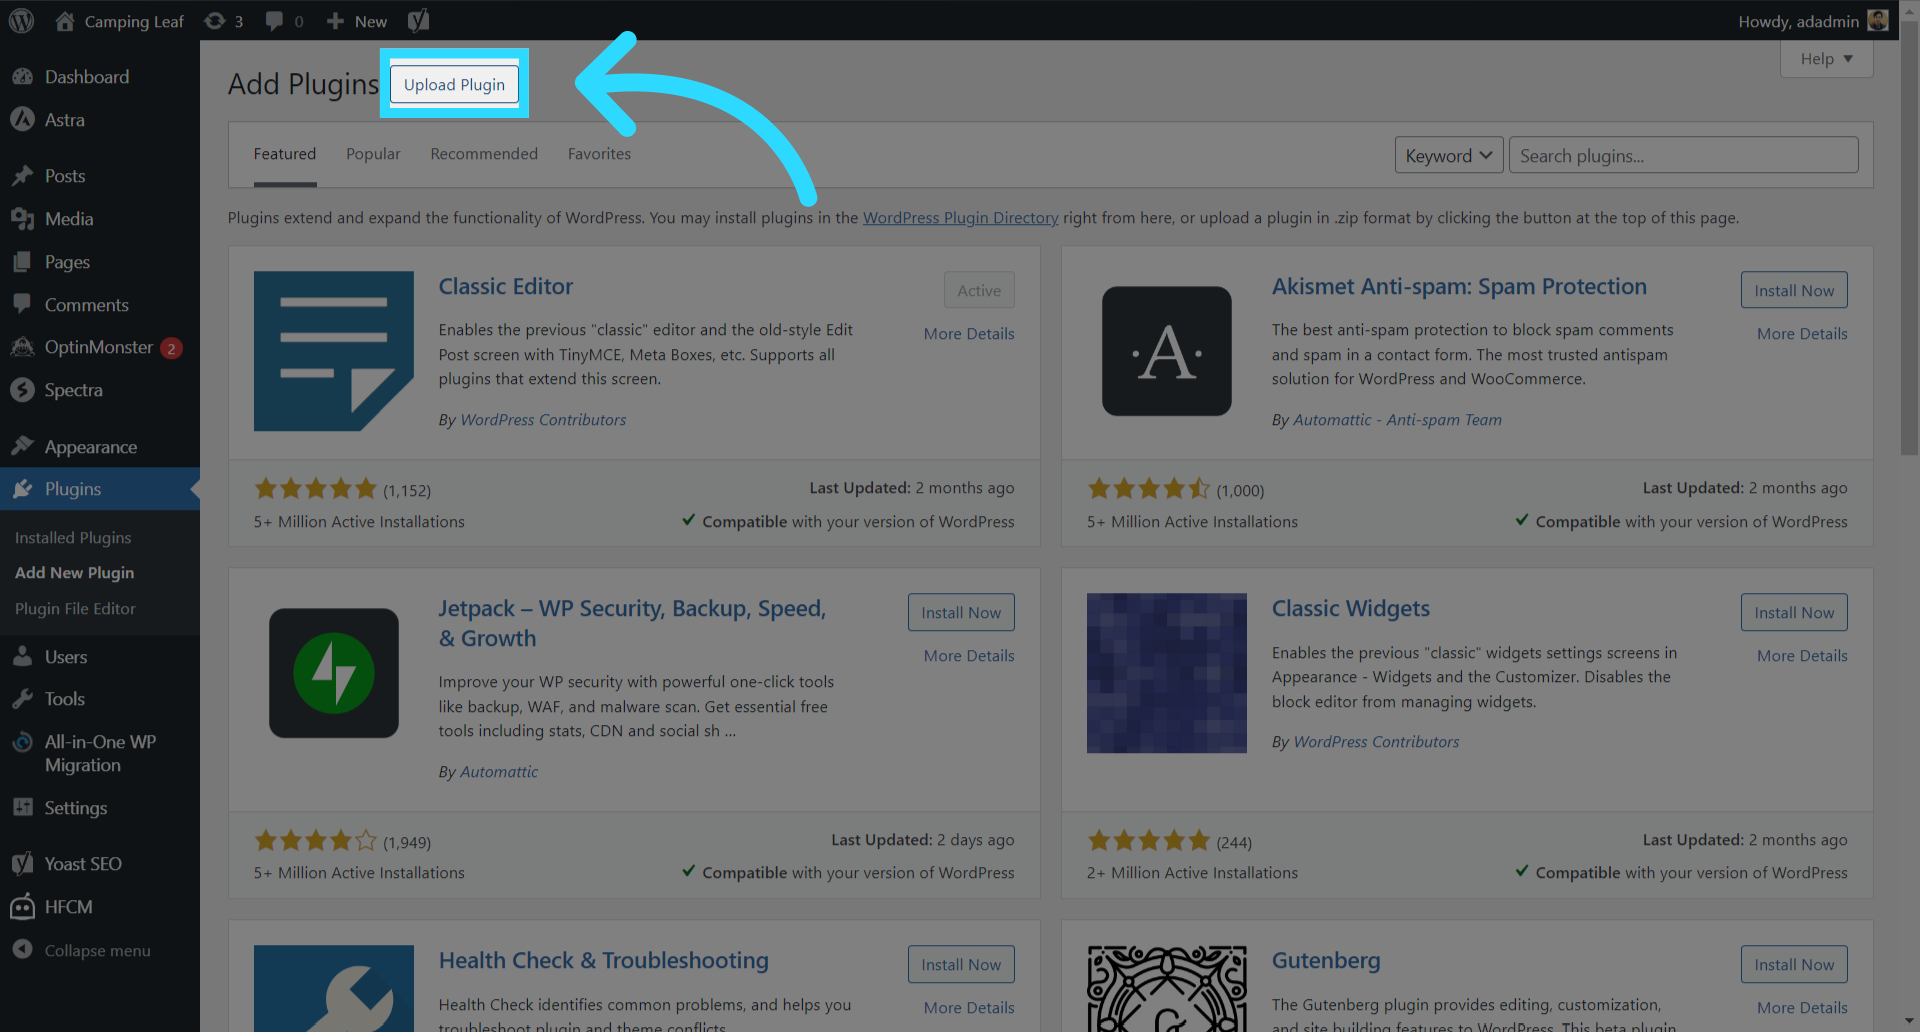
4. Click on the "Add New Plugin" button
5. Click on the "Upload Plugin" button
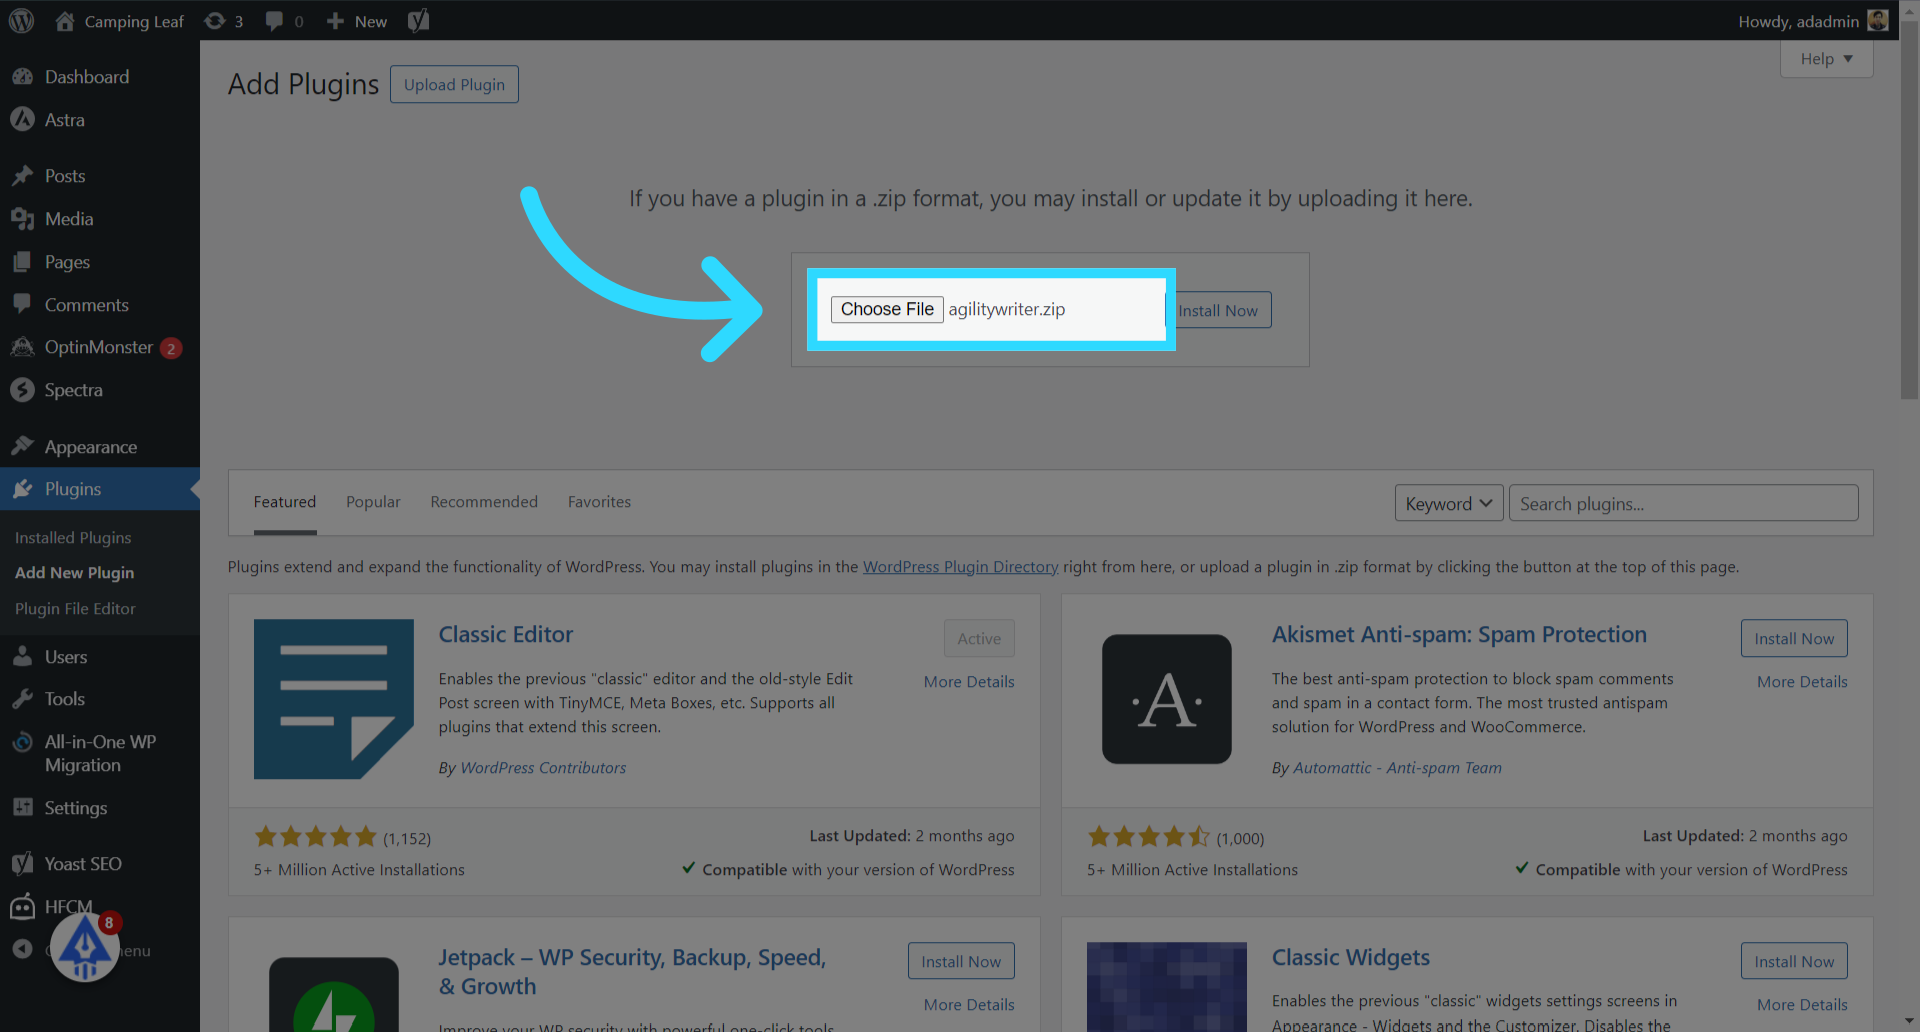
6. Click on the "Choose File" button and select the agilitywriter.zip plugin.
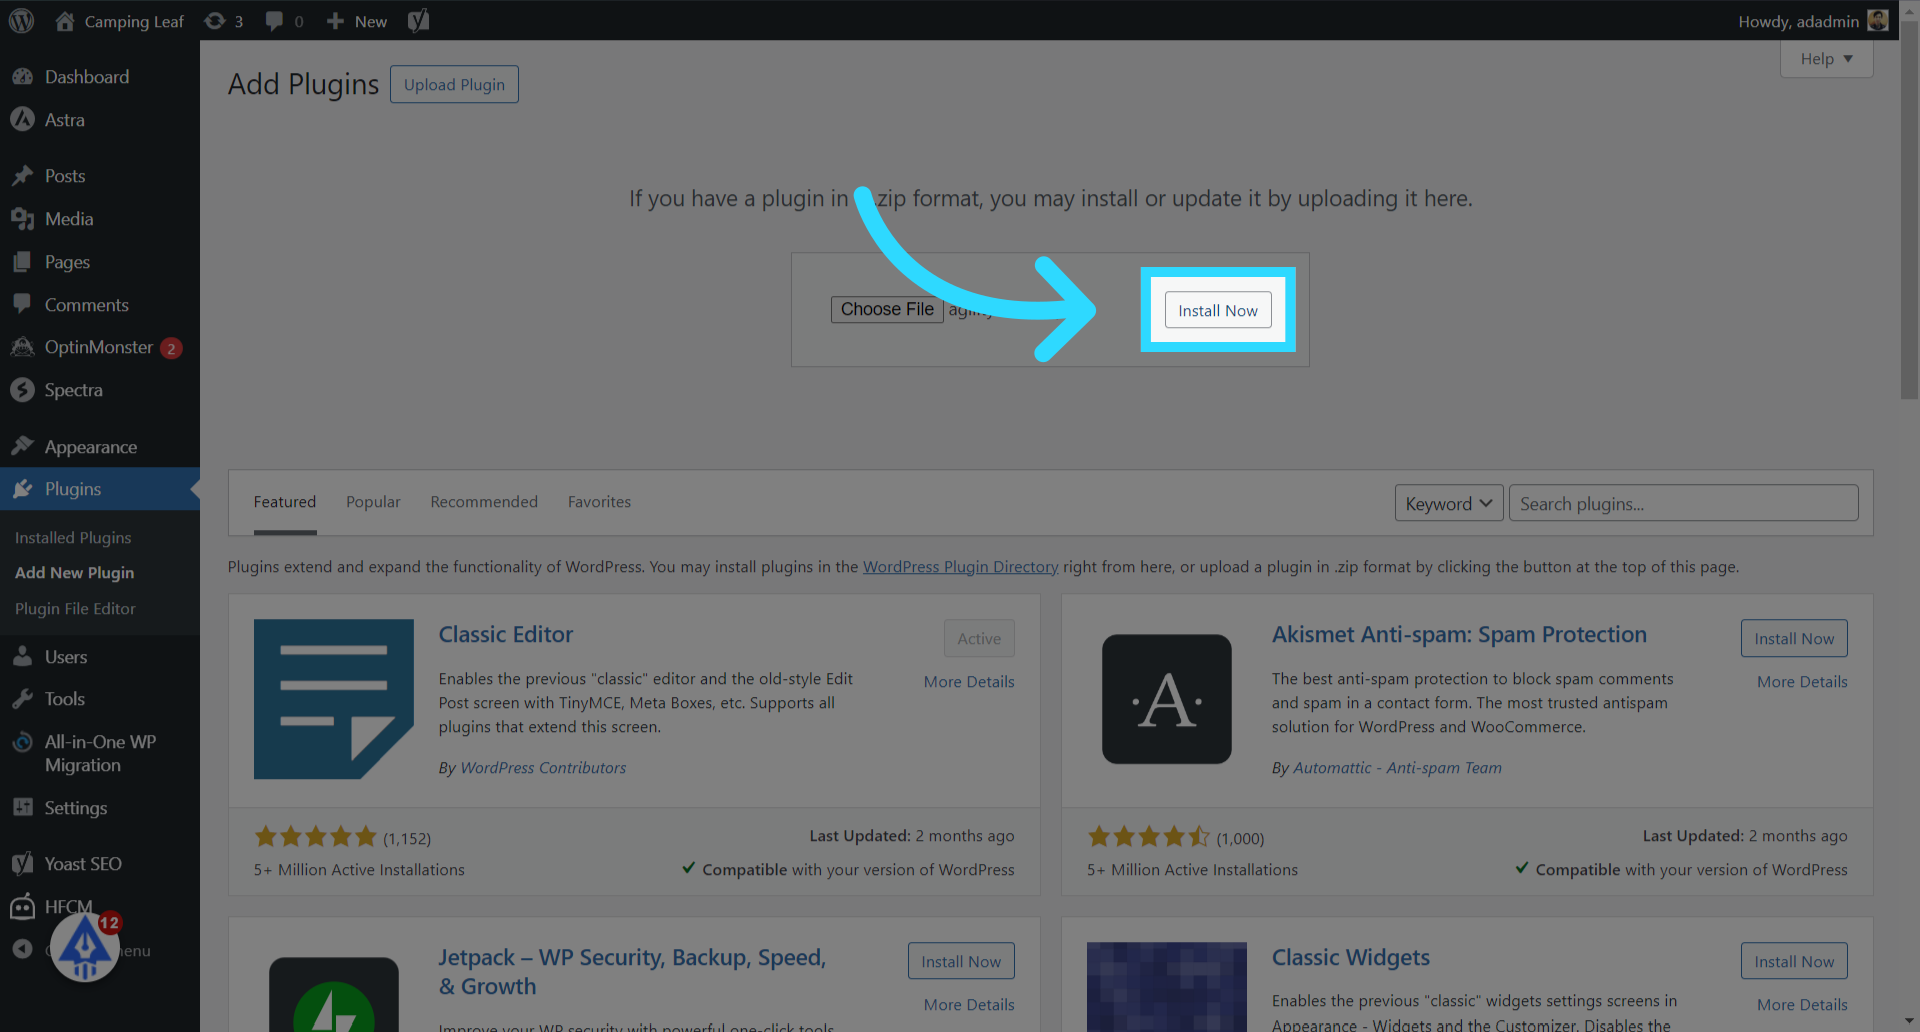
7. Click on the "Install Now" button
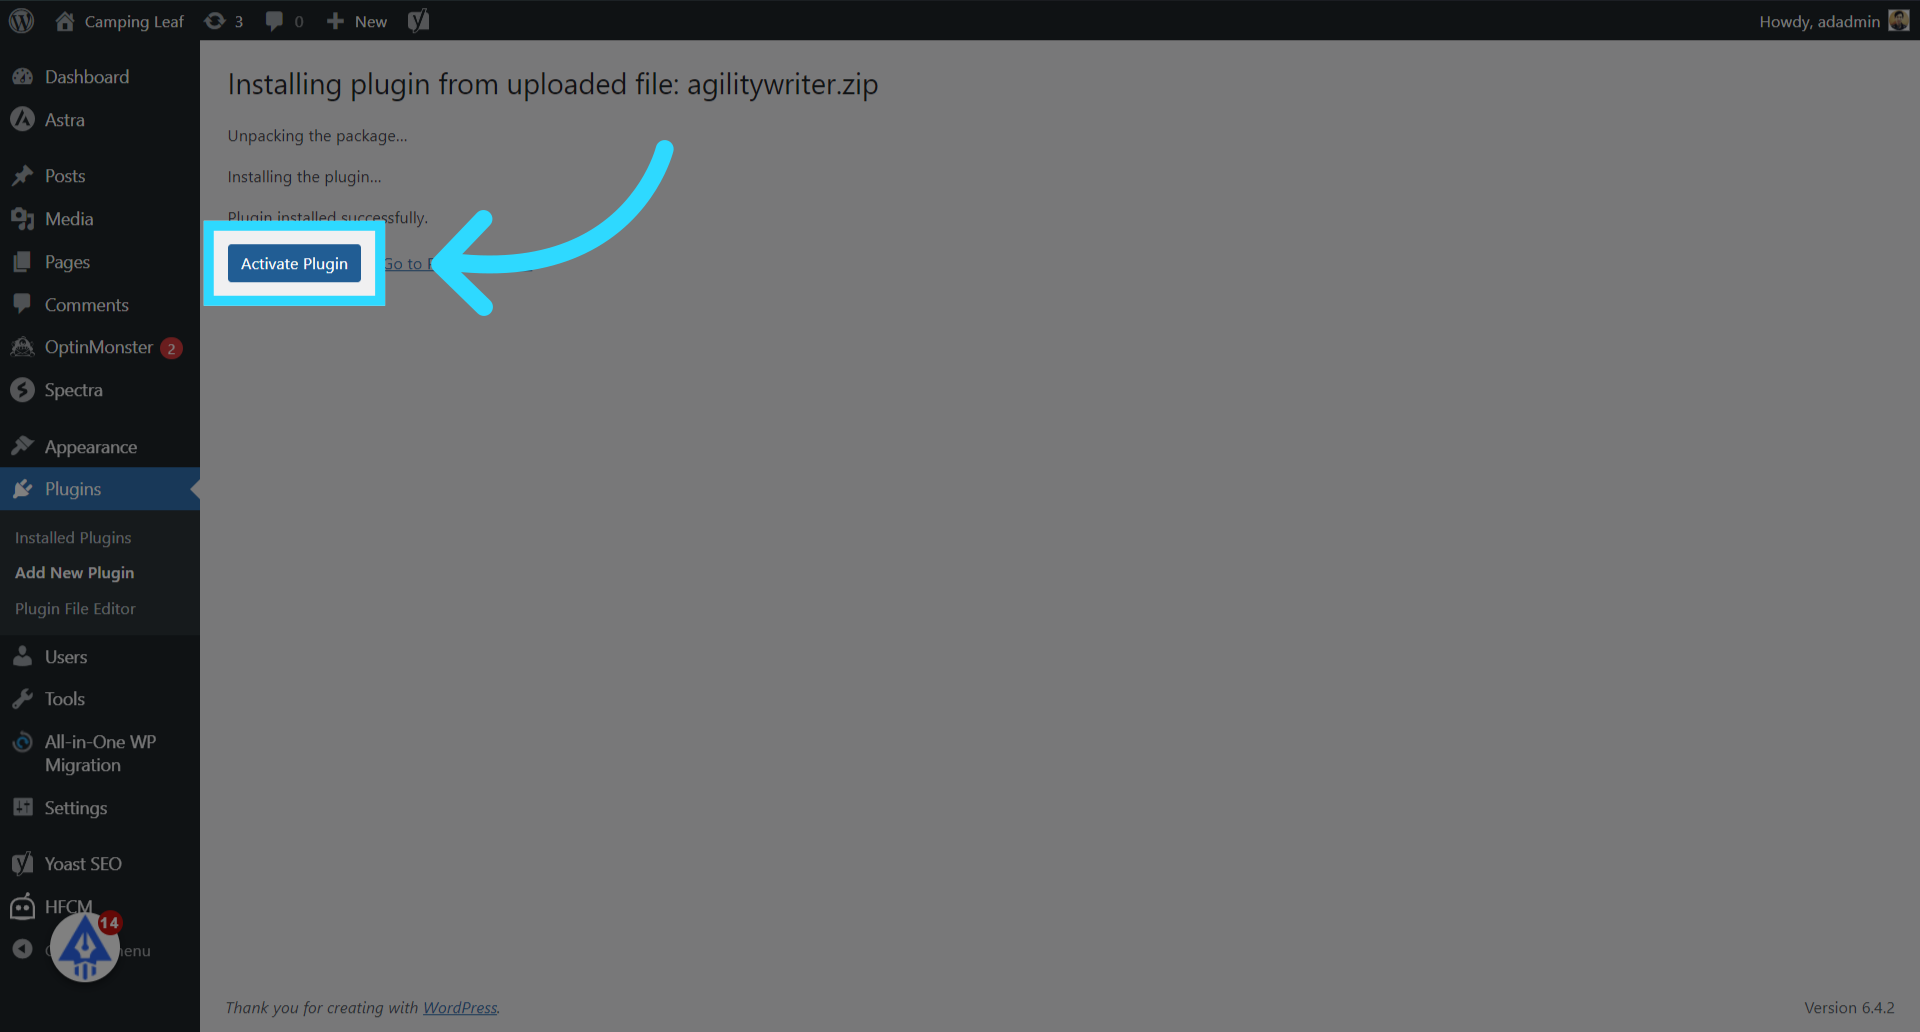
8. Click on the "Activate Plugin" button.
9. Click on the "Agility Writer" menu.
10. Enter "API Key"
You need to enter the API Key generated from the Agility Writer system.

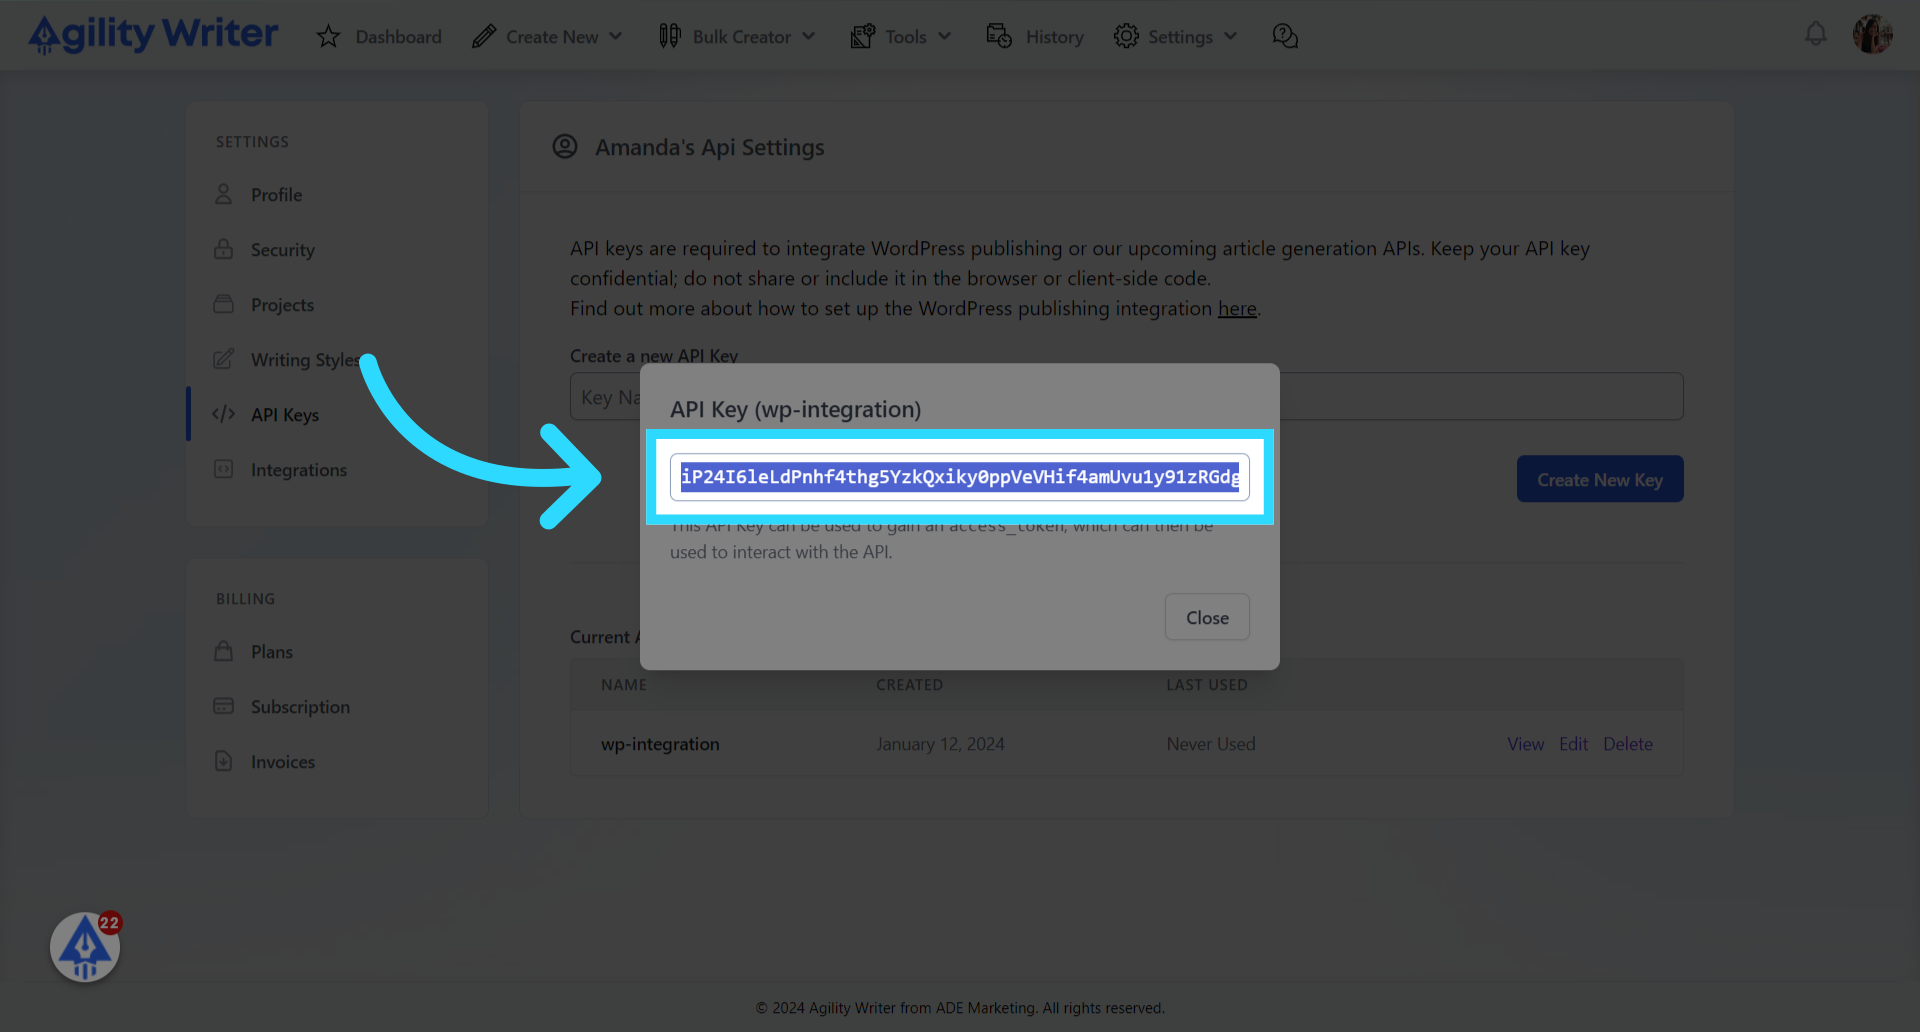
11. Switch back to Agility Writer. Click "here" to open the API key generation screen.
12. Enter an API key name. In this case, we enter "wp-integration."
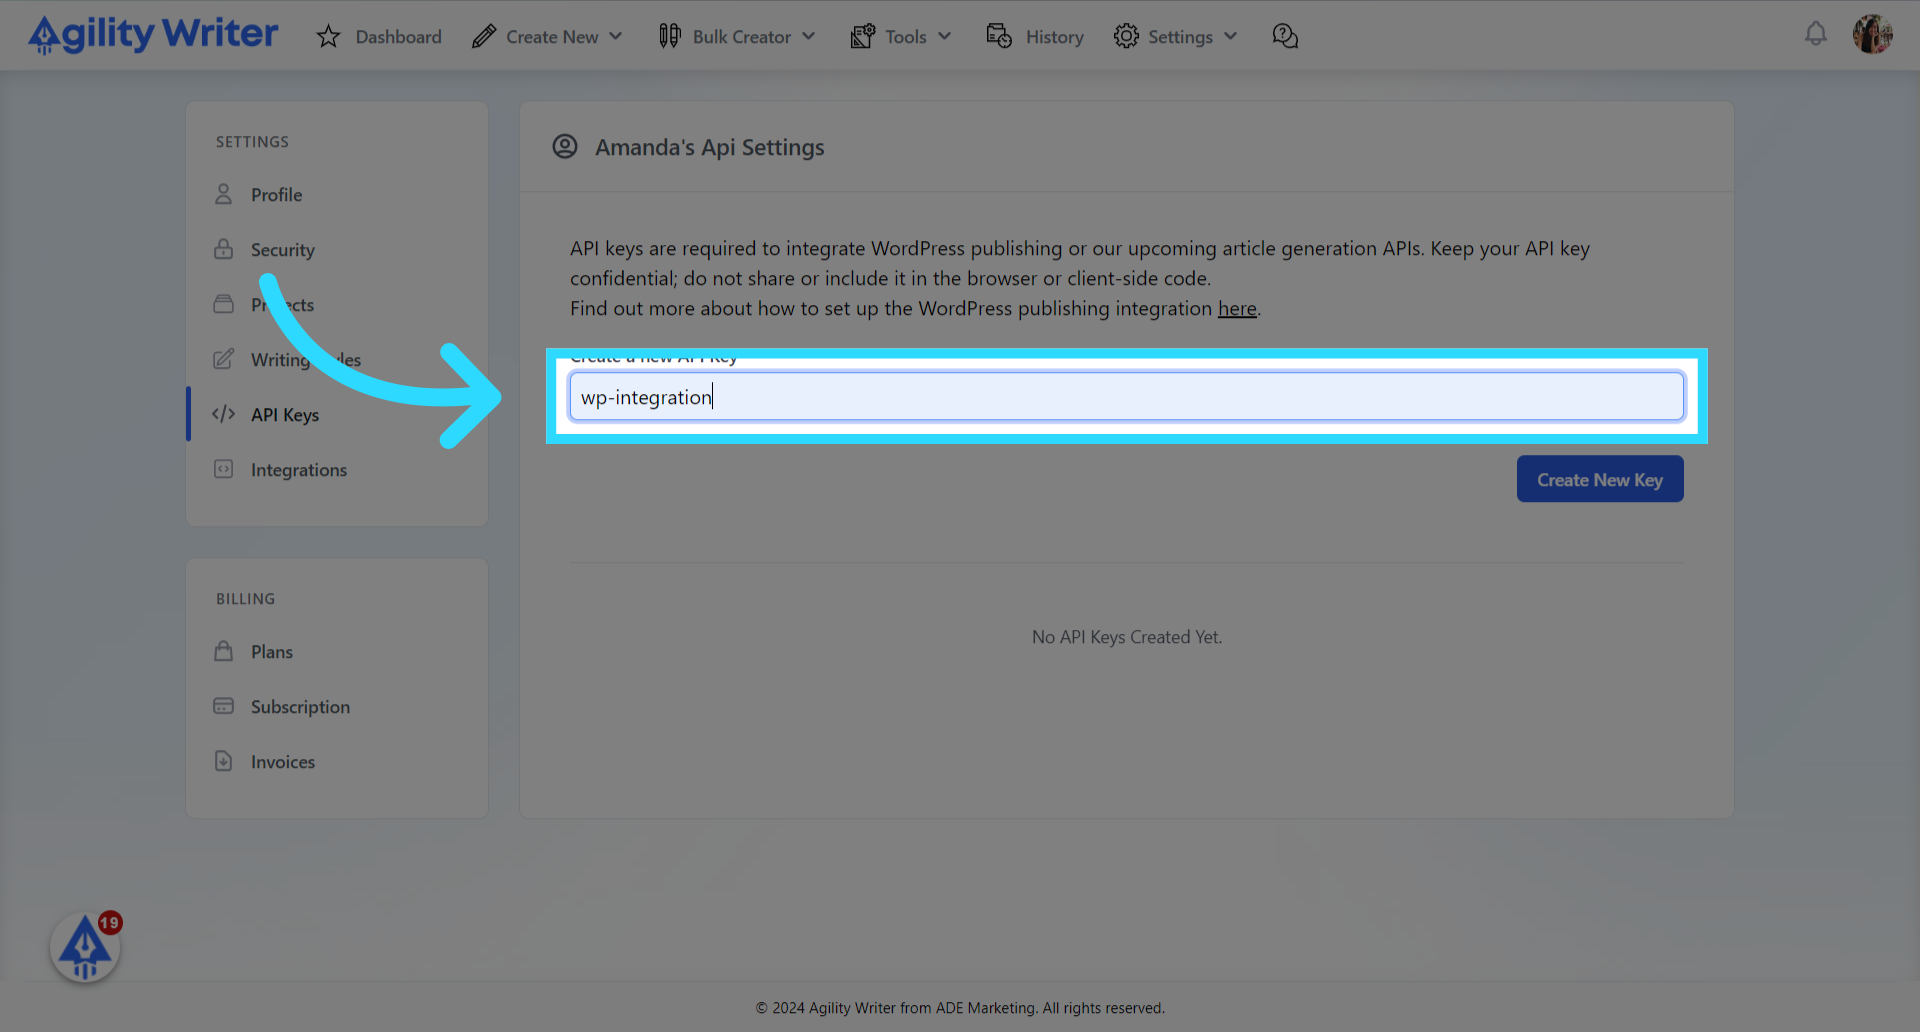
13. Click on the "Create New Key" button.

14. Click on the "View" link to find out the API Key.
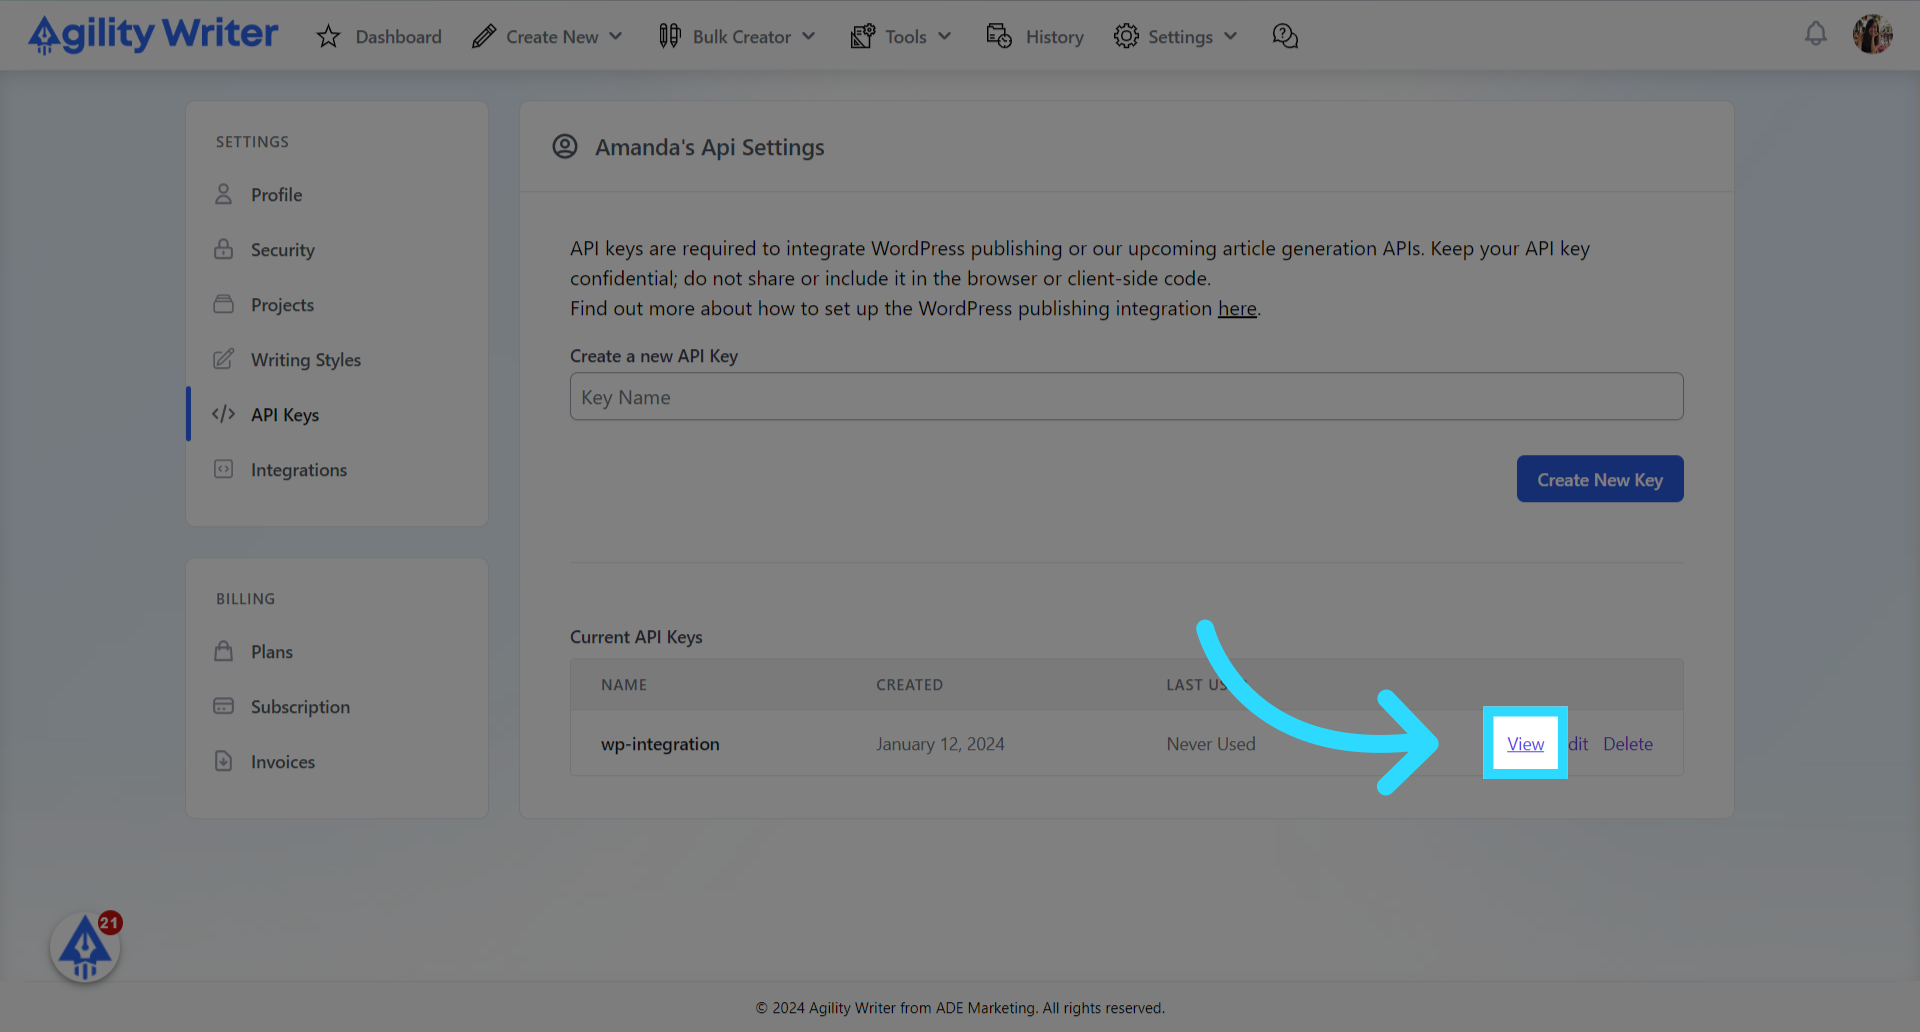
15. Copy The API Key
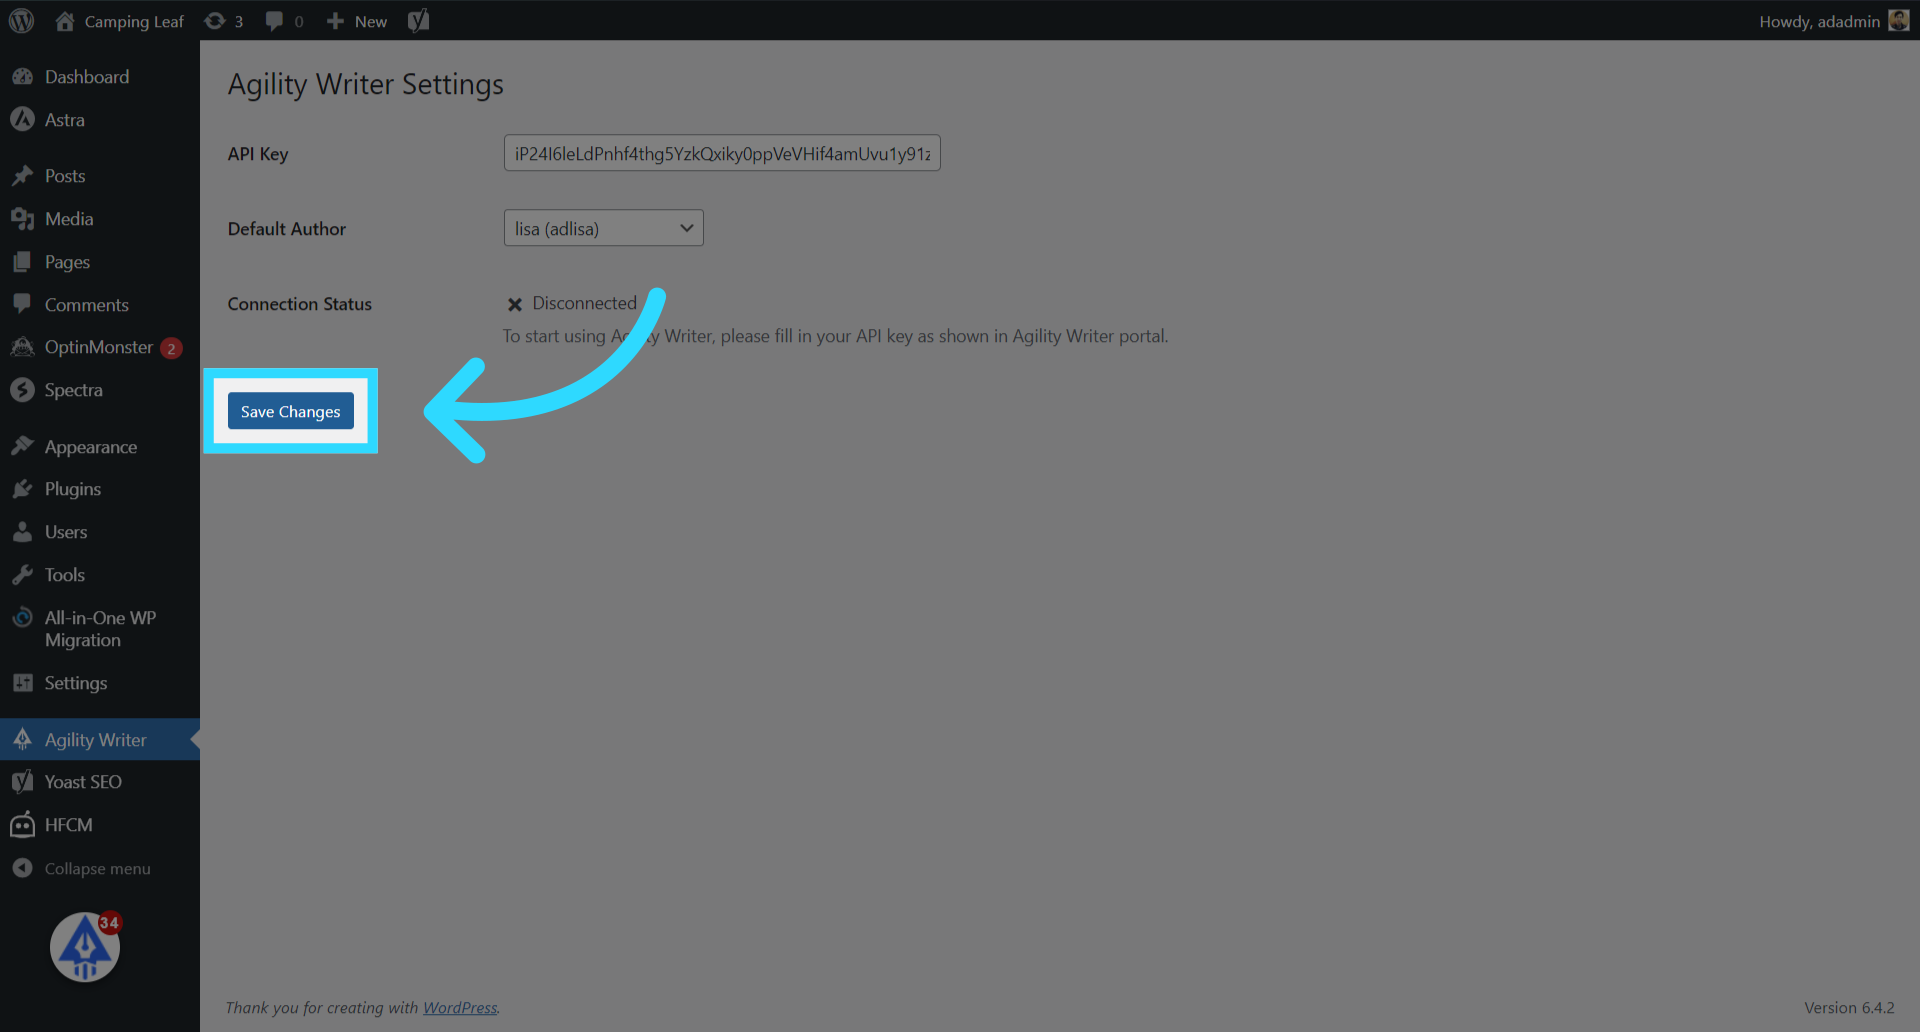
16. Paste the API Key
Switch back to WordPress. Enter the API Key here.

17. Click on the "Save Changes" button to connect to Agility Writer.
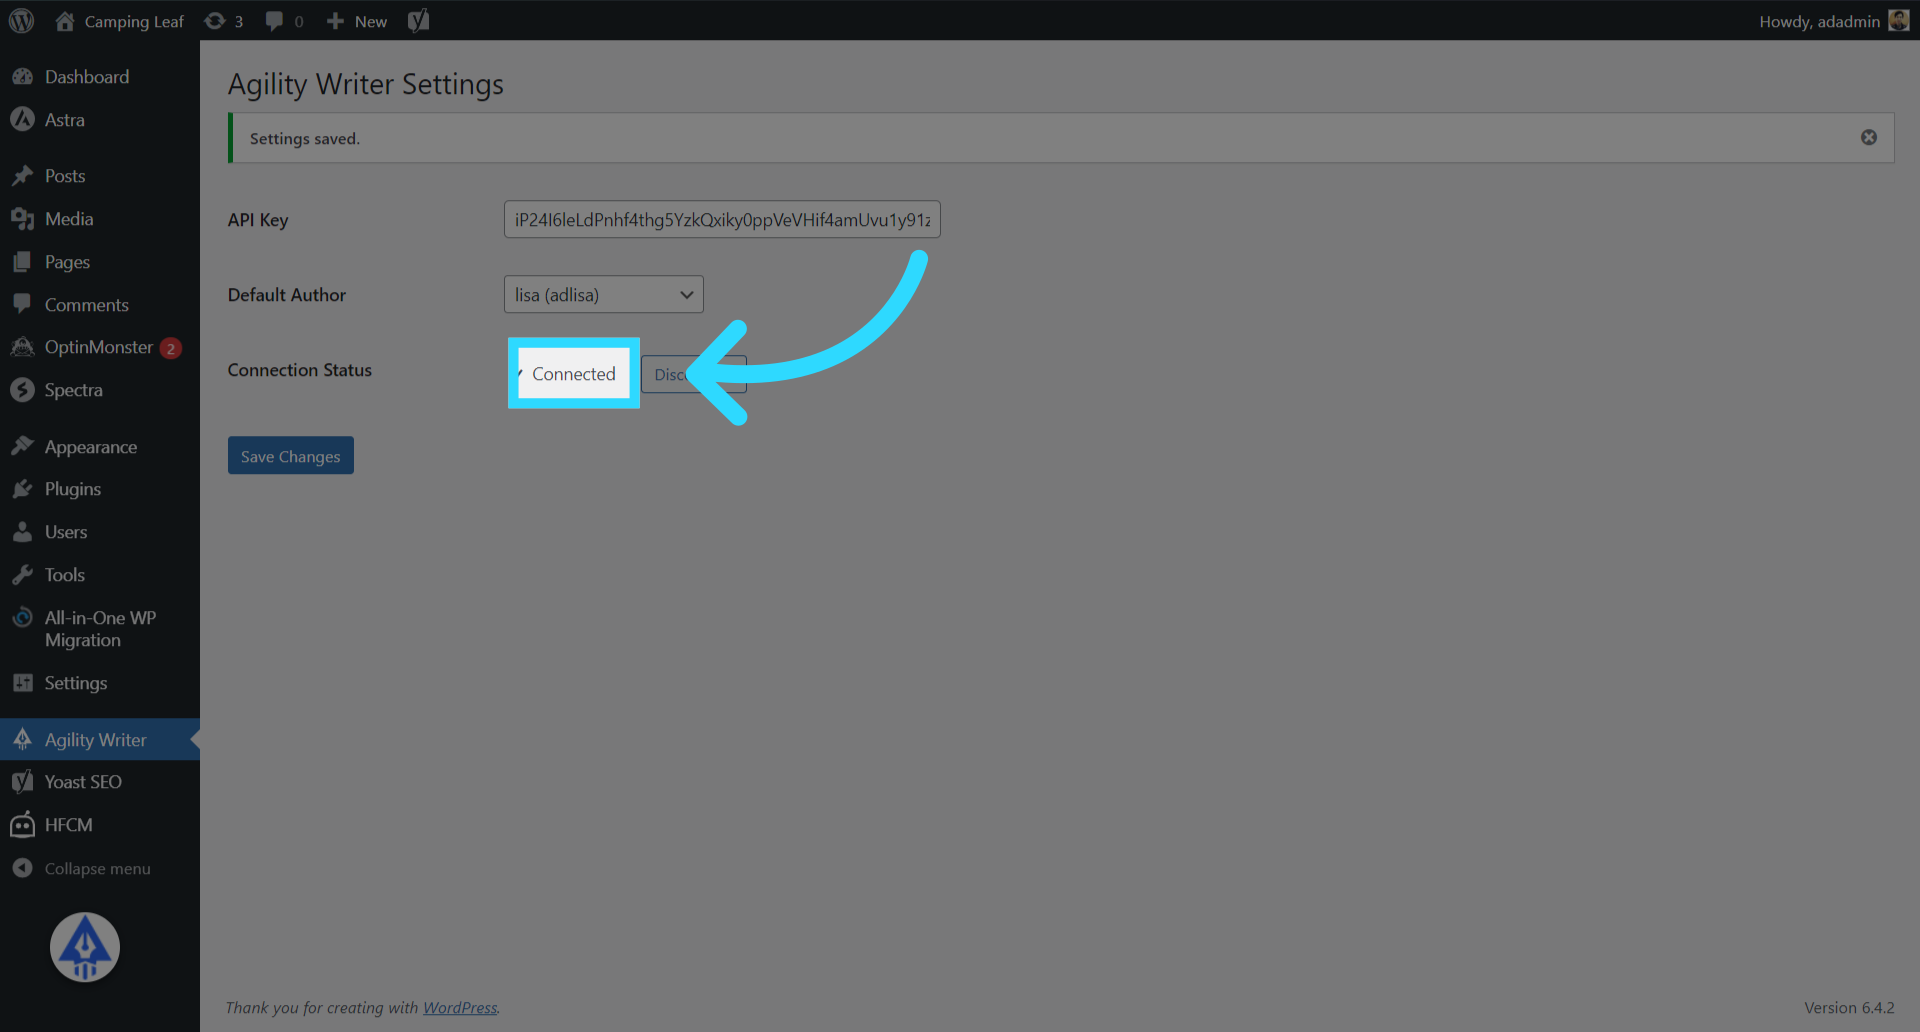
18. WordPress is now connected to Agility Writer.
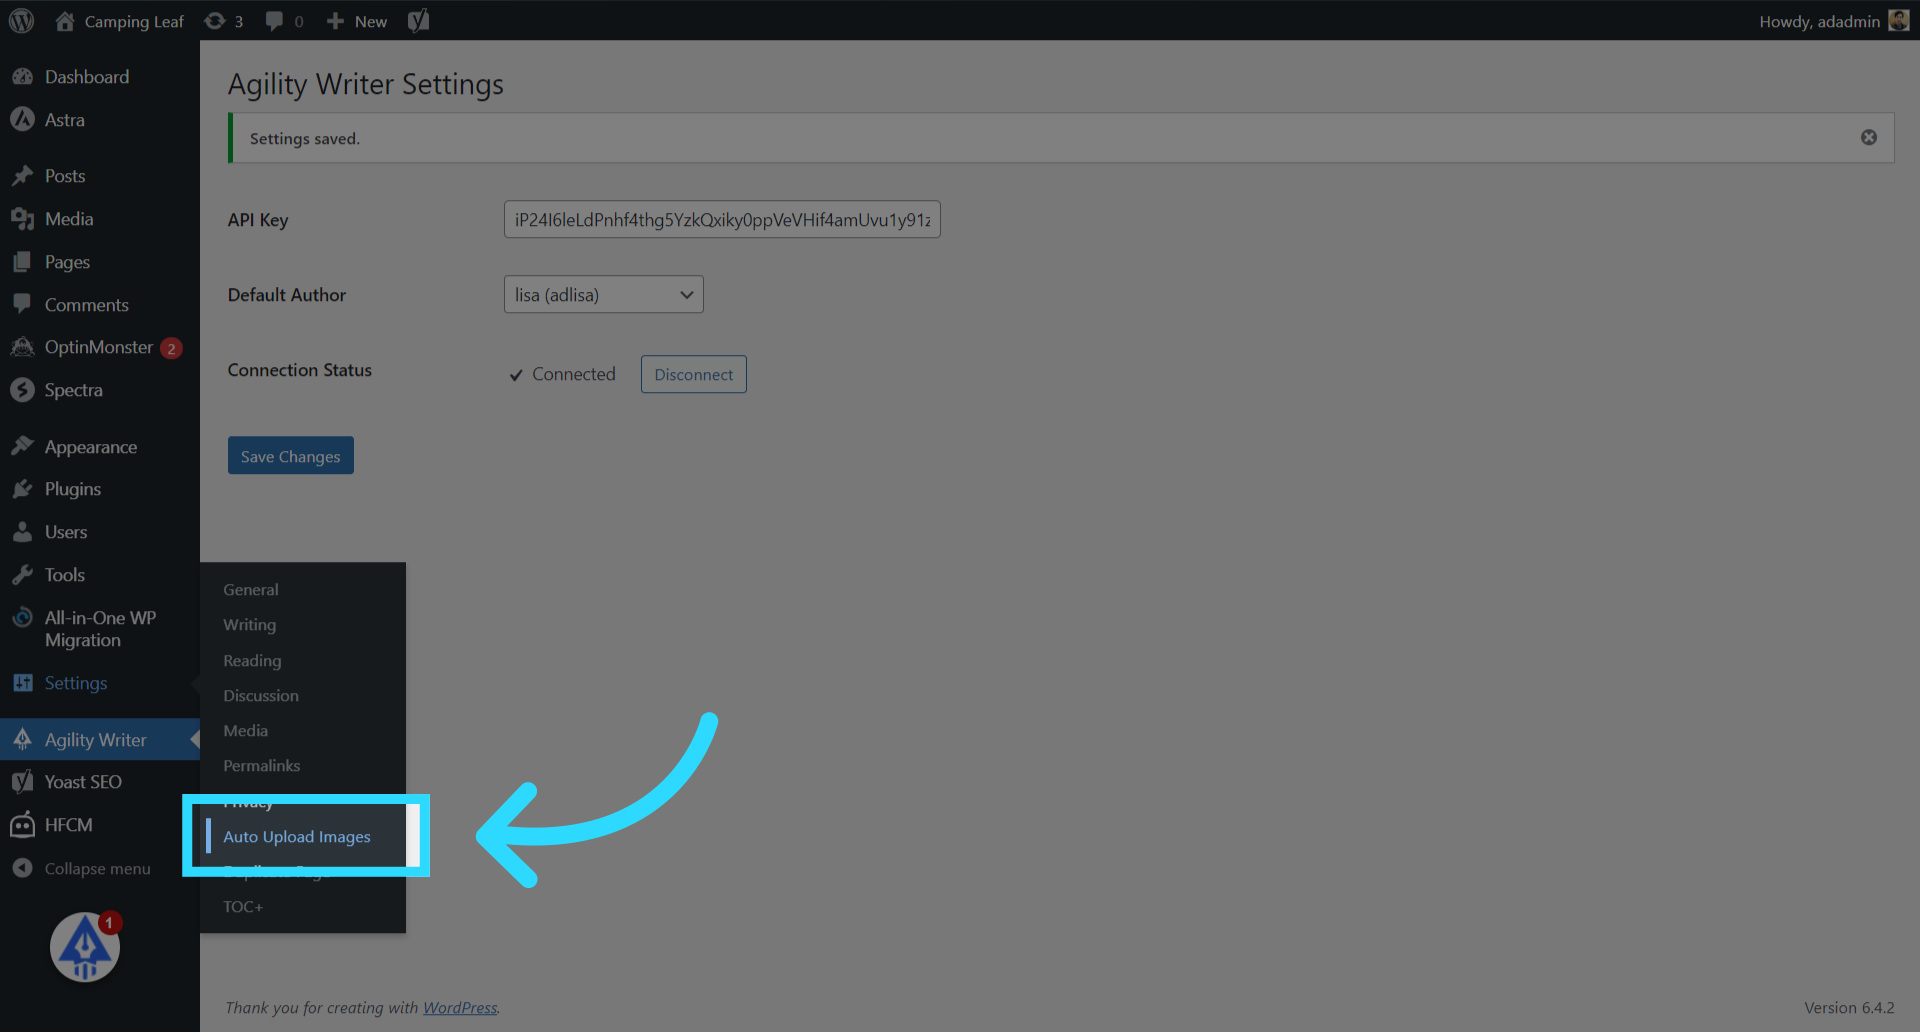
19. For users who use the "Auto Upload Images" plugin, please modify the "Auto Upload Images" plugin to avoid duplicate image creation. Skip to step 22 if you are not using the "Auto Upload Images" plugin.
If you use the "Auto Upload Images" plugin to save images locally, you must exclude our domain name, or remove the plugin.
This is required to ensure no duplicate images are created. Our Agility Writer plugin will auto-save images to your local server.
Click here to exclude our domain name.
20. Enter "https://app.agilitywriter.ai" to exclude our domain name.
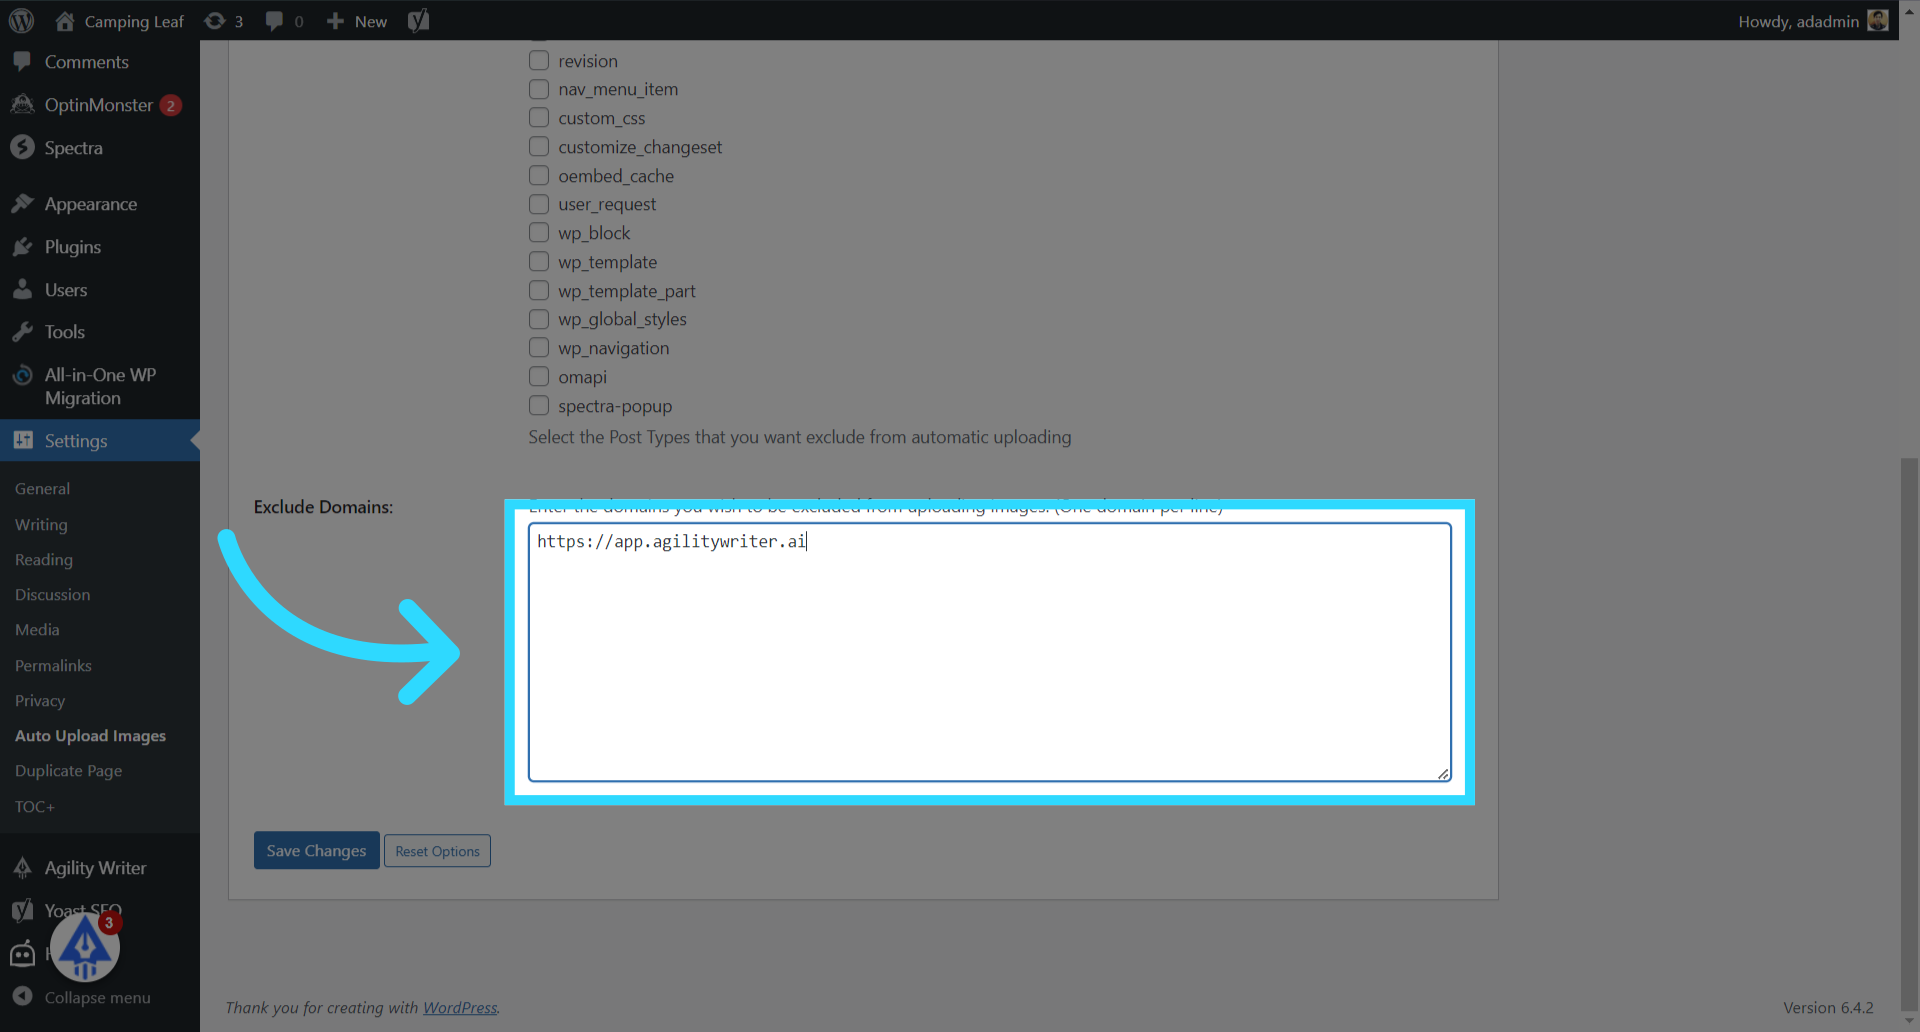
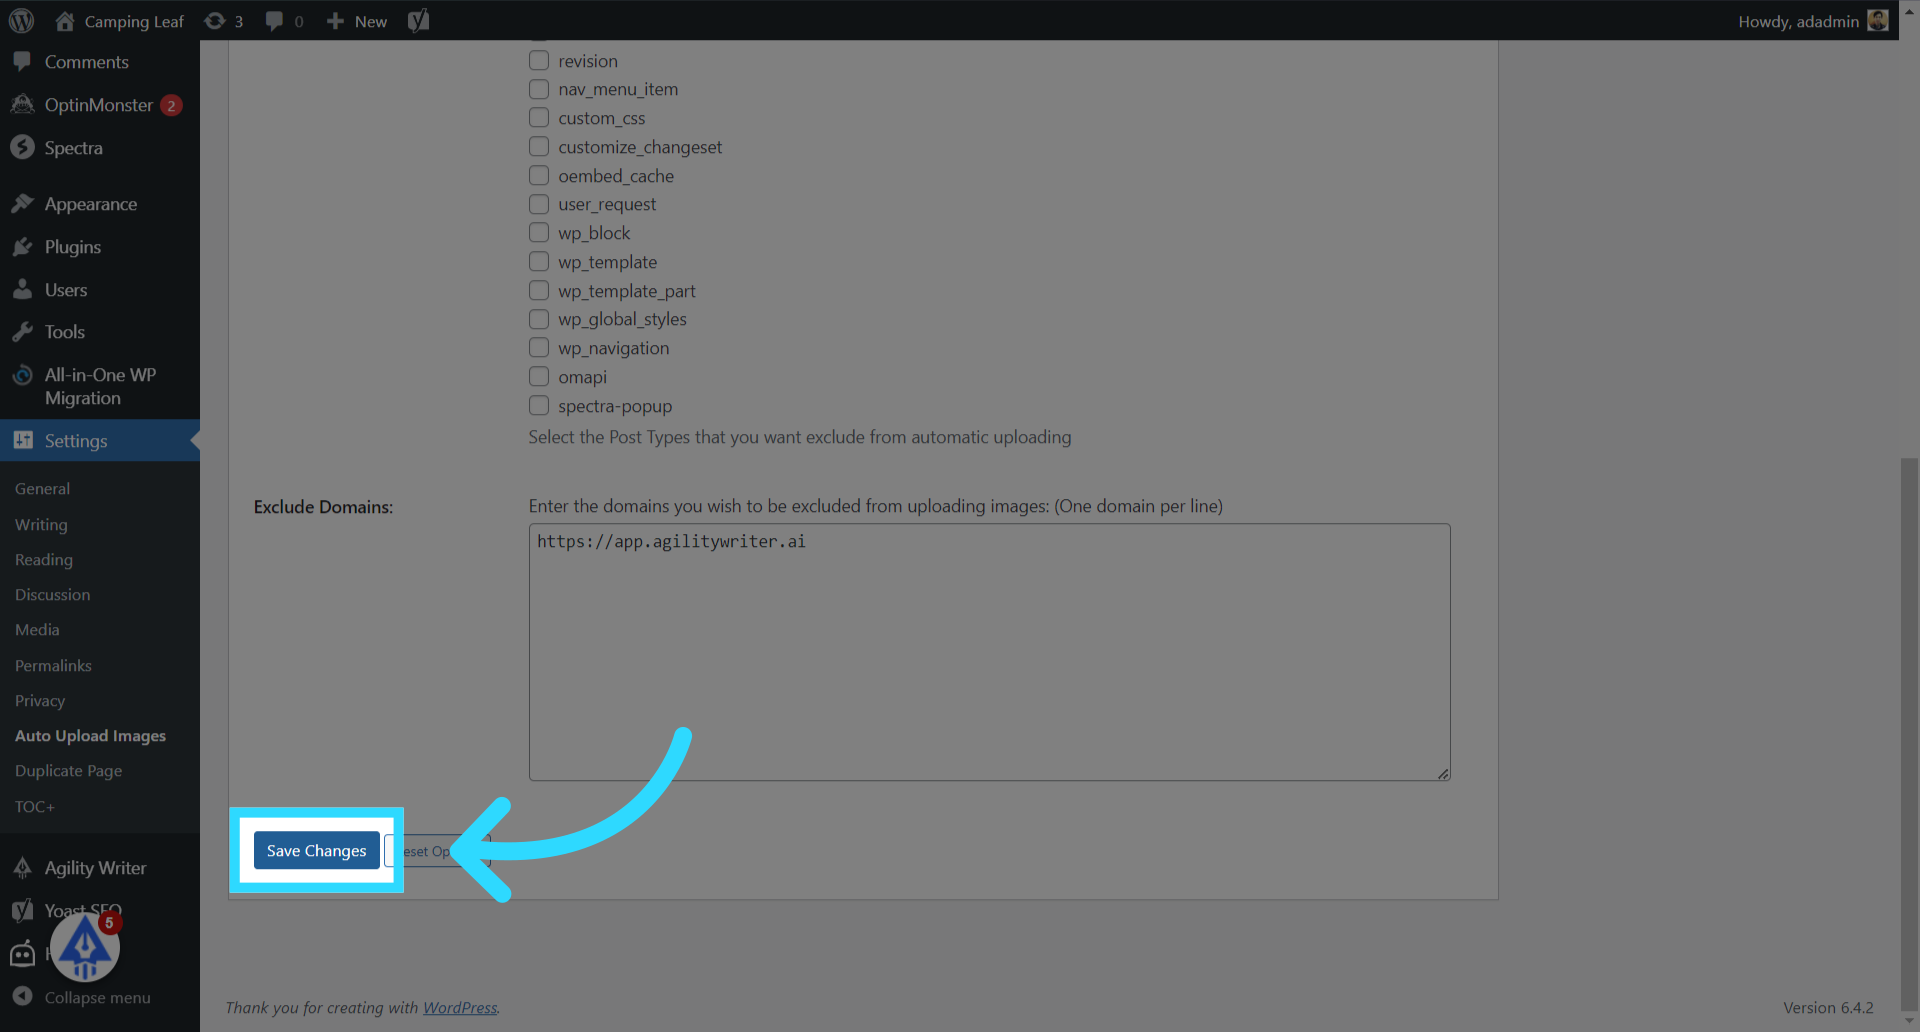
21. Click on the "Save Changes" button
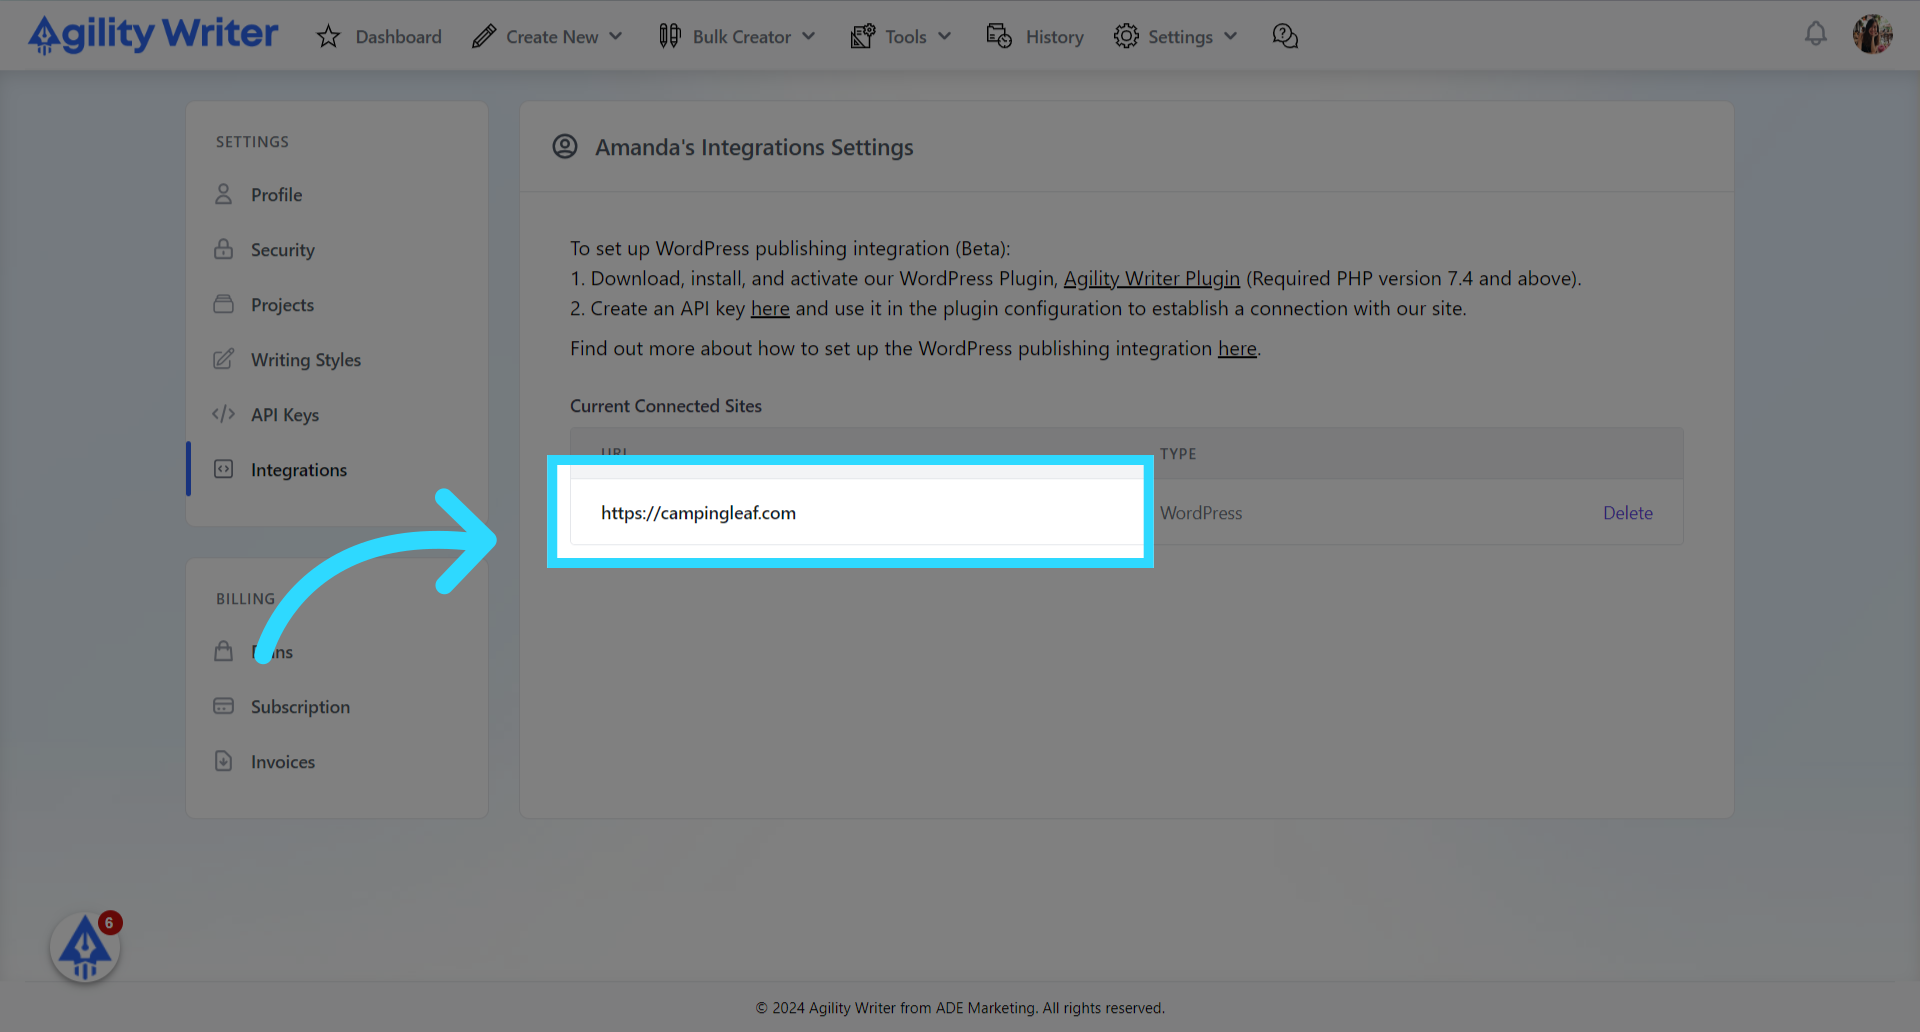
22. Integration shows the connected website.
Switch back to the Integration screen. Refresh the screen. You should see the WordPress site is connected.
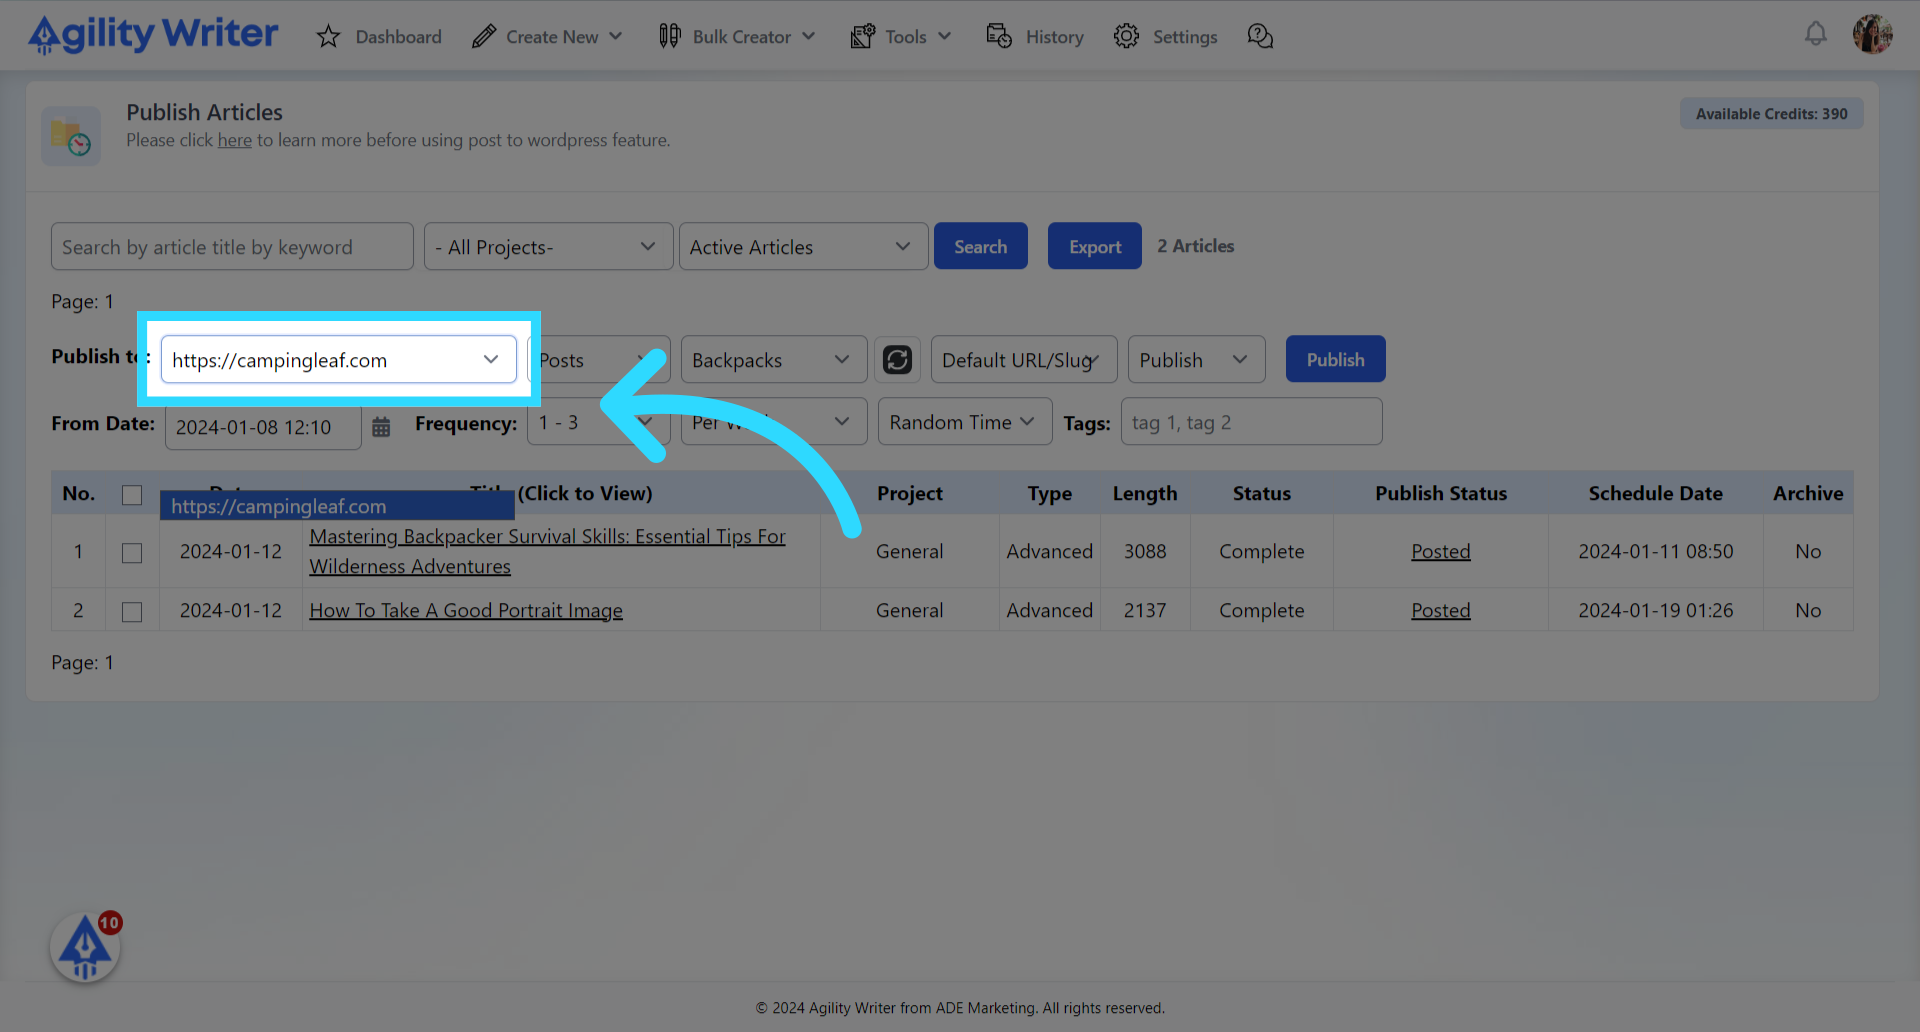
23. Navigate to "Publish Articles" menu. This is the page where you can schedule and publish bulk articles.
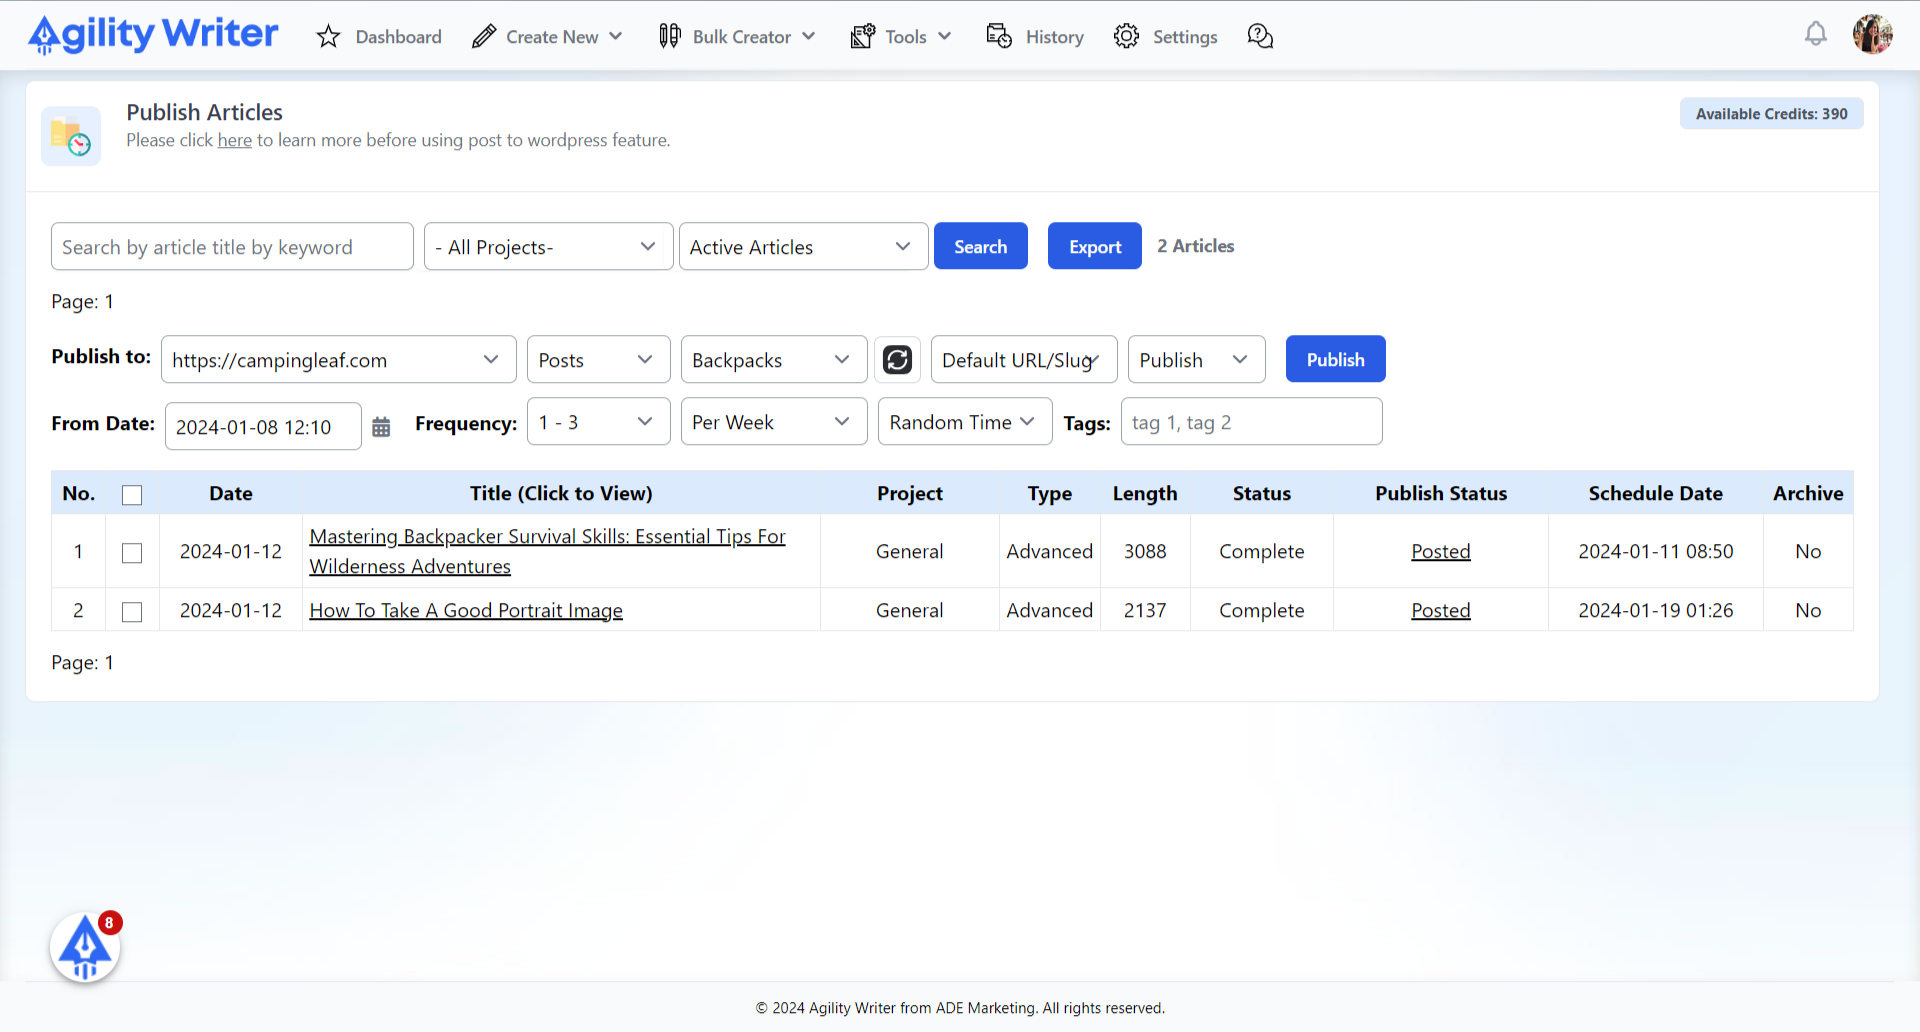
24. Click the "Publish to" dropdown field to select the new connected site. If you are connected to multiple websites, they will be listed here.
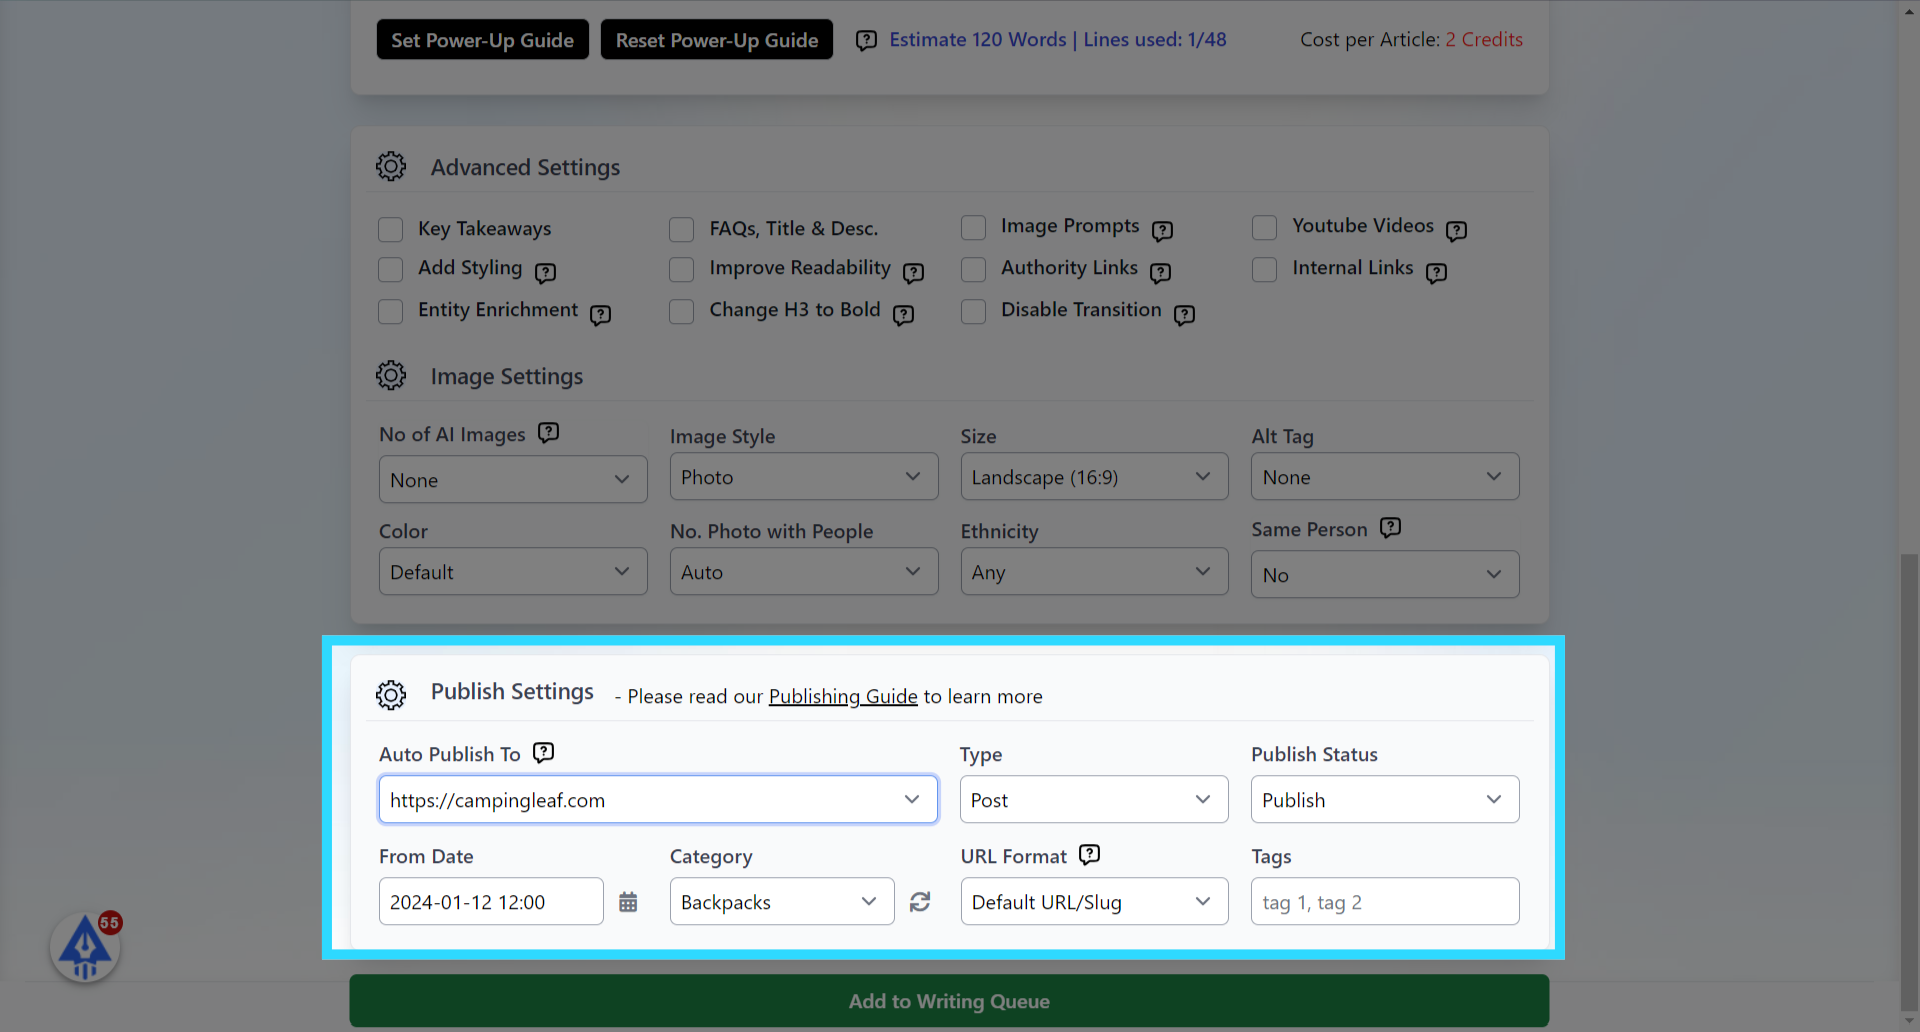
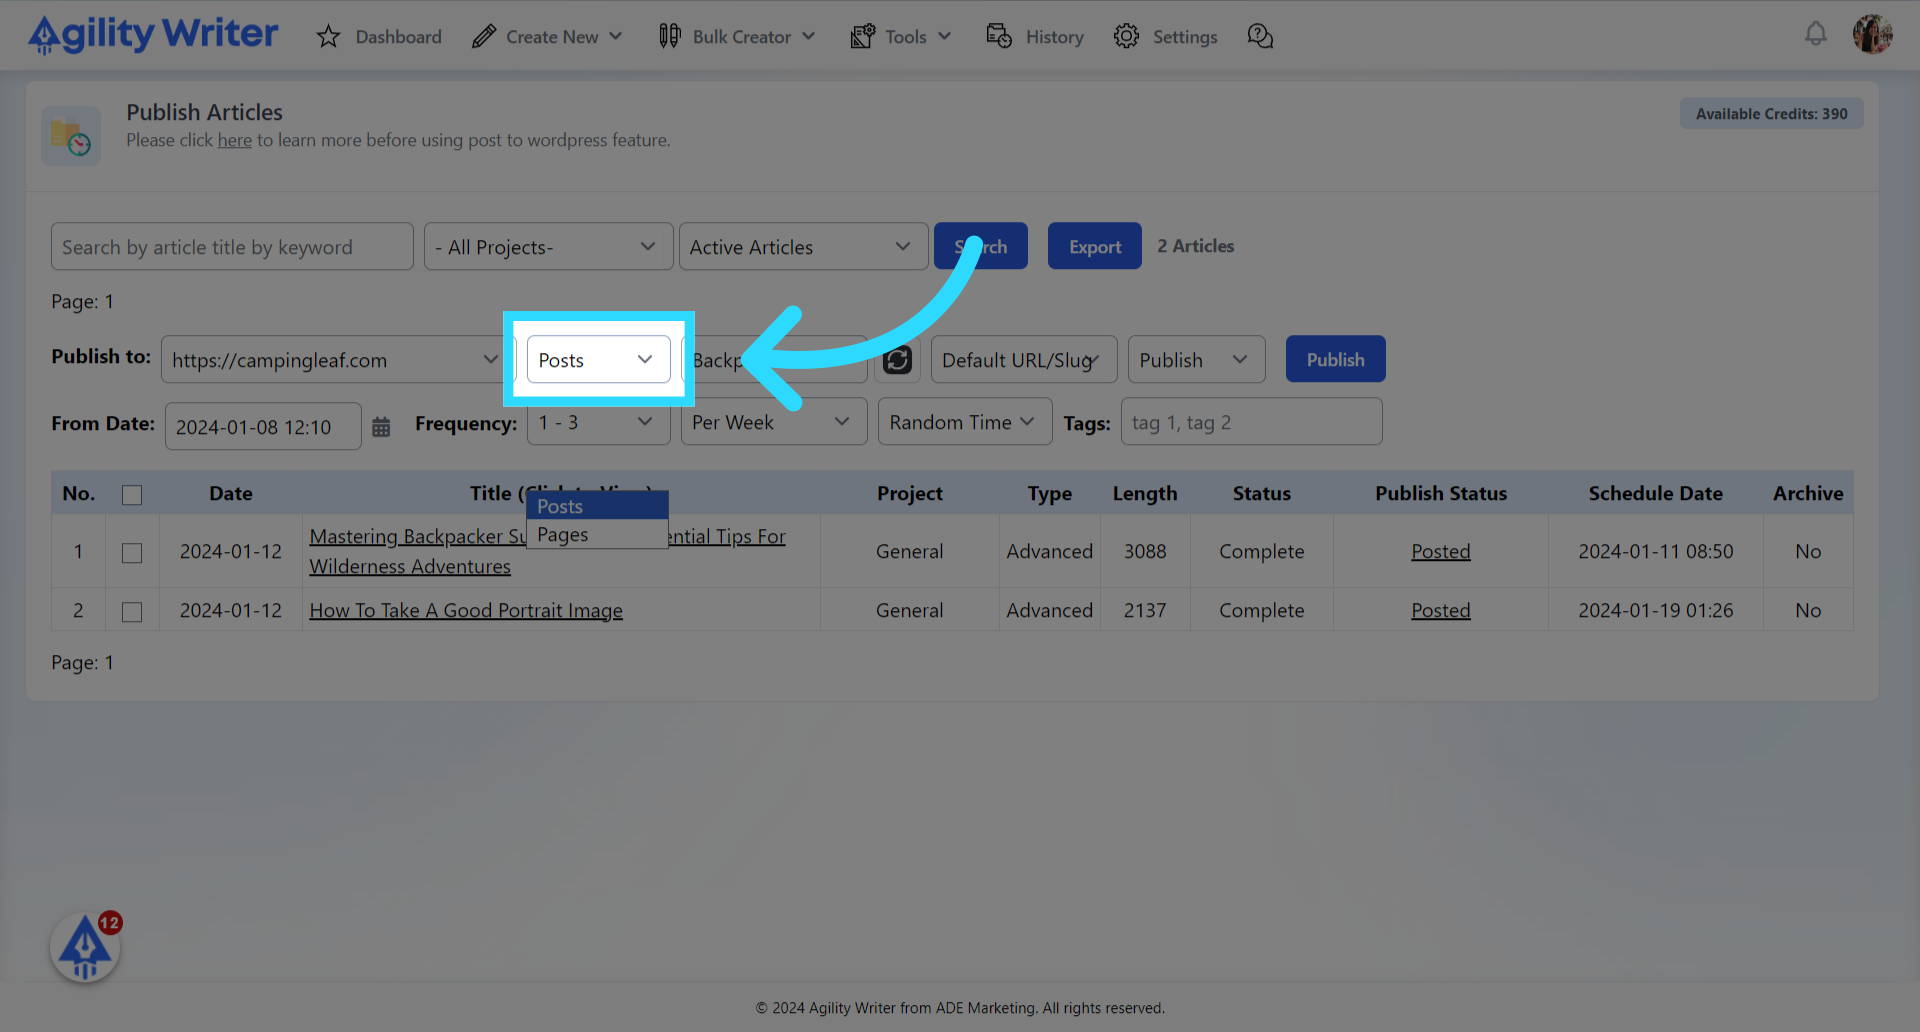
25. Publish as "Posts" or "Pages".
You can publish the article as "Posts" or "Pages". Click on the "Post" to proceed.
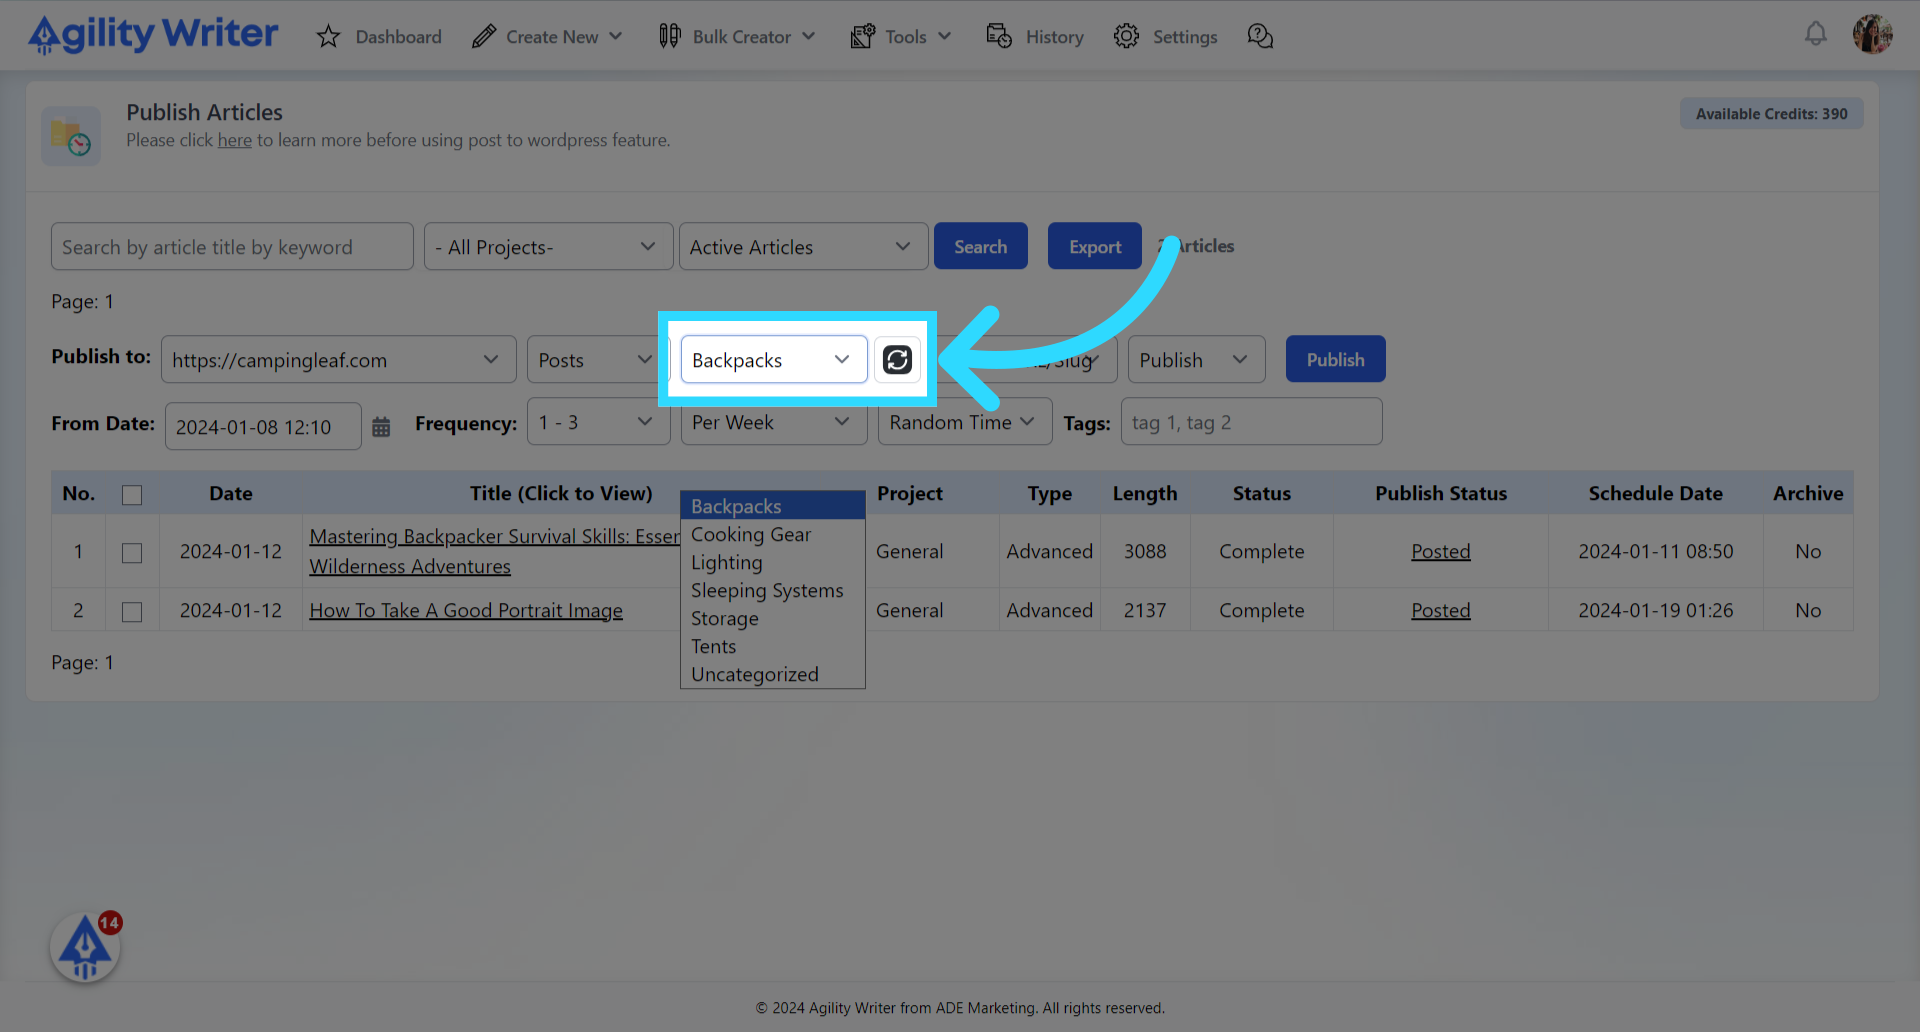
26. Select the article's category.
Select the article's category. You can click the refresh icon to get the latest categories. The category will be ignored if you publish the article as "Pages".
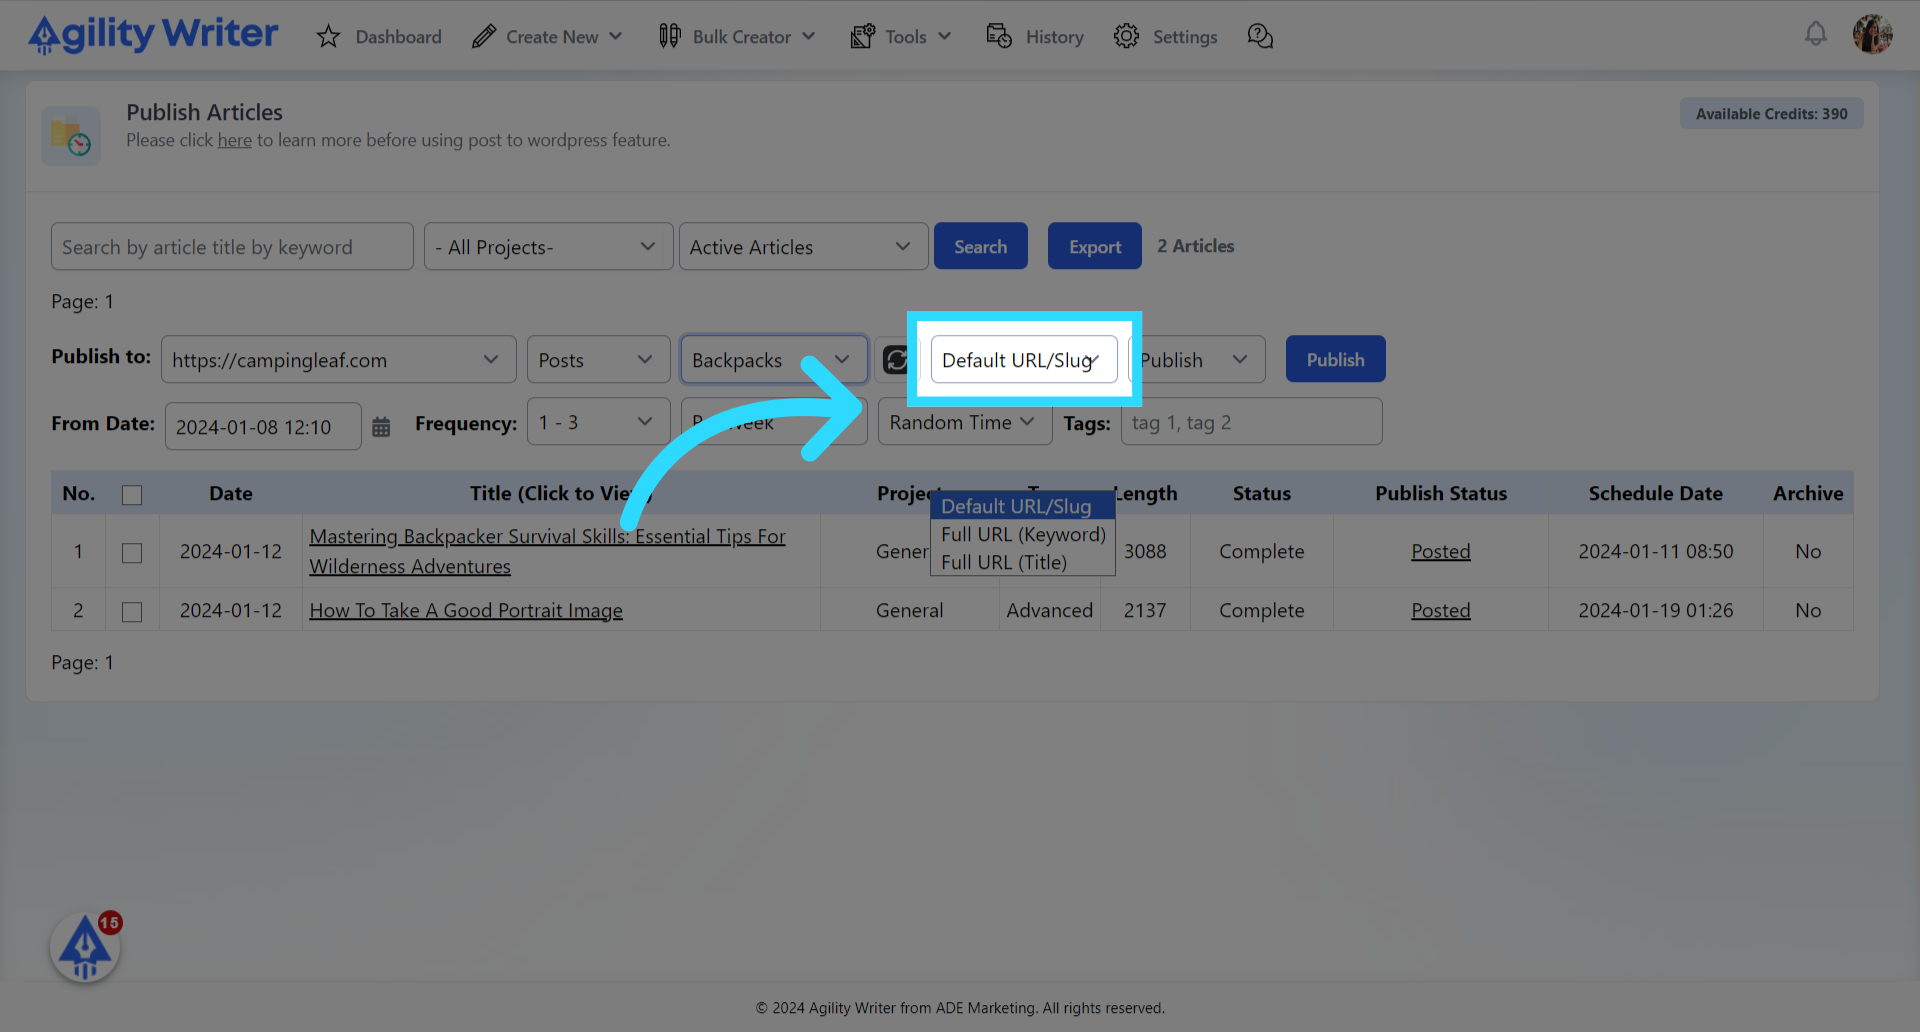
27. You can choose how the article's URL should be.
Click on any of the listed options: "Default URL/Slug", "Full URL (Keyword)" and "Full URL (Title)".
- The "Default URL/Slug" option will use the main keywords as the URL and also remove common words.
- The "Full URL (Keyword)" option will use the main keywords as the URL without removing any common words.
- The "Full URL (Title)" option will use the article title as the URL without removing any common words.
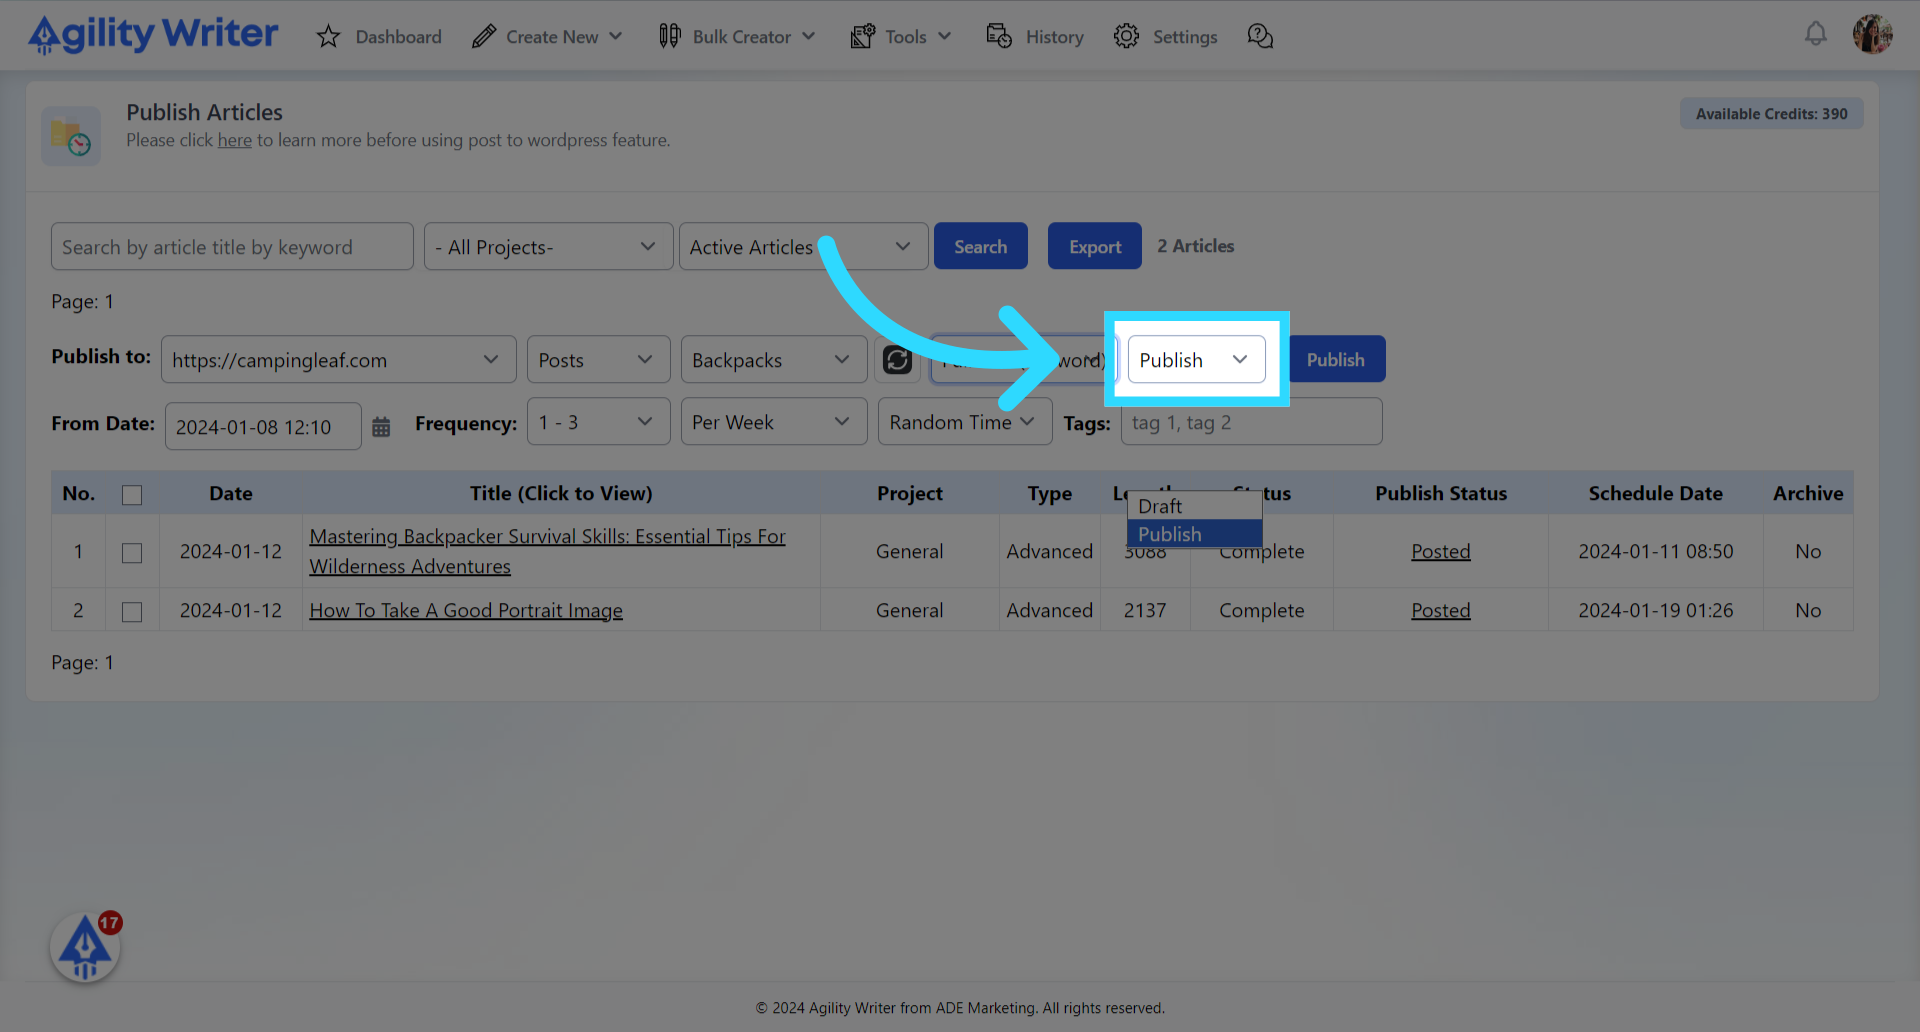
28. Click either the article status as "Draft" or "Publish".
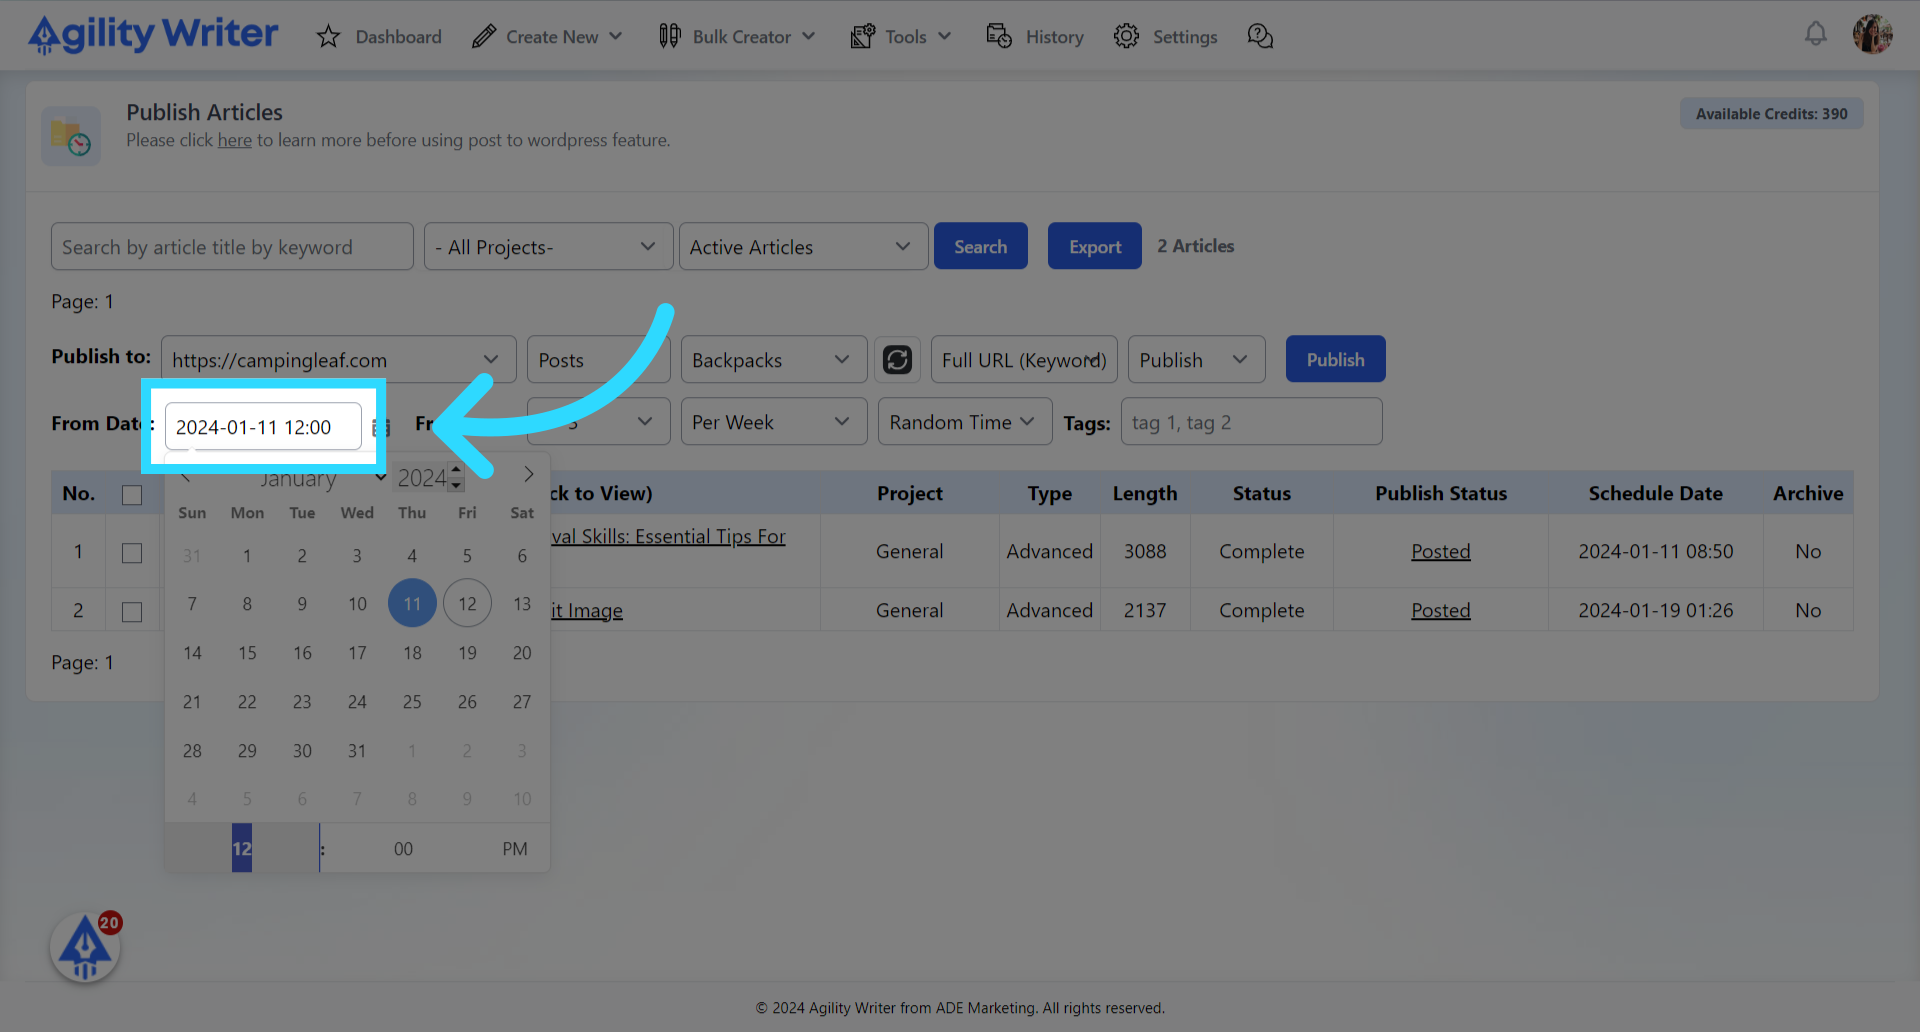
29. Choose the publishing start date and time.
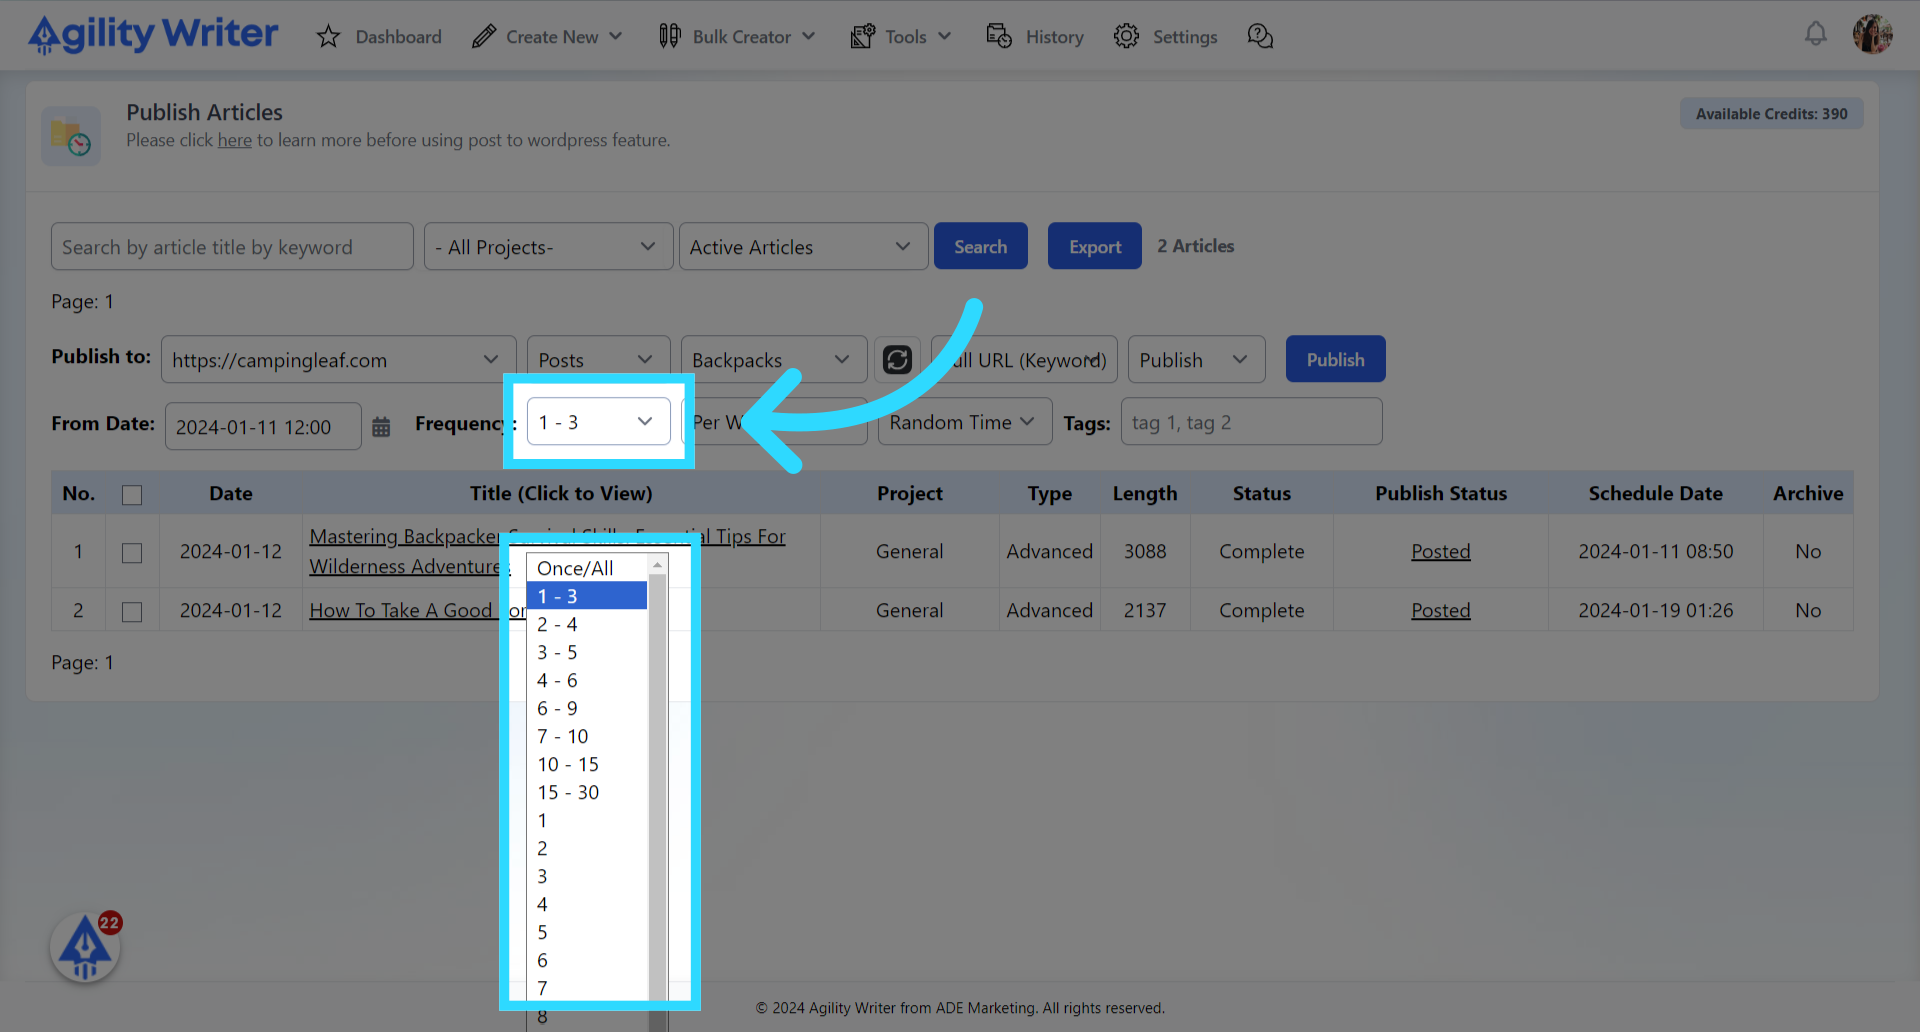
30. Choose the publishing frequency.
You can choose how many articles to be published for each interval time. There are 3 options.
- The "Once/All" option will publish all articles at once based on the selected date.
- The "Range" option will randomly publish a number of articles within the selected range according to the interval time. For example, if you choose a frequency, 1 to 3, and interval time as "per week", the system will randomly set the publish date of the 1 to 3 articles each week.
- The "Number" option will set the publish date for a fixed number of articles according to the interval time.
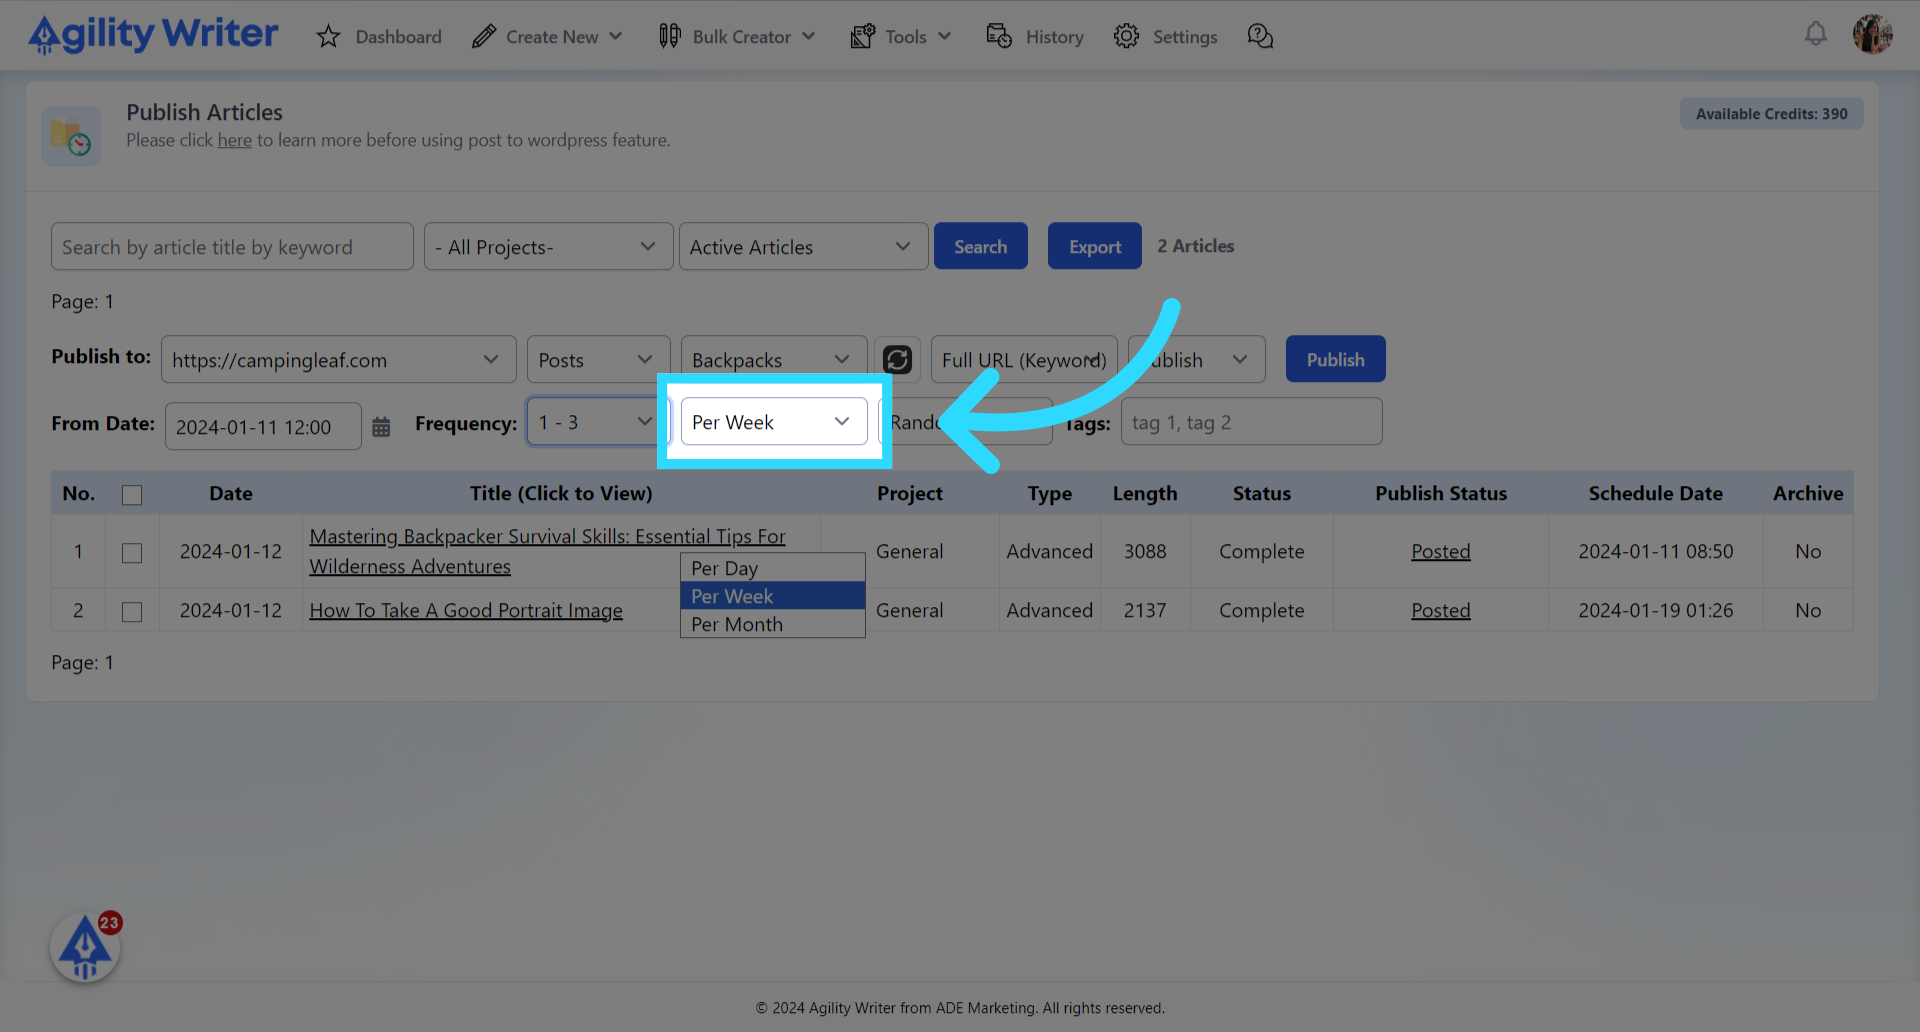
31. Choose the interval time.
You can choose the interval time. Click on any of the listed options: Per Day, Per Week, Per Month.
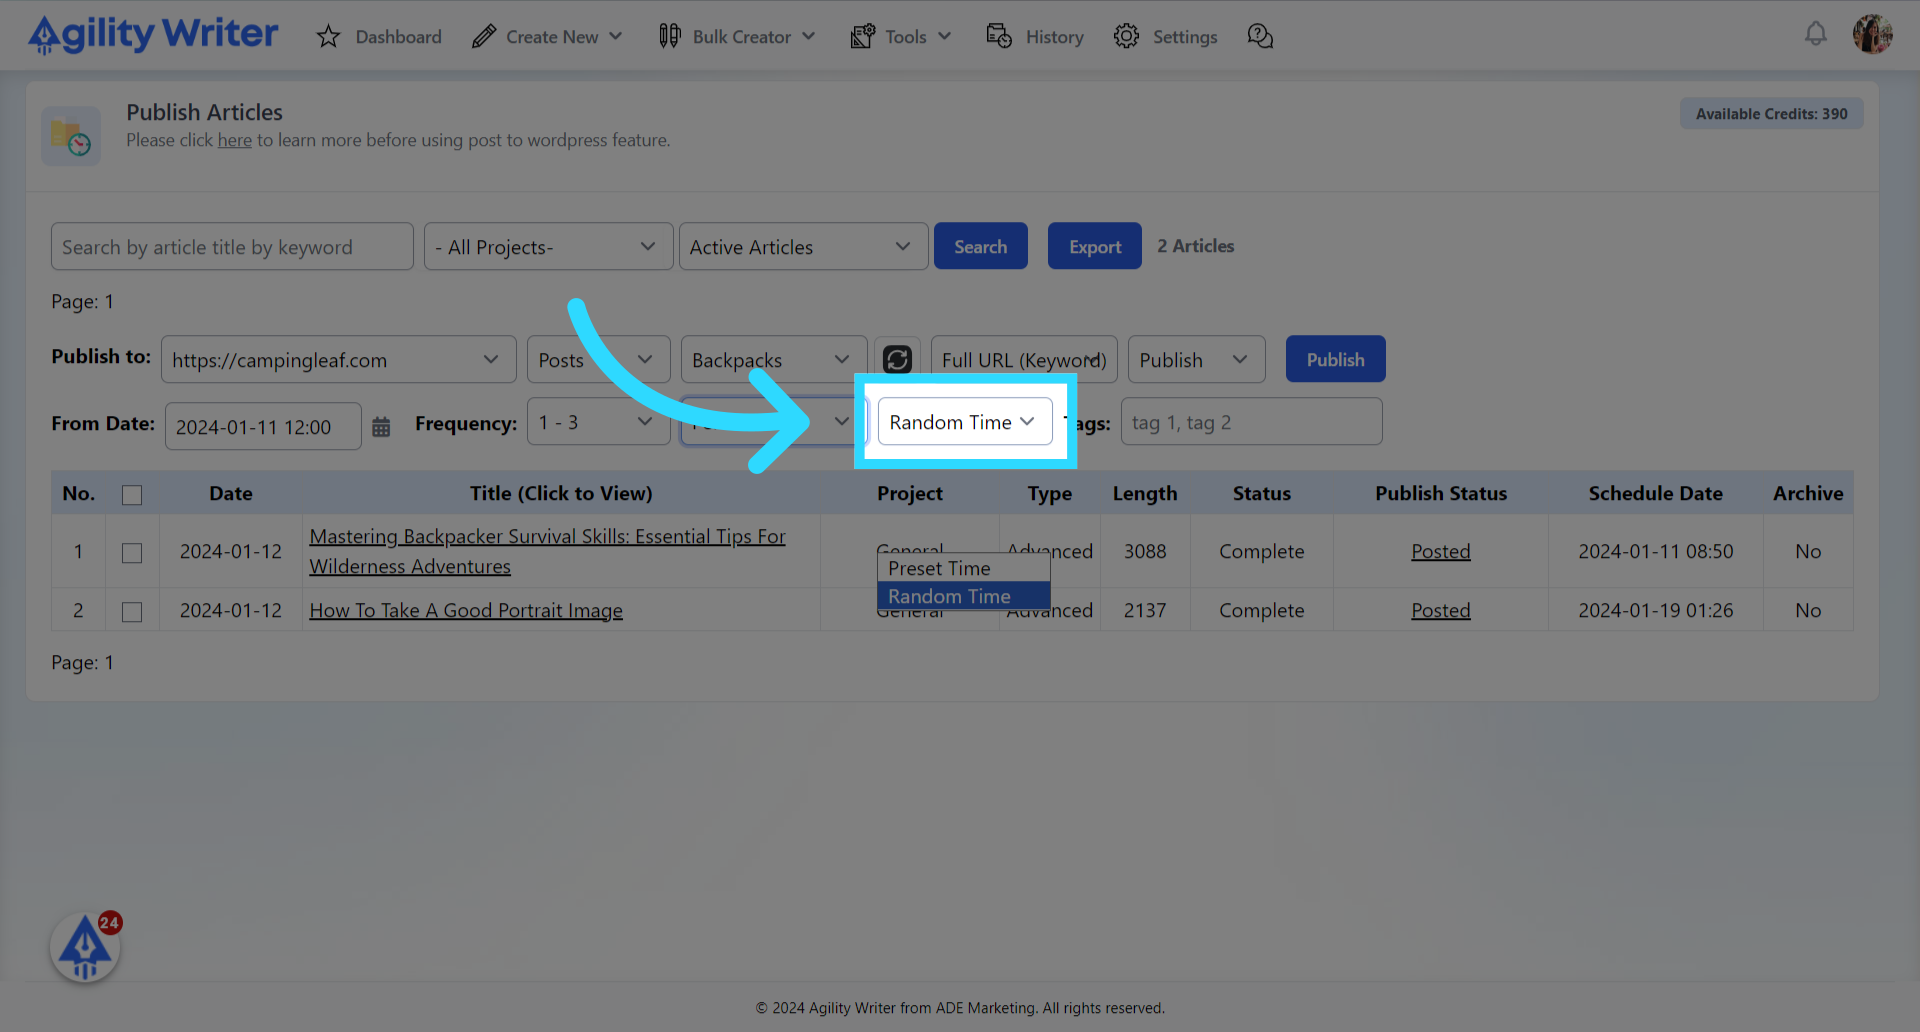
32. Choose the publish time
Click on any of the listed options: Preset Time, Random Time. The "Preset Time" option will use the same time value from the "From Date" field.
33. Enter Tags.
You can enter the article's tags. Use a comma as the separator.

34. Select all articles
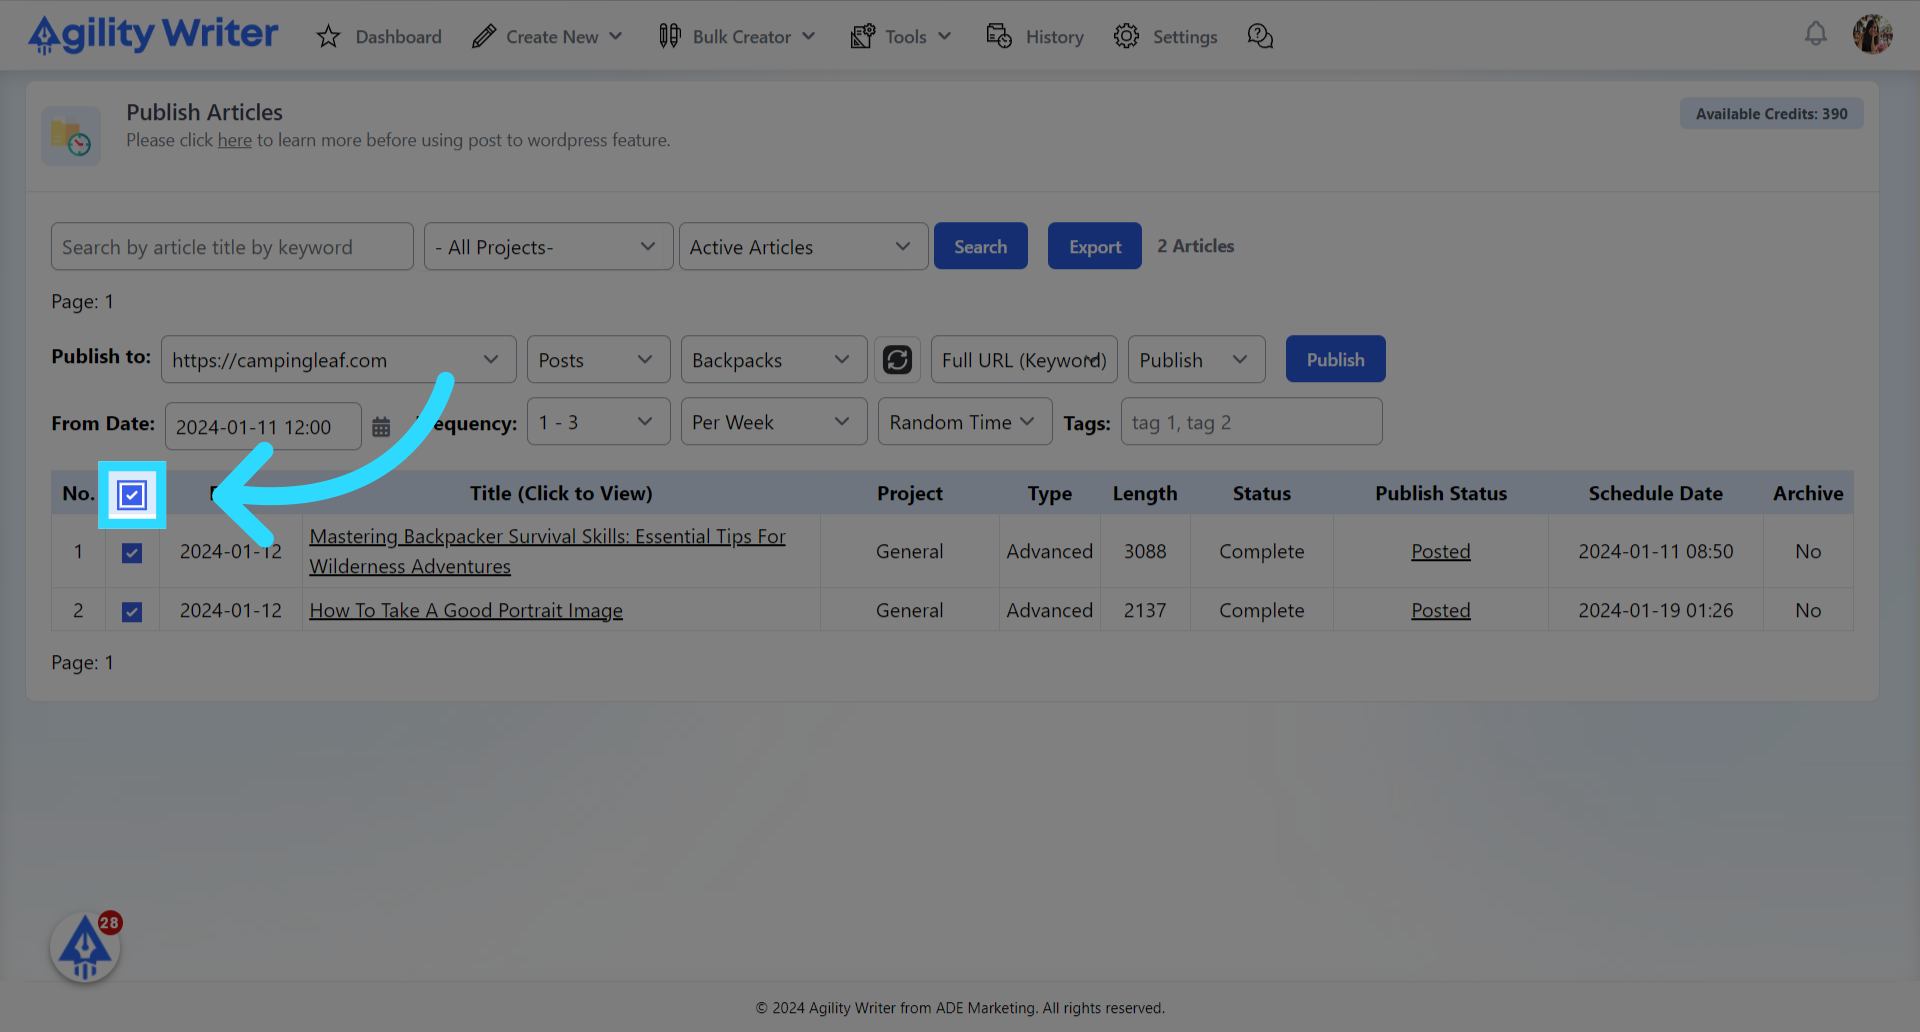
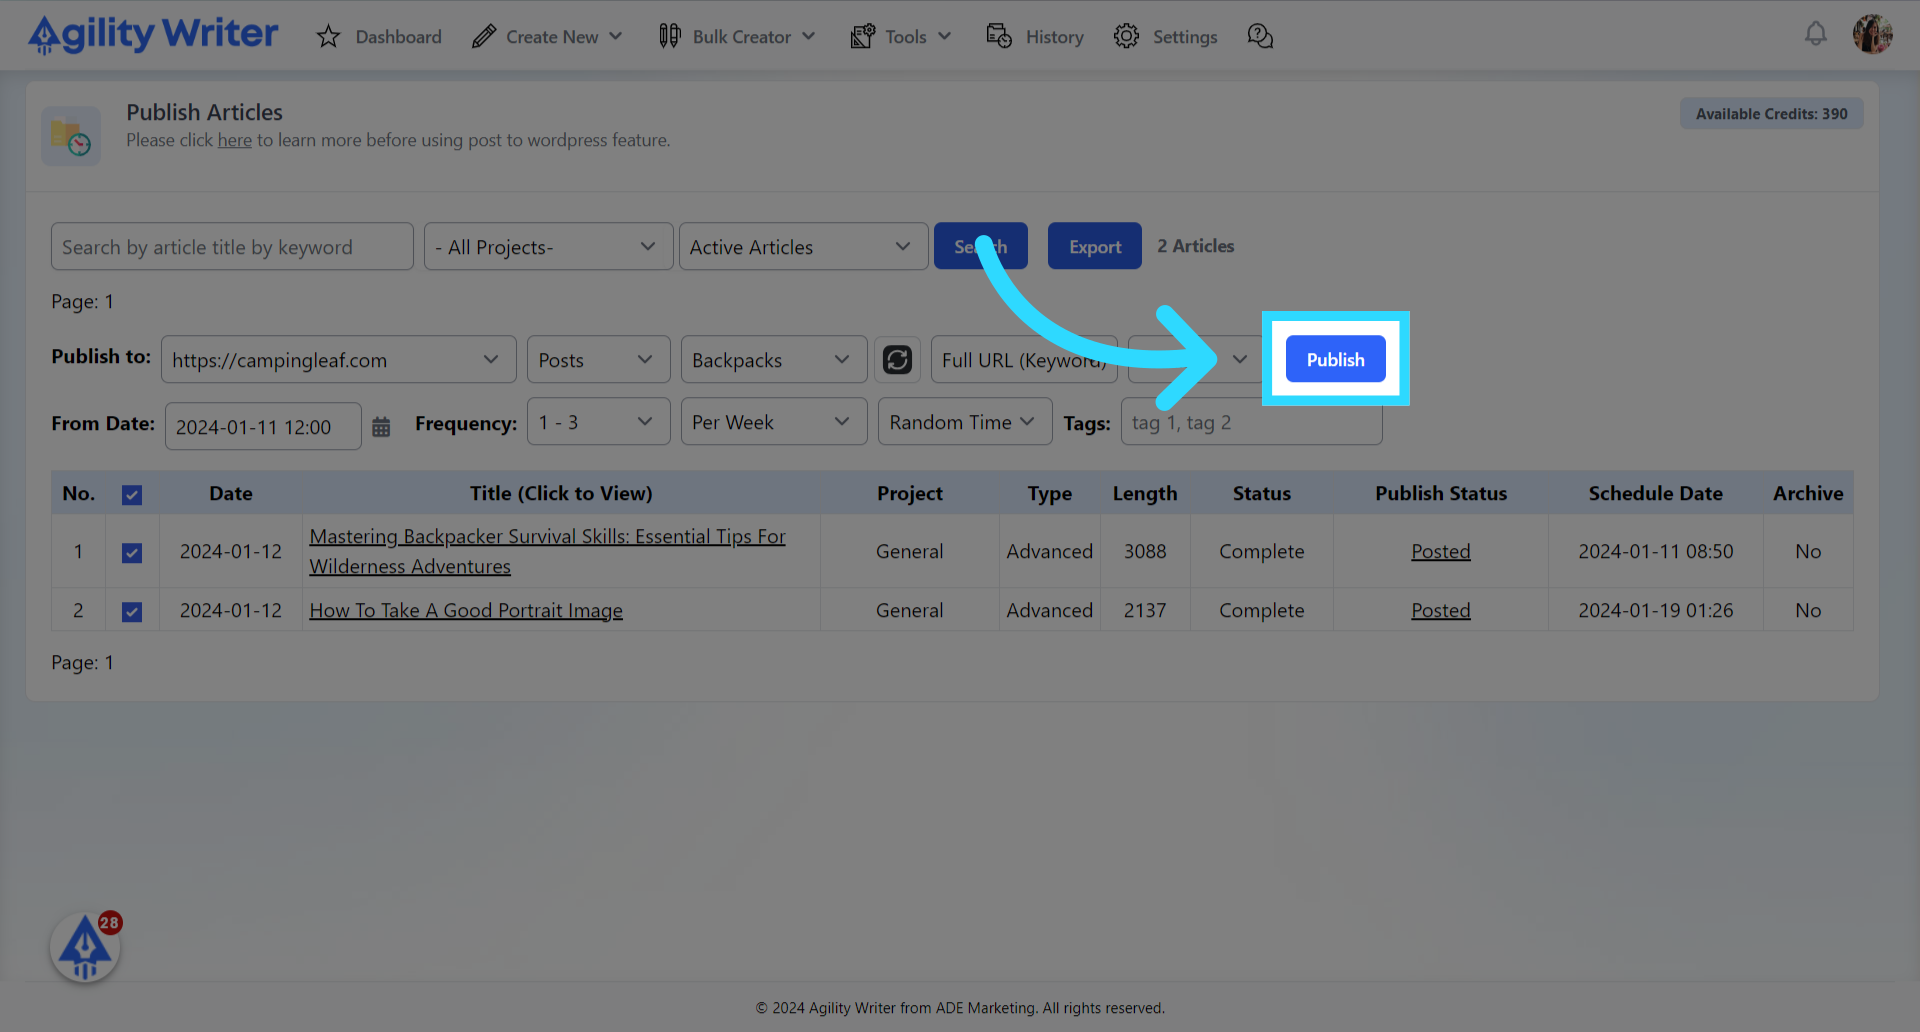
35. Click on the "Publish" button.
You can refresh the screen to check the publish status. It usually takes a few minutes to publish the articles. It may take longer to complete if you have many images or a slow server.
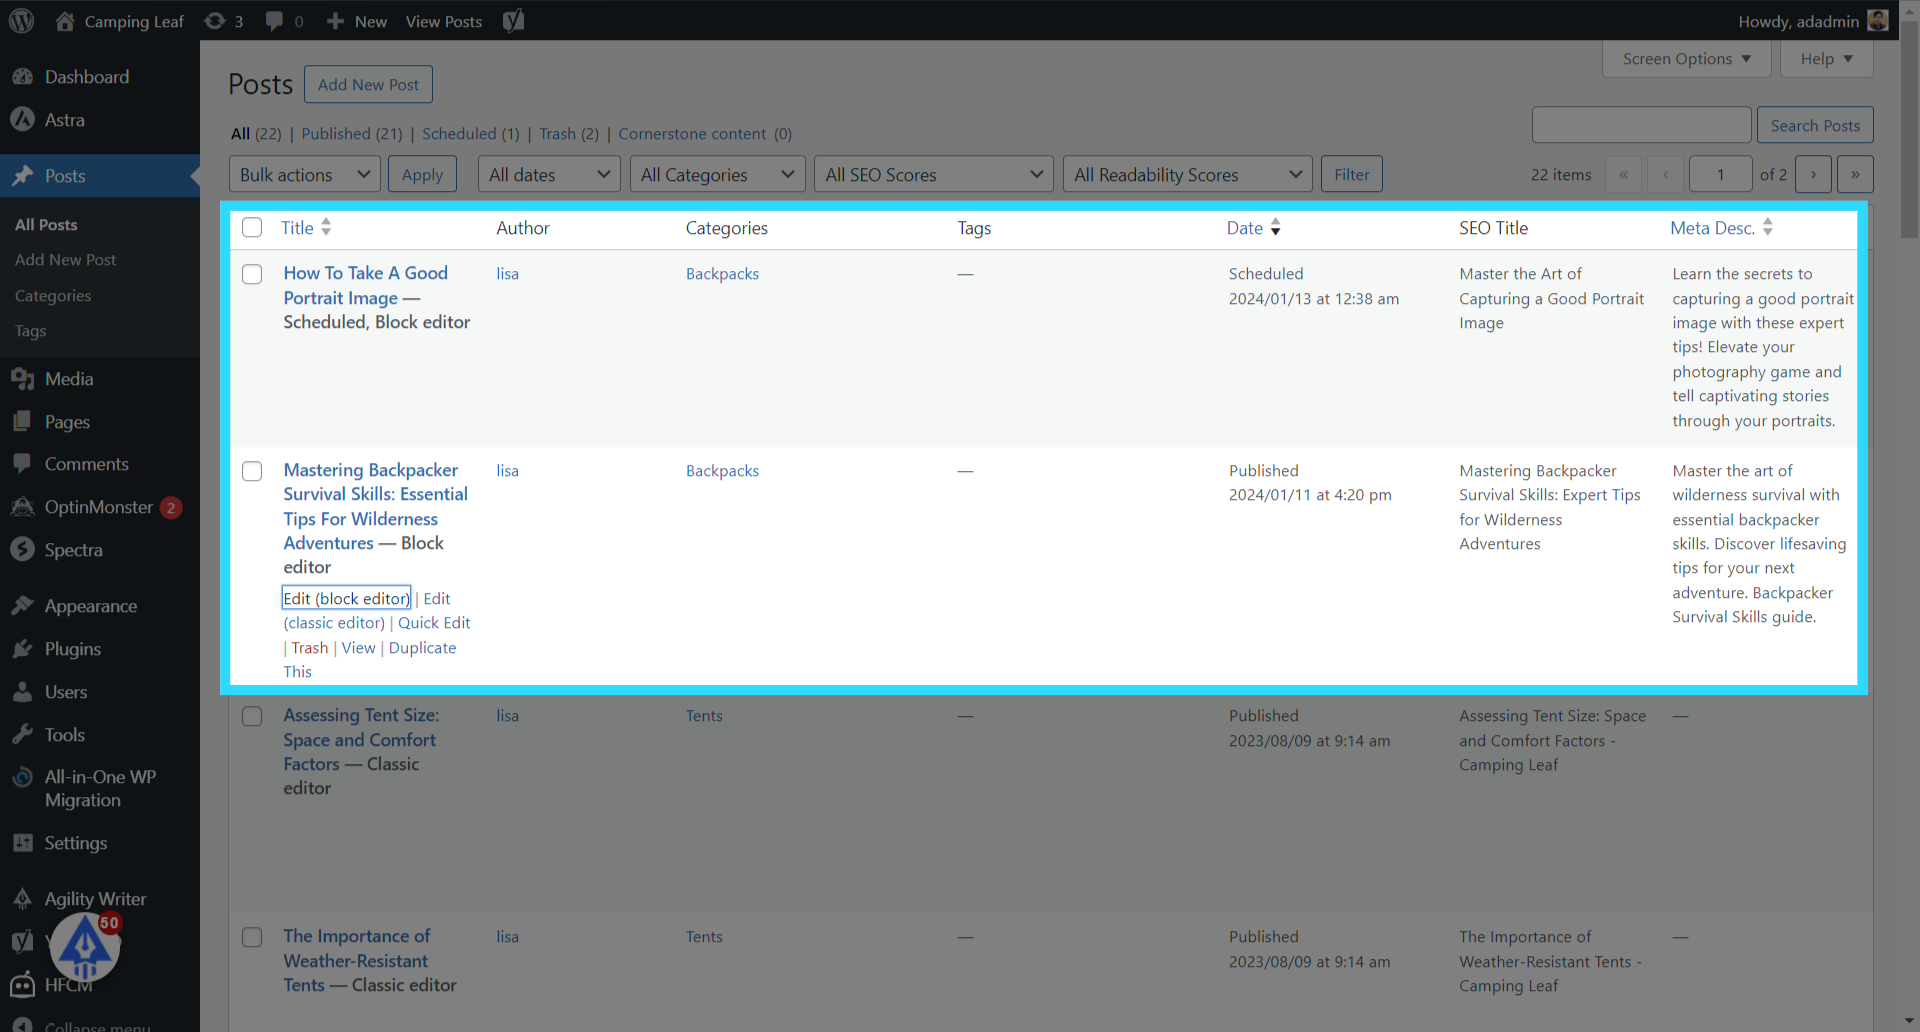
36. Switch back to WordPress sites. The articles are published successfully. The meta title and description are updated as well.
37. Auto Publish an article.
You can also auto-publish an article once it is completed. Look for the "Publish Setting" for each writing mode.
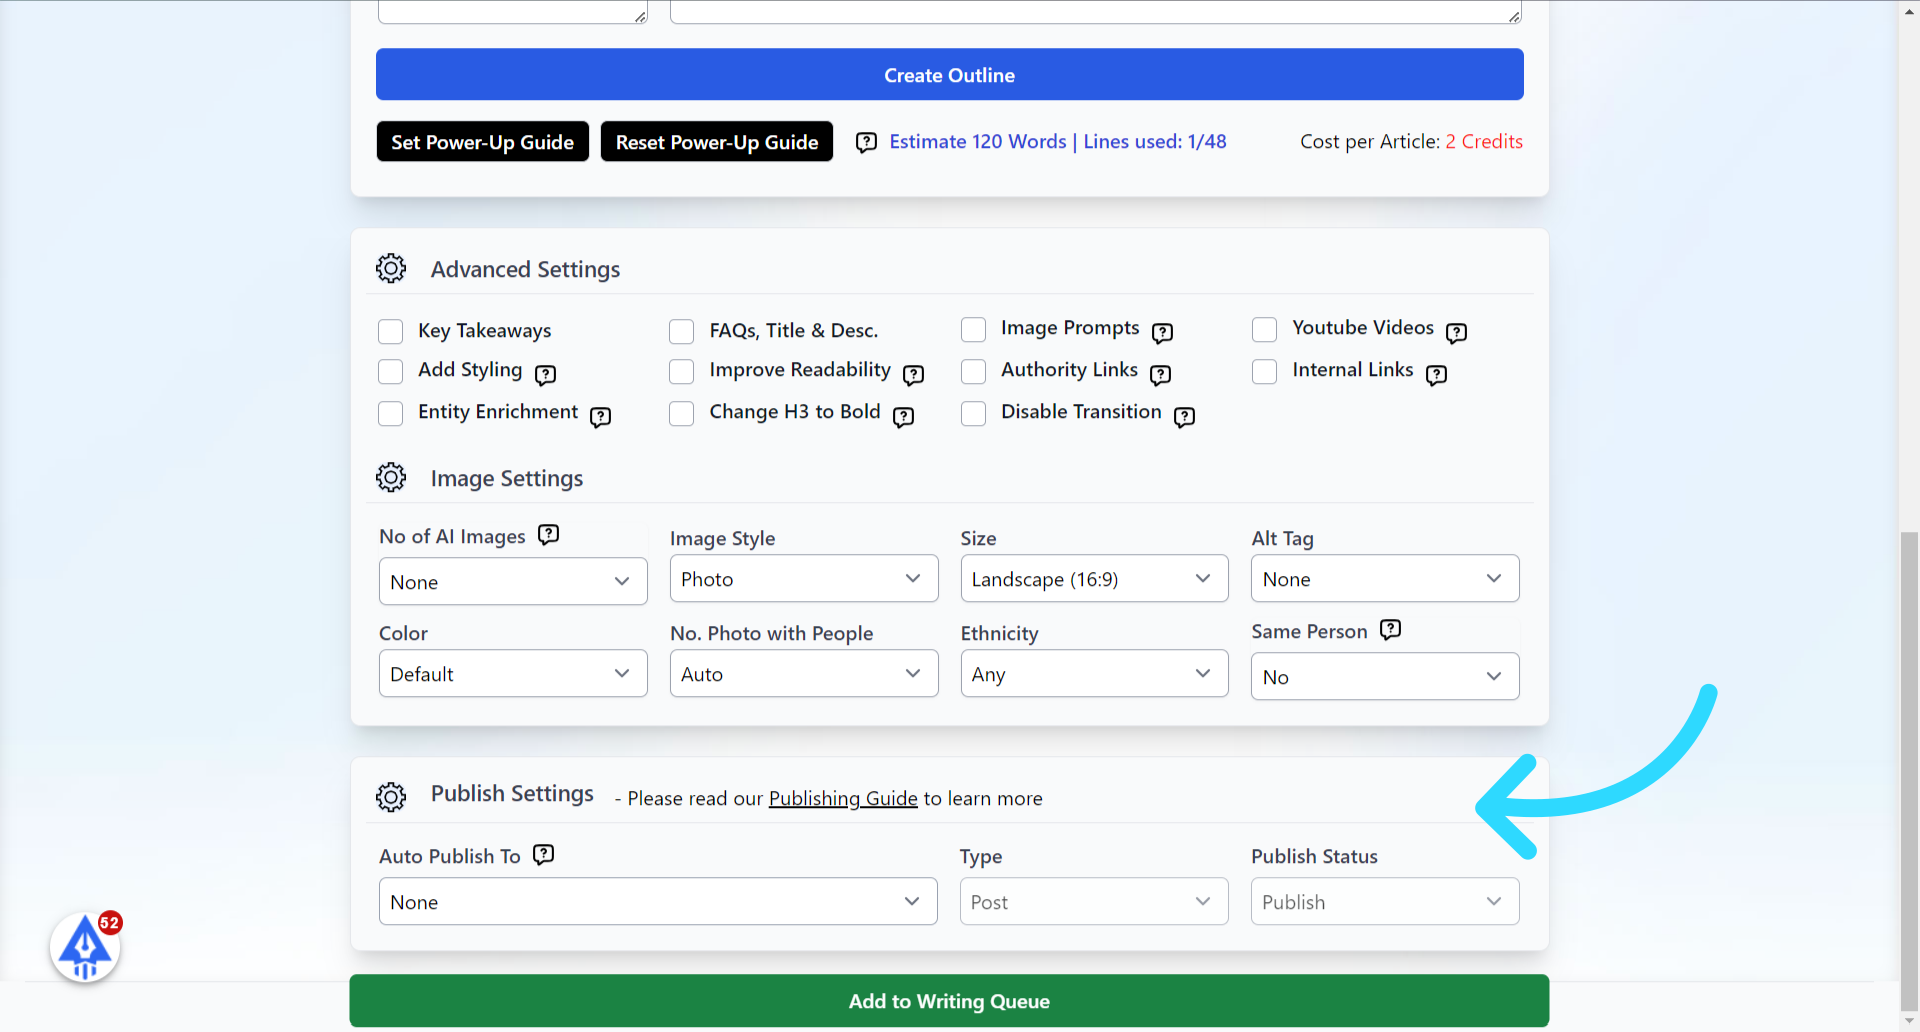
38. Select a connected site will turn on the auto-publishing feature.
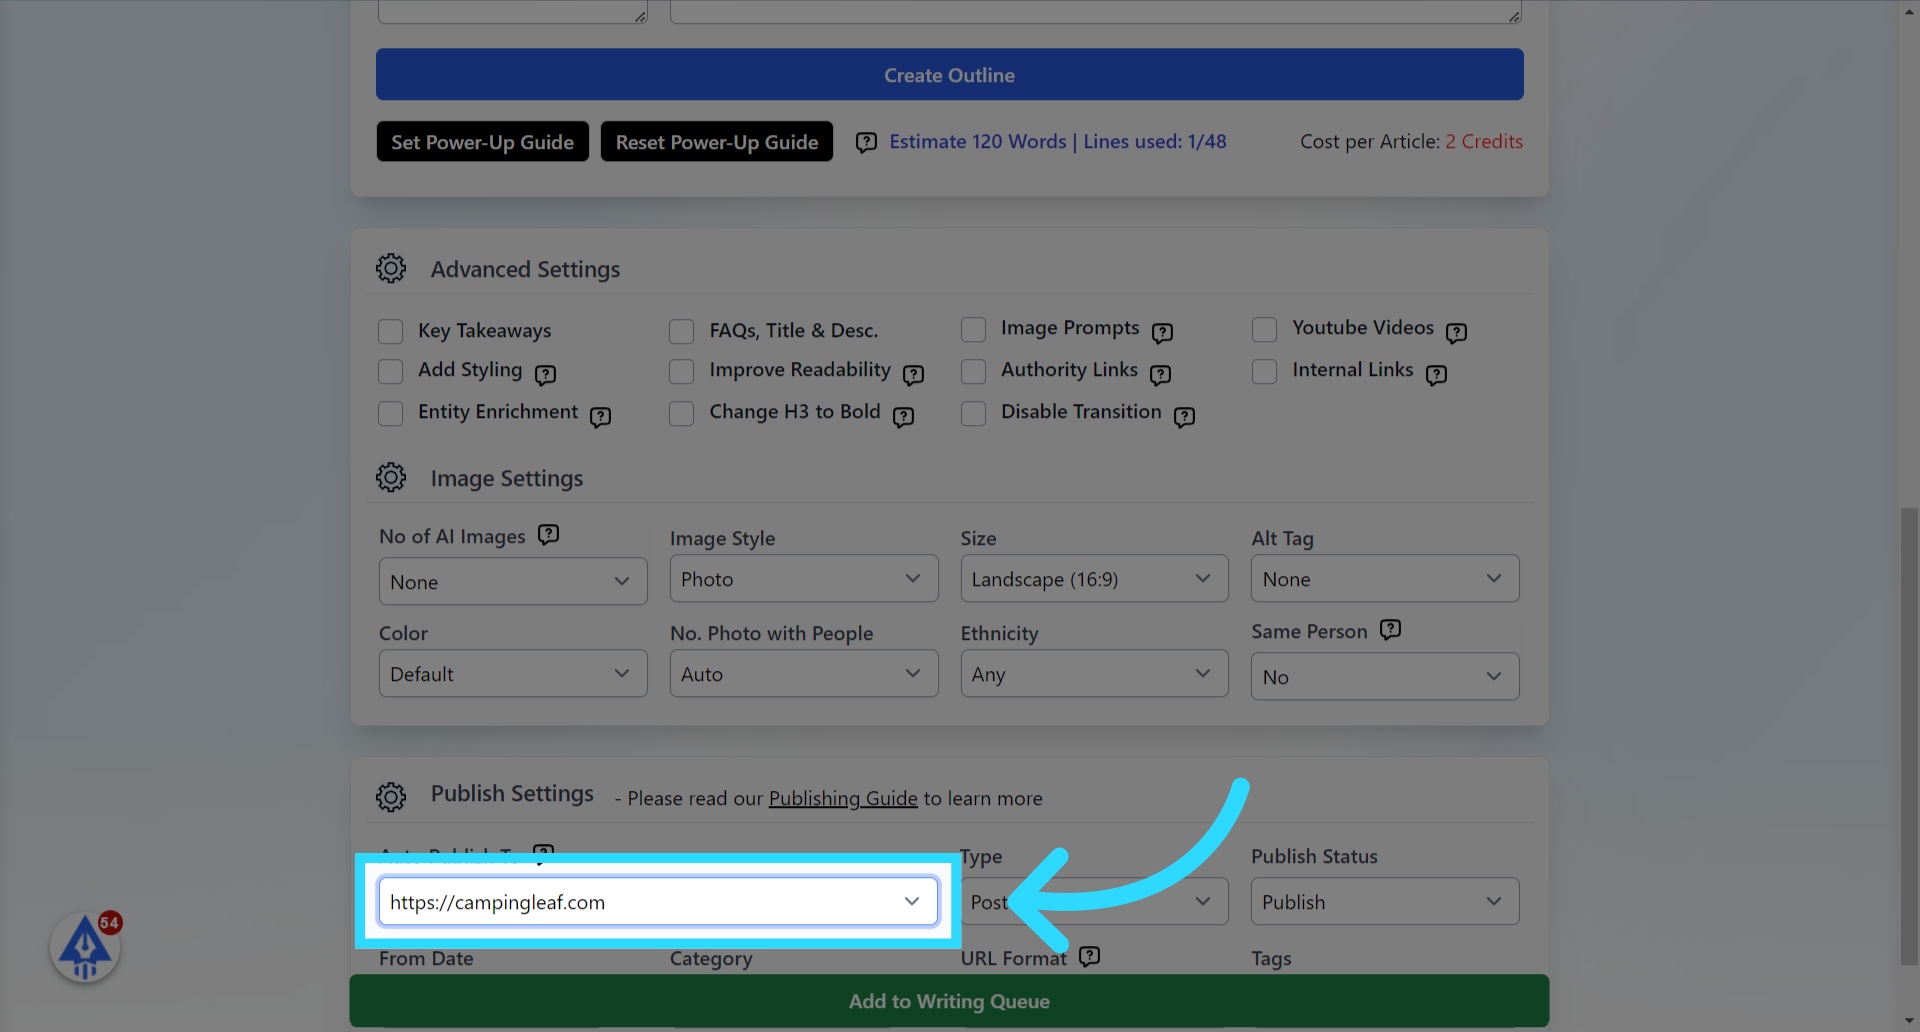
39. Set the publishing setting.
You can set the publishing setting according to your preferences. Agility Writer will auto-publish your article once it is complete.