Roundup Review
Create Product Roundup Review for any products (Amazon & Non-Amazon)

Agility Writer
Last Update 2 years ago
Our product roundup review allows you to write in-depth roundup reviews from any product including digital products and non-amazon products within a few clicks.
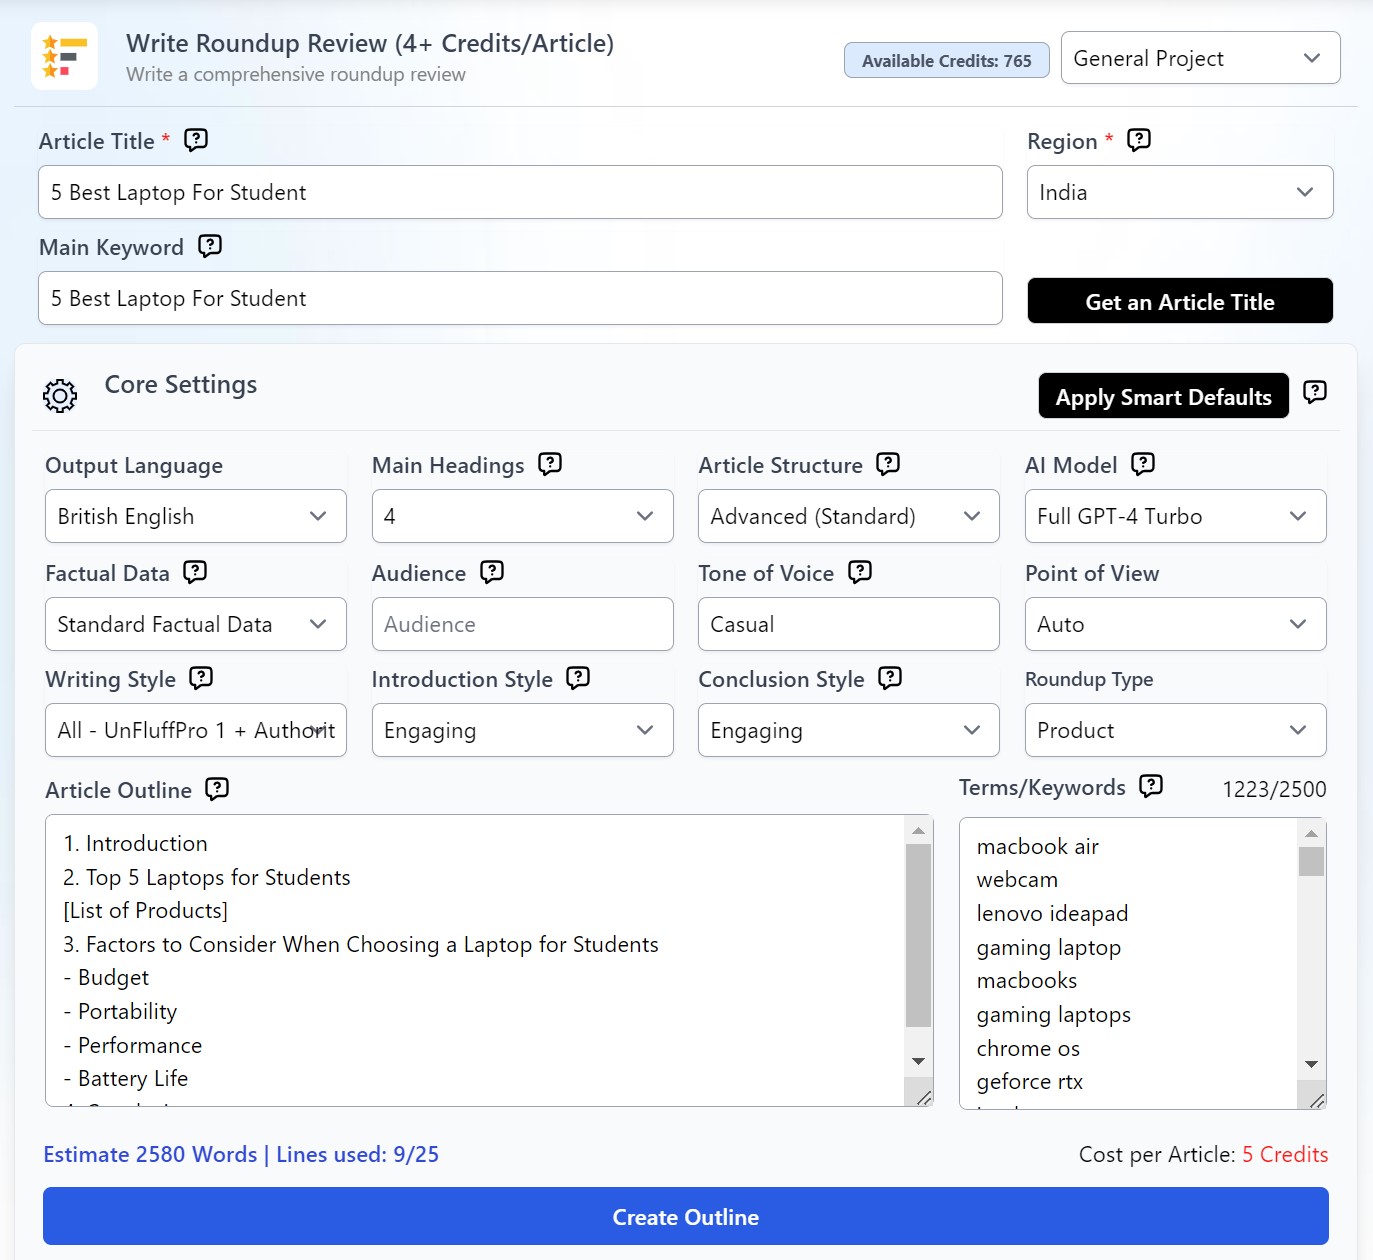
Step 1: Setting up your review
- Use the title format below for best results:
- [Number] Best [Product Name] in [Current Year]
- Example: 8 Best Smart Watches in 2024
- Another option is for you to input your target keyword and allow the system to generate a title for you.
- Make sure to set your target region before getting to Step 2.
Step 2: Core Settings
With your title and target audience set, it’s time to prepare your long-form, search-engine friendly content.
Main Headings
You can set this up manually and choose up to 10 main headings (H2 headings). But, it's recommended to keep the headings for product review minimal to ensure you are in the right search intent.
Article Structure
- Standard Advanced: For more diverse-looking content with a mix of text, bullets, and tables.
- Advanced Detailed: Recommended for articles heavy on statistics and data. Otherwise, a standard advanced setting will do.
- Standard Text: All-text output, recommended for simple, personal blog posts.
- Long-text: For that highly informative, authoritative article.
AI Model
You may choose the Full GPT-4 Turbo for the highest quality results, but this will require extra 1-2 credits depending on the number of headings you choose.
If you select a foreign language, it is recommended to also choose the Full GPT-4 Turno model.
- Standard (GPT 3.5/4) - Writes a standard GPT 3.5 model + GPT 4 (handling complex tasks and important headings)
- Full GPT-4 Turbo - Handle complex tasks and all headings using full GPT-4 model.
Factual Data
This gives you the option to select your credible data sources or simply let the AI search from the top sources.
• Standard Factual Data – Crawl live factual data for every paragraph, ideal for articles that do not require a lot of numeric data.
• In-depth Factual Data – Crawl live factual data for each paragraph for non-product related content.
Audience
Specify the group of people you want to talk to with your article. Examples: Homeowners, students, business owners, etc.
Tone of Voice
Let the system know the writing style or tone here. Example: professional, informal, educational, etc.
Point of View
Set the author’s point of view here.
Writing Style
This recently added feature allows you to personalize the article style further based on your niche. Among the choices are Conversational, journalistic, academic/technical, personal, and authoritative.
You may also refer to this link for more information on how to customize your writing style.
Introduction Style
You can choose from four settings for your introduction paragraph:
- Concise – Quick introduction to your topic at around two to three sentences.
- Engaging – This is a more extended intro to build more interest in your topic.
- Authoritative – Build author credibility early in your article with this option
Conclusion Style
Choose between a Engaging, or Expert Opinion conclusion for your article:
Concise - write a short and concise conclusion
- Concise - write a short and concise conclusion
- Engaging - write an interesting and more extended conclusion
- Expert Opinion - conclude your article with a unique perspective from a fictional expert.
Step 3: Creating and Perfecting Your Outline
Once you are happy with your settings, click “Create Outline”. This will generate your suggested outline but you can still change it, add more items up to 25 lines.
Ensure you have a [List of Products] tag added to the outline. The system will add detailed product reviews in this section.
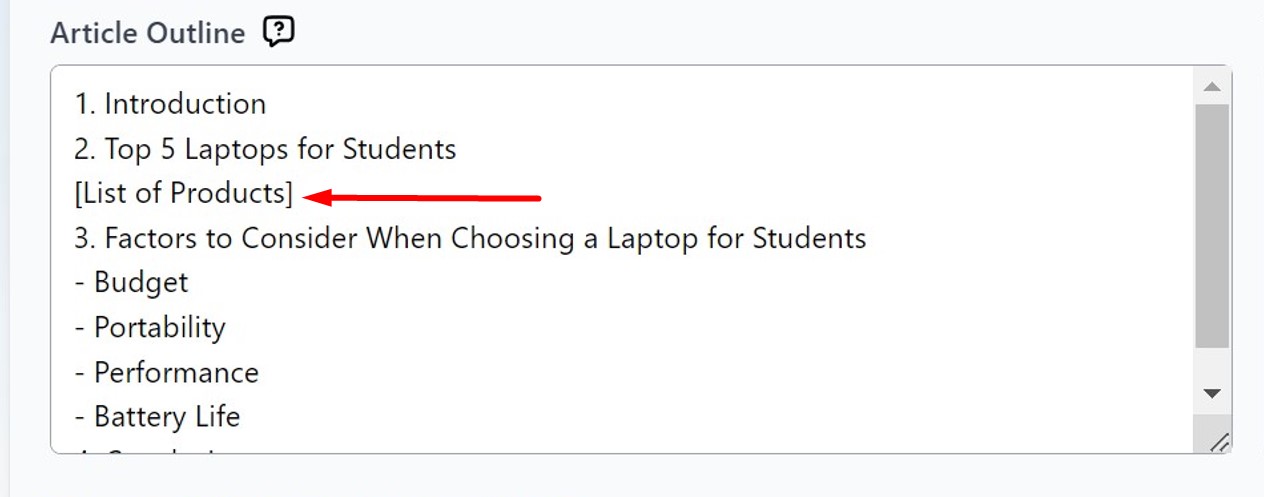
Note: You can enter your keywords in the Keywords/Terms box and the system will try to incorporate it in your article.
Step 4: List of Products
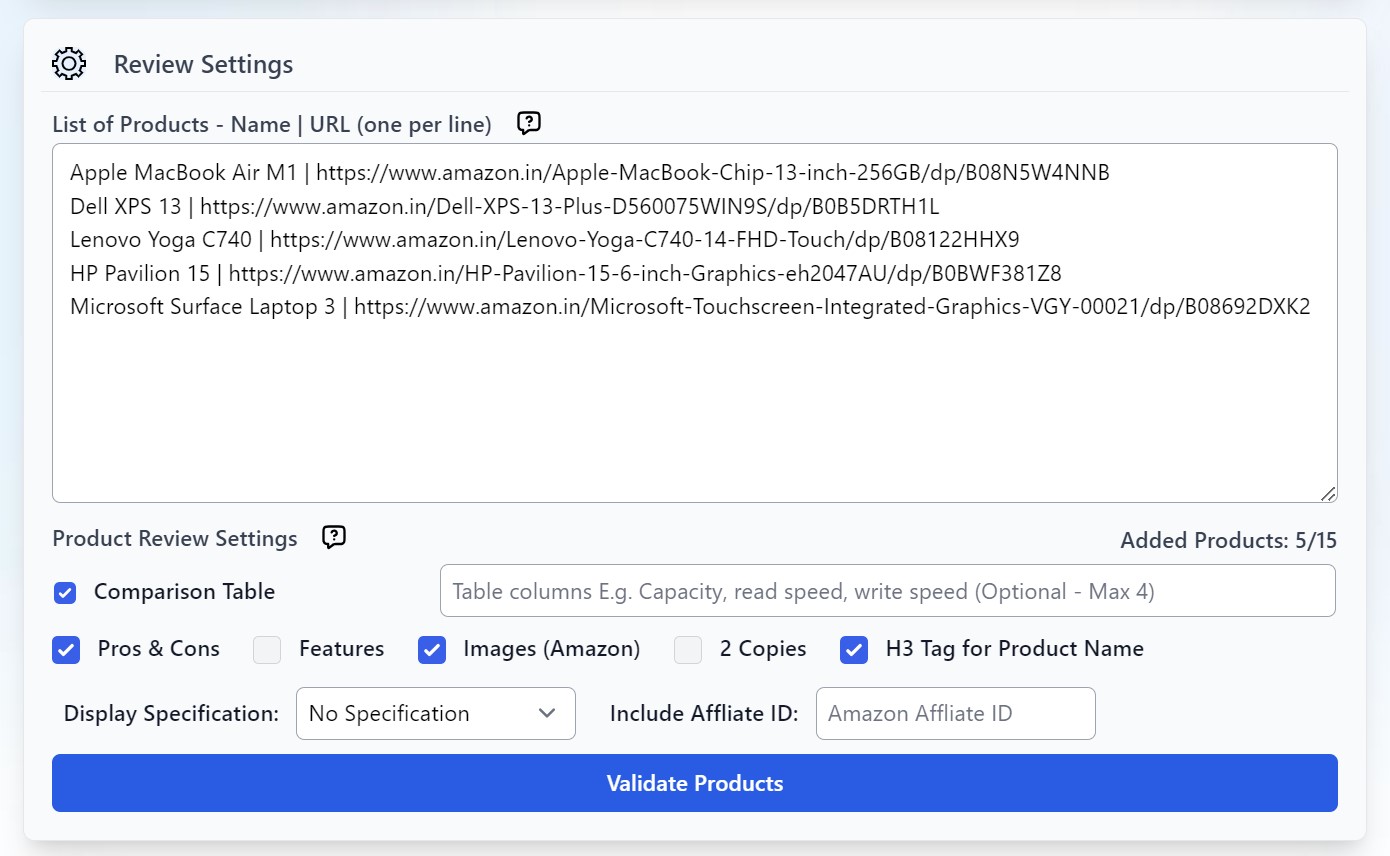
Along with Creating your Outline, it will also generate the suggested list of products for review. Otherwise, you can also create your own products list.
Tips for Creating the Product List
- Include the Brand and Model Name and Product Type [Sony WH-1000MX5 Headphones]. You can just remove “headphones” in each product before publishing.
- Include the product URL either from Amazon or other authority sites. Using “Auto” will allow the system to search a product page/URL from Amazon.
- Re-arrange the product list as you wish.
Step 5: Review Settings
This allows you to configure how the AI generates the full review:
1. Comparison Table
The table’s columns will be automatically generated by the AI based on available data or your specified data.
2. Pros and Cons
This will include a list of pros and cons of the products in bullet form
3. Features
This will include a short list of product features in bullet form
4. Image
The AI will generate 1 product image from Amazon.
5. 2 Copies
To generate the best result, click this option to choose and/or merge the best copy for your review article.
6. H3 Tag for Product Name
By default, the system will set the product name as H2 heading. You can click this option to change it to H3 heading.
7. Specification
You have the option to NOT include spec data, specs in a list, specs in paragraph form, or table.
8. Include Affiliate ID
Include your Amazon affiliate ID and let the system create the affiliate link.
Step 5: Validating Products
Once your review settings is set up, validate your products to ensure all products and URLs are working. It is normal to have 1-2 errors in the list so it’s best to add back-up products. This will take up to 2 minutes depending on the number of products on your list.
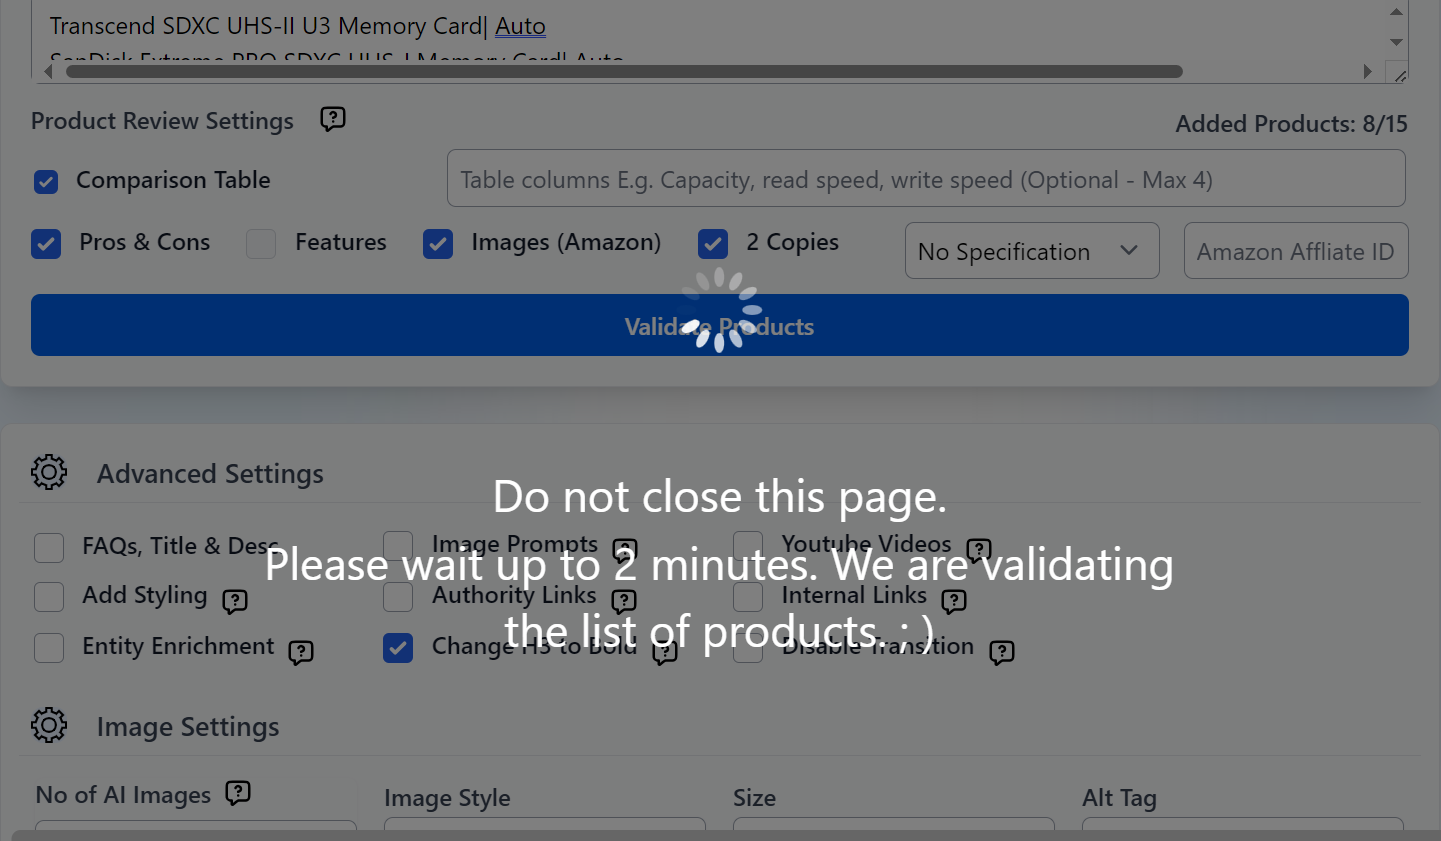
Step 6: Advanced Settings
This is for your added SEO needs, although majority of the setting options can be already addressed in your core settings. Below are some of the options that you may find helpful:
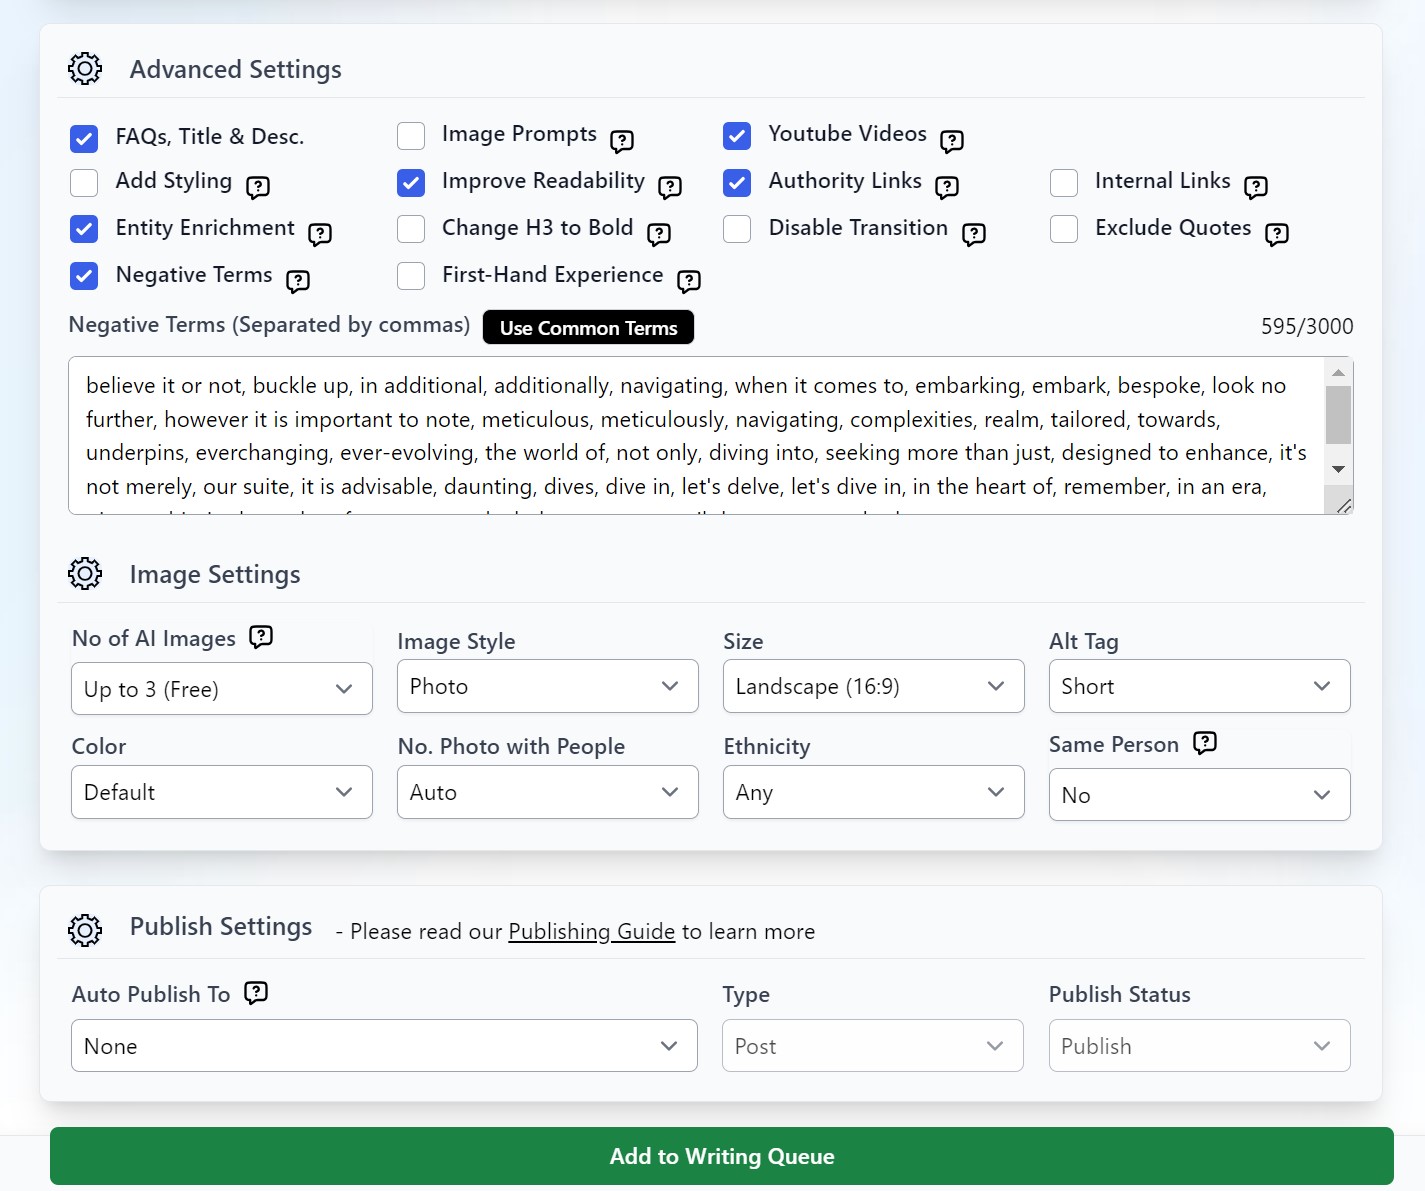
1. Key Takeaways
Tick this option if you want to include quick summaries of your article.
2. Image Prompts
Add image prompts for AI Images Creator.
3. Youtube Videos
Will automatically add Youtube videos in your first three headings (H2)
4. FAQs, Meta Description, and Title
Need to use more keywords? Maximize your keywords by using them in your FAQs and meta description.
5. Authority Links
Auto-add up to 5 outbound authority links to high-domain authority links as part of the SEO optimization.
6. Internal Links
AI will analyze based on your internal URL/Custom URLs to find relevant anchor text to add to your links.
7. Improve Readability
You can do this early on in your core settings by choosing In-Depth Factual Data or Custom Factual Data. This may also reduce word count of your article output.
8. Change H3 to Bold
This is an easy way to create a neat article that does not have too many heading tags but still retains the outline you prepared.
9. Add Styling
This will add bold style to important terms across the articles.
10. Entity Enrichment
Adds entities and importance terms from top search results to increase entity density. You will see the extracted results in your keyword field once the article is completed.
11. Disabling Transition
If you tick this, our system will not generate transition sentences in between headings.
12. Exclude Quotes
Avoid including quotes in the article. By default, the system will automatically insert quotes with the Advanced article structure.
13. Negative Terms
Instruct AI to avoid specific negative terms, separating each word by commas.
14. First-Hand Experience
Incorporate personal insights and experience at various points in the article to enhance its Experience, Expertise, Authoritativeness, and Trustworthiness (E-E-A-T). First-person point of view and Full GPT-4 will generate the best results.
Step 7: Image Settings
Generated images will be hugely based on the number of H2 and H3 you have. Note that the Premium Image option is best if you want more photos with humans in it.
Read more about AI Image Settings here.
Step 8: Publishing Settings
Select a site where you want to auto-publish your article once it is completed. You may check the WordPress publishing Guide for more information.
Best Practices
- Opt for a more advanced AI model (such as Full GPT-4 Turbo) when writing in foreign languages or utilizing complex custom instructions.
- Activate Entity Enrichment to enhance the density of entities in your content.
- Enable FAQs to optimize the use of input keywords.
- Use custom factual data or in-depth factual data to achieve higher quality content.
You have reached the end of the Product Roundup! All that’s left to do now is to sit and wait for your article to be generated within 30 minutes to 1 hour.
FAQs
1. Can I write products from something other than Amazon.com?
Yes. Our system able to write all products including digital products and non-amazon products. Check out the video above for the step-by-step guide.
2. What languages are supported?
We currently support English, Brazilian Portuguese, Danish, Dutch, German, French, Italian, Malay and Spanish. We may add more supported languages later.
3. Why is the cost higher compared to the Advanced Mode article?
The cost is higher because writing a roundup review article incurs more API providers. The number of API requests is also significantly higher than in the advanced mode. For example, writing a 10 best product round article will trigger over 150 API requests.
4. How do you ensure you get the best quality roundup article?
- Check the “2 copies” in the review settings; it will generate 2 sets of comparison table, product descriptions, highlights and pros & cons. You can then choose the one that suits your taste.
- If you are writing 10 best products, increase the number of products to 12 or 13. Doing this lets you get more product reviews and choose the best 10 products to publish.
- When choosing the products to review, always enter the exact amazon product page URL instead of using Auto mode. This can ensure that the system will write based on the selected product.
- If you choose to use Auto mode, make sure you have a specific product name. For example, “Transcend Ultimate 64GB” can be an SD card, pen drive or SSD. So, it would be best if you were specific as “Transcend Ultimate 64GB SD Card”.
5. Can I write a roundup review for services and companies?
Not yet. We only support writing product roundup review.
6. Why the links in the quick recommendation section doesn’t work?
Due to the browser behaviour, if you copy and paste the content from Agility Writer to your website, it will copy the source url, https://app.agilitywriter.ai/view-articles as well. Simple remove the URL as below:
From: <a href=”https://app.agilitywriter.ai/view-articles#product9″><u>Toshiba Exceria Pro 64GB SDXC</u></a> to <a href=”#product9″><u>Toshiba Exceria Pro 64GB SDXC</u></a>
7. What happens if I get a very low-quality or incomplete roundup review article?
Firstly, follow FAQ to ensure you set the product correctly. Most cases are caused by the product name being too generic and using Auto mode. Please contact us at [email protected]; we will review and do the refund if it is bad quality from the system. But this doesn’t cover the minor formatting or extra unnecessary text.